Super Mario Galaxy 2 Walkthrough
Mario is back for another space traveling journey. Lost in a tricky puzzle, or stuck on a tough boss? Our Super Mario Galaxy 2 Walkthrough will help walk you through this adventure.
Mario is back for another space traveling journey. Lost in a tricky puzzle, or stuck on a tough boss? Our Super Mario Galaxy 2 Game Guide will help walk you through this adventure.
Here's what you'll find inside:
- Walkthrough: A full walkthrough to help you through the entirety of the game's story.
- Boss fights: Find tips to help you beat tough enemies and make it to the next World.
- Secrets: Learn about hidden paths, power ups, and star locations.
World 1: Sky Station Galaxy
Peewee Piranha's Temper Tantrum
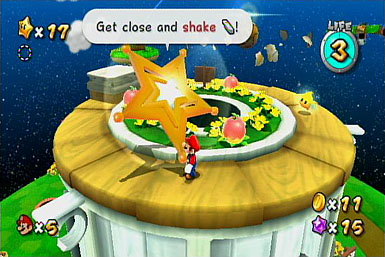
As this is the first level, it serves as an easy tutorial into the game's basics. If things ever become confusing, simply move over to a signpost or monitor post to gain directions. To start the adventure, move left and enter the green pipe, which will take you to the other side of the planet. Here, move up the hill and spin the large crystal twice to destroy it, leaving a large opening. Enter the hole and you'll wind up back on the other side. Talk to the Luma nearby and it will become a launch star, leading to the next area.
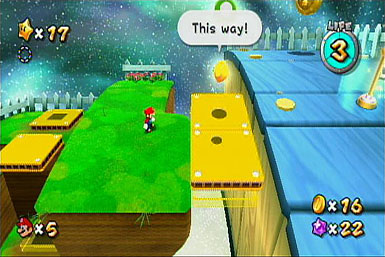
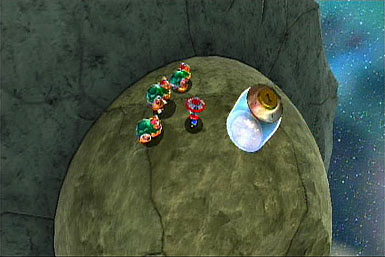
Here, there will be yellow platforms that disappear and reappear every few seconds. Time your jumps correctly and you'll be able to safely move up and to the right. On the far right edge is a bonus area, where you can acquire free 1-ups. Enter the bonus stage warp and you'll be transported to a small battlefield, swarmed with enemies. You have a short time to defeat all of the enemies, which will reward you with several extra lives. If you run out of time, you'll be ejected from the area without penalty. Either way, proceed up to the top of the tower for another launch star and the next part of the level.


You'll arrive at a cylinder shaped area with giant vehicles rolling around its longitude. There are also different terrains on the planet: mud, which will slow you down, and dirt that has no effect on movement. Move right across the world, stepping in the dirt to maintain speed and avoid the vehicles. You'll reach another launch star that will take you to a check point and a life mushroom. This power up will increase your life meter to a total of six, however, if you take three damage your maximum health will be reduced to the normal amount. Continue ahead to reach another launch star and the level's boss, Peewee Piranha.


The boss may look intimidating, but defeating it is really quite simple. While you'll take damage from its head, the egg shell on its back is weak to your spin attacks. The best option is to wait for Peewee to make a leap attack, which will stun it for a few seconds, and move in for a spin attack. After a few hits, a short cutscene will play and Peewee will become enraged, increasing its movement speed.


The strategy remains the same, however Peewee won't make a leap attack until he has charged at least twice. Use this knowledge to your advantage and move in for a finishing blow. After defeating the boss, a Power Star will appear. Grab it to finish the level.
Storming the Sky Fleet
Right off the start you may notice that the first area is the same as in Peewee Piranha's Temper Tantrum, however several objects and enemies are changed. This is a common gameplay method throughout levels. Instead of the Goomba from the previous level, you'll encounter Chomps. These enemies are immune to your spin and jump attacks, so instead you'll have to hit the various green balloons scattered around the level. While the balloons don't hurt you, being hit by them will stun you and cause you to drop your accumulated star bits. Proceed through the green pipe on the right and it will take you to the other side of the planet.


There is a trapped Luma here, and one of the Chomps has the key. Use the green balloons to destroy the enemies and grab the key, freeing the Luma. It will turn into a launch star and take you to a new planet. Here, large Bullet Bills will be firing directly at you. However, you actually need to approach them and locate the opening in the floor ahead. Once inside you'll hit a check point. Proceed to the right over the moving platforms and you'll see a launch star guarded by two enemies. Hop on to one of the ascending platforms and jump down to the launch star to reach it safely.


The launch star will take you to the next area, where blue panels lead forward. Your goal is to walk over each blue panel to turn it yellow. Once all of the them are yellow, they will then turn green and unlock the path to the next area. Here, you'll have to activate more blue/yellow panels, but this time you're being chased by Cosmic Clones, duplicates of Mario that cannot take damage. Once turning all of the panels to green, the clones will be destroyed and a launch star to the next area will appear.


Here, move forward along the dirt to avoid the Bullet Bills on the right, take the path on the left and up the pole to reach several Piranha Plants. Kill the largest one with a good stomp to discover a key. Pick up the key and a Luma will appear on the right side, where the Bills are still firing. Return to where the Luma sits and it will award you a Power Star.
World 1: Yoshi Star Galaxy
Saddle Up with Yoshi
This stage will introduce you to the mechanics of riding Yoshi. Move forward and you'll find a Yoshi egg being guarded by a Magikoopa. This enemy will summon Goombas to fight along side it, so you'll need to eliminate them quickly to free your dinosaur friend. His controls are very similar to Mario's, but be sure to make use of his tongue, which can both defeat enemies and interact with objects.


Move ahead and defeat the enemies on the way. There is a pink enemy ahead, and though it doesn't deal damage, it will stick to Yoshi's face and prevent him from using his tongue. Use a spin attack to remove it when this happens. Further ahead is a large fruit. Use Yoshi's tongue to grab and pull it, revealing a launch star to the next planet.


This area is littered with spiked fruit, however Yoshi can safely eat them with his tongue. An alternative is to flutter jump over them. Continue to the right and up to reach the top of the tower, where another launch star awaits. Here, use Yoshi's tongue on the flowers to swing across from platform to platform. You'll also need to pull open ledges by grabbing green handles with Yoshi's tongue and pulling back.


Proceed to the top and you'll locate the Power Star inside a crystal. Break the crystal and free the star with two spin attacks. The star will float a short ways up and to the right. To reach it, use Yoshi's tongue to swing across the flowers to the left, and use the moment to return to the right.
Spiny Control
Similar to the previous level, you'll be taking Yoshi's reigns for this adventure. This time around, you'll be encountering several Lakitus and the Spinys they throw. Yoshi can eat the Spinys with two hits from his tongue, forming them into a ball and spit them out as an attack. Grab one of these Spiny balls and fire it to break the glass ahead, freeing a launch star. Take this star to the next area.


Your objective here is the same: break open the glass with a Spiny. However, this time the glass cage is off in the distance, so you'll need to have a bit more precise aim. Once the target is destroyed, a Luma will spring out and become a launch star to the next planet.


Here will be more platforms that must be opened with Yoshi's tongue. The green handles work just like the ones in the previous encounters, however the red ones will close after a short time. There will be an audible sound, and as it speeds up you'll know when the platforms are about to retract. Smash open the glass ahead with a Spiny, and take the launch star towards the boss.


This huge Lakitu boss has some similar abilities as his normal counterparts: he loves using a barrage of Spinys. The best way to take him out is to use his arsenal against him. Use Yoshi's tongue to curl a Spiny into a ball and blast it back at the Lakitu. After two hit, he'll become enraged and increase his speed, so instead of aiming at him, aim for where he is moving towards. Additionally, he has a lightning attack where he will sweep across the battlefield, however it is easily dodged. Once the boss taks another few hit, it will go down, leaving a Power Star.
World 1: Spin-Dig Galaxy
Digga-Leg's Planet
You'll now get a taste of the Spin Drill, which makes holes in soft surfaces and will take you to the otherside of the planet. Move to the polar opposite side of the large tower, and drill to descend/ascend to the top. There will be a Luma here. Talk to it and it will transform into a launch star, leading to the next area.


This planet will have several columns of various sizes protruding from both its top and bottom sides. Grab the nearby spin drill and dig through the lowest column on the left to end up on the underside of the planet. Move to the center column, drill again to reappear on the upside and take the launch star to the next planet.


Here, several yellow platforms will flash blue before disappearing. Time your jumps correctly and make your way to the left where several coins sit. After picking up the coins, a Luma will arrive and transform into a launch star, leading to the next planet. On this new planet, grab a spin drill and dig anywhere and you'll arrive in the planet's core. Locate the small crater and dig again to wind up on the planet's highest point. Take the nearby launch star to ascend to the next area.


Instead of a planet, you'll arrive at the Starshroom, a spaceship manned by the Toad Brigade. Additionally, there is a Luma that will exchange star bits for 1-ups or life mushrooms. Buy any power ups you might require, and use the launch star to a boss fight.


Digga-Leg has two sides: an offensive drill that launches projectiles, and a glass blub that is week to your hits. Grab a spin drill and dig into the planet to either destroy the enemy drills or simply avoid them. When Digga-Leg switches to his glass side, move to the opposite side of the planet and dig through to damage it. After, damaging it three times it will drop a Power Star, ending the level.
World 1: Rightside Down Galaxy
Breaking the Laws of Gravity
This world uses a gravity mechanic that is noticeable by the background. Blue backgrounds with arrows pointing down will cause you to fall, while red ones with arrows putting up will have inverse gravity. Now that you know how the planet works, move forward and drop down to the ground level. There is a button on the left that will grant coins when hit with a ground pound. On the right is a flower that will throw you to the next level when you spin on it. Advance forward and jump passed the spiked enemy. You'll arrive at a switch that will change the flow of gravity, taking you to the ceiling.


There will be a large Piranha Planet blocking your way. Lure it by moving in close, quickly move away, and it will slam the ground, dazing it. Use this chance to spin or jump on it to defeat it. Continue to the right and you'll encounter Thwomps smashing up towards you. Time your movements to avoid being squashed. Continue forward and you'll gain a Fire Flower. Unlike most other Mario games, the Fire Flower will disappear after a short amount of time. When the music starts to speed up, you'll know it will dissipate. However, there are many Flowers scattered around the next section.


Use your Fire Flower power up to destroy the crates ahead, move forward and up to destroy a few more. You'll soon arrive at a checkpoint and another gravity change. This time you'll be moving along the back wall. There will be Goombas running around, but are easily avoidable. Continue ahead and you'll come to some easy moving platforms. Jump across them and you'll arrive back into side-scrolling mode. Time your movements to dodge the few Thwomps and Chomps and you'll spot the Power Star. There is a four way gravity "loop" so time your movements around it to grab the star, ending the level.
The Great Crate Incinerator


This level and Power Star inhabit the previous stage. Re-enter Breaking the Laws of Gravity and make your way to the switch. Alter gravity, but this time double back to the left and enter the pipe. You'll be taken to an area with a lot of boxes and a Fire Flower power up. Your goal is to destroy every box in the short span of twenty seconds. The best method is to move to the bottom and fire all of your shots straight up. Each fireball will pass through a destroyed box and others that are close by. With some luck, you'll only need to use five or six shots. After completing the task, talk to the nearby Gearmo to gain a Power Star.
World 1: Fluffy Bluff Galaxy
Search for the Toad Brigade Captain
This level will introduce you to the Cloud Flower, a power up that will allow you to create platforms. Each power up will provide you with three clouds you can form by spinning. However, if you touch water, you'll lose your powers. Proceed upwards and to the left and you'll arrive on top of a cliff. You'll need to use the clouds ahead along with your Cloud Flower to safely make it to the ledge on the other side.


Even after landing on the other side, you may need to wall jump up the shaft in order to reach the launch star. Either way, you'll be taken to a water planet guarded by Cosmic Clones. Your objective is to grab the five star chips scattered about. This will not only defeat the clones, but will form a launch star to the next planet.


On this planet will be several stone faces that will retract into the mountain wall. Time your movements to avoid being pushed and advance to the left. Grab the nearby Cloud Flower and advance to the top. The roof of the mountain is covered with water, so it may be hard to depend on your cloud power. Thankfully, there is a swing hanging on a large tree. Use this swing's momentum to reach the top of the tree, where the Toad Captain awaits.


It appears that the captain was challenged by some kind of monkey, and wants you to complete the task for him. Use your cloud powers to advance ahead through the sea of clouds. At the far end you'll arrive on mountain where you'll meet a new ally, The Chimp.


Even though The Chimp will award you with a Power Star, he will mention that he will be contacting you later for a real challenge.
The Chimp's Stomp Challenge
While aboard the Starship Mario, The Chimp will send you a letter challenging you to a stomping contest. Return to Fluffy Bluff and you'll be able to undergo this level.


Your goal for this mission is to gain 10,000 points in the short span of 120 seconds. Each coin you acquire is worth 100, and several power ups will grant big bonuses. You can also gain chain points by stomping on enemies in succession for up to 300 points a piece. The best strategy is to move to the top of the level , where many enemies await. Chain stomp them and grab any mushrooms along the way. If you manage to gain 10,000 points you'll be awarded with a Power Star.
Bowser Jr.'s Fiery Flotilla
Gobblegut's Aching Belly


The starting part of this level is pretty short. There is a Thwomp ahead, but is easily dodgeable. Just past it is a Magikoop guarding a switch. Defeat the koopa with a spin and hit the switch to open the large door in the background. Defeat or avoid the Dry Bones and take the launch star the next area.


This place is surrounded by fireballs and fire pillars. It is fairly simple to navigate, but be sure to side track towards the end and you'll discover items such as a Life Mushroom. When ready, take the launch star to find Bowser Jr. and the boss.


Bowser Jr. will summon Gobblegut, a large dragon with bulbs around its body. Your goal is to destroy the six bulbs with spin attacks. The best time to attack is after Gobblegut descends into the planet, as each of his bulbs will become stuck for a few seconds, leaving him vulnerable. Once you destroy three bulbs, Gobbleguy will become enraged and move faster, however the strategy remains the same. After killing the boss, grab the Power Star to win the World.
World 2: Puzzle Plank Galaxy
The Puzzling Picture Block
This stage will require a high amount of ground pounding to reach various areas. First, move over the "H" shaped platform and ground pound the icon in the center. This will cause the structure to fall apart, crashing into the next area.


There are some Wiggler enemies lurking about, however defeating them is not necessary. Instead, move to the button on the bottom right and ground pound it to summon a launch star to the next planet.


Here, you'll notice a launch star way up in the sky, but no means to reach it. Move across to the edge of the planet and you'll wind up on the opposite end. Ground pound the columns to cause them to appear on the planet's other side. Move back to the planet's starting area and climb the columns to reach the launch star.


This next planet is covered in buzz saws that not only damage you, but will destroy parts of the ground. Move quickly across them and jump past any gaps that form. You'll arrive at several Mandibugs, who can be defeated with ground pounds. Continue ahead and you'll arrive at another launch star leading to the final area.


Move across the planet and locate the ground pound symbols scattered about. Your objective is to move the blocks to form a picture of a Mandibug. When it is complete, a Mandibug stack will appear. Ground pound it twice to defeat it and grab the Power Star it leaves behind.
Bugaboom's Back
Another stage in a stage. Start up The Puzzling Picture Block, but when arriving at the planet with the columns, search for a Luma. It requires 70 coins to transform. The best option is to locate Question Mark Coins that will yield several coins. There is also a nearby pipe with a mini-game that can award a large amount of coins. Once you have 70, feed the Luma and you'll be launched to a boss fight.


Bugaboom is like a large Mandibug, so you'll need to ground pound it. However, due to its size, it's not as simple as jumping on its back. Instead, grab the Cloud Flower and use it to get above the boss. The tree in the center even has a branch you can perch on to time your jumps better. After two hits, Bugaboom will become more aggressive: it will start flying and shooting projectiles. It is imperative that you stay in the air and get on its back. After one more ground pound, you'll be victorious and receive a Power Star.
World 2: Hightail Falls Galaxy
Hot-Stepping Dash Pepper
This level makes use of Yoshi and his Dash Pepper ability. You'll find a Yoshi egg right at the start, so break him free and continue forward. The path will start to ramp up vertical. Ascend it as much as possible, and use your tongue to grab the Dash Pepper. This will cause Yoshi to run at high speeds. While he speeds ahead, make sure to steer passed the on coming barriers.


In the next section, the platforms ahead will drop after a short amount of time. You'll need Yoshi's Dash Pepper again to rush passed before the ground falls away. You'll come to a area with little flooring, but many walls. Use the Dash Pepper to move along the walls and advance to the right.


You'll come to a platform with several floating flowers on the left. Use Yoshi's tongue to swing across and land at the last area. You'll spot the Power Star on one of the walls, however it is near many obstacles. Grab the nearby Dash Pepper and carefully steer passed the barriers to safely arrive at the Power Star.
Silver Stars in Hightail Falls
You can reach this level by gaining 30 coins in Hot-Stepping Dash Pepper. The best place to rack up coins is via the Question Mark coins along the first wall with barriers. The Luma leading to the stage is located near the end of the stage, shortly before the Power Star.


Take the launch star the Luma turns into and you'll arrive on a planet with many enemies carrying various items. Due to their speed, your best option is to eat them with Yoshi's long tongue. Your goal is to collect the five silver stars, which in turn will become a Power Star.
World 2: Boulder Bowl Galaxy
Rock and Rollodillo
You'll once again be introduced to a new power up: The Rock Mushroom, which will turn Mario into a spinning rock that can smash obstacles and enemies. However, it's trapped inside a glass container. Defeat the nearby enemies and grab the power up. Roll up into a ball and smash into the wall ahead. It will topple over, forming a bridge to the next area.


Here, a large amount of enemies swarm around a launch star tucked into a glass container. Destroy all of the enemies with your rock power. However, be careful not to break too many fences, as they are the only thing keeping your rock mode from falling off the planet. Once the launch star is free, you'll come to a planet with many Chomps. Locate the largest crystal, and destroy it by rolling into it twice. Take the launch star to a check point leading to the stage's boss.


The boss, Rollodillo has a large shell that protects it from damage; however, it has a vulnerable spot on its rump. Every time the boss rolls, he will stop briefly, giving you a chance to strike. The more damage Rollodillo the longer and more often it will roll. After four hits, it will bite the dust, leaving a Power Star.
C'mere, Goomba
After some time, a Gearmo will send a letter to the Starship Mario. He will request that you help him collect a Goomba. Return to Boulder Bowl and make your way to the planet with the rolling Chomps.


Talk to the Gearmo and he will form a zone to lure a Goomba into. Grab a Rock Mushroom and destroy any large boulders moving around. You can't destroy the Chomps, so they will have to be avoided. Break open one of the small crystals to reveal a Goomba. Have it follow you towards the Gearmo, who will trap it and grant you a Power Star.
World 2: Wild Glide Galaxy
Fluzzard's First Flight


This is a very simple, easy stage where you take control of Fluzzard and glide across a course. Though you can take damage from ramming into walls, there are plenty of healing coins along the way. Your goal is the circle object at the end of the route. As long as you enter the center you'll be awarded a Power Star.
Jungle Fluzzard Race


Eventually, you'll receive a letter onboard the Starship Mario. When this happens, return to Wild Glide. This level is similar to the last, but this time you must race against four birds. The only way to increase speed is to nose dive. However, this can also lead you to crash into the ground, costing you health and time. Time your dives for steep terrain and you'll be able to make it to the circle object. Once again, enter the center to finish the level. If you took first place you'll receive a Power Star.
World 2: Cosmic Cove Galaxy
Twin Falls Hideaway
This is a fairly easy level that will introduce you to swimming. Move forward and you'll come across a turtle shell. This item is optional, but Mario will use it like a boogie board, allowing you to advance without having to manually swim.


Proceed through the underwater cave and resurface at the other end. There will be a castle tower shaped building off in the distance. Climb to the top of this tower and ground pound the switch on top. The water in the zone will freeze, trying all enemies and opening new areas.


Locate the frozen waterfalls off in the distance and wall jump up them. At the top will be a crystal containing a Power Star. Spin the crystal twice to break the star free, completing the level.
Exploring the Cosmic Cavern


This stage will start with a Luma trapped in a glass container, and you'll need to locate the key somewhere. Skate along the ice ahead and enter the pipe. You'll enter a side-scrolling swimming area. Proceed to the right and you'll come to a switch to open a nearby door.


Keep swimming and you'll encounter several giant eels poking out of the wall. Time your movements carefully, as these enemies will spring out and try to bite you. If your air supply begins to fade, grab coins or bubbles to recover your meter. Locate the next pipe to take you to another zone.


Swim through the floating water, dodging any enemies and mines along the way, and you'll come to several moving water blocks. Ride the blocks while staying at the surface, which will prevent you from depleting your air. At the very top is the key and a pipe leading back to the Luma. Free the Luma and it will become a launch star, leading to the last palnet.

Locate the spin drill and spin through the largest dirt patch on the planet. This will take you to the other side, which is populated by enemies. Destroy them with your drill and one will drop a key. This key will open yet another glass container near the top of the planet. Drill through the opening left behind and the planet will flood with water. The amount of water will raise you high enough to grab a Power Star, completing the level.
Catch the Star Bunny


To access this stage, you'll need to collect 15 coins after freezing the water in Twin Falls Hideaway. Once the enemies are frozen, you can easily stomp them for extra coins. Once 15 are acquired, return to the tower and feed the Luma your coins. You'll be launched to a water planet where a star bunny waits. He'll force you to catch him, however the terrain is too slippery. Locate the button on the far side of the planet to freeze the water. Skate across the ice to quickly catch the bunny, who will award you a Power Star.
World 2: Honeybloom Galaxy
Bumble Beginnings
This level will make use of the Bee Mushroom, which will transform Mario into a bumblebee that can fly for short bursts. However, much like the Cloud Mushroom, touching water will cause your Bee power to disappear. Proceed to the right and swing across the vines until you locate the first Bee Mushroom. Continue to the up and right.


There will be many floating enemies here, so you'll need to time your flying so you can quickly avoid them. Also, the flower platforms are a bit dangerous: They are flytraps and after a short period, will attempt to eat you. Jump off them quickly to stay safe.


Continue along the straight path and fly upwards to the poles. Hang on to these poles to recover your flight meter. Beware of the Fuzzies that lurk across the poles, as they can damage and deplete your Bee power. Towards the end are a few cloud platforms, jump across them quickly and you'll reach the level's Power Star.
World 2: Bowser's Lava Lair
Bowser's Big Lava Power Party
This is the final level of World 2, so get ready for a more intense challenge. Move ahead and defeat the Magikoopa. It will leave behind a swing star, which you can use to travel to the next area. Here, carefully jump across the moving, rotating platforms and grab any powerups on the way.


In the next part, you'll encounter platforms similar to Thwomps, that will spin in aggression every few seconds. Time your movements and quickly cross these platforms. You'll arrive at a few Hammer Bro. enemies, but are easily defeated with two spin attacks. Take the swing star he leaves behind and you'll be taken to the next area.


You'll need to lure the Whomps here by moving in close and running away. When it slams the ground, you may notice a symbol on its back. Quickly jump on the Whomp and ground pound the symbol to defeat it. Advance and you'll locate a few skulls munching holes in the ground. You'll need to be quick with your movements to make it by. Keep in mind though that the floor will regenerate after a short amount of time.


Ride on the platform up ahead and it will take you into a gambit of fireballs. Be sure to leap on top of the fire pillar spindle, as a Life Mushroom sits on top. When the platform reaches its destination, defeat the two Hammer Bros. that block your path. Advance forward and you'll come across large Bowser symbols and a meteorite. Jump onto the meteorite and ground pound it into the symbols. This will create a vortex leading to the boss.


Bowser is still big and menacing, but should be no match with a good strategy. He has a few attacks: he will summon three meteorites that will crash into the planet, a flame breath attack, and will punch his fist into the ground. When he uses this punch attack, all the meteorites will fly into orbit. Use this chance to hop on a meteorite and ground pound it right at Bowser. Hitting him four times will grant you a Grand Star and unlock World 3.
World 3: Tall Trunk Galaxy
The Flotacious Blimp Fruit
Move to the other side of the planet to discover Yoshi. Move back up to the topside and locate the blue Blimp Fruit. Eating this will turn Yoshi into a blimp that will float for a short amount of time. Use it to ascend the large tree and reach the launch star at the top, taking you to another planet.


Your goal is to move to the right and grab the Blimp Fruit. Like in previously levels, you'll need to locate the star chips scatter about this planet. After acquiring all five, a launch star will form in the middle of the planet. Use it to travel to the next area.


Grab the next Blimp Fruit and float up and to the right. There are spiked fruit all around the area, so you'll need to be careful with avoiding them. When the coast is clear, drop down and the Power Star will be directly below you.
Tall Trunk's Big Slide
This level is short buy quite challenging. Take the swings attached to the tree to reach the first launch star. Your task here is to make it through the giant tree slide in one go.


The slide contains many unpredictable hazards, including Spinys, Wigglers, spiked fruit and large gaps. If you take damage, aim for the coins on the way to restore some of your health.


If you find the route too challenging, talk to the Cosmic Guide. She'll lead you safely along. However, you will only earn a Bronze Star, and will have to beat it again to gain a true Power Star.
World 3: Cloudy Court Galaxy
Head in the Clouds
This level again makes use of the Cloud Flower. Grab the power up and use it to travel across the clouds ahead. The best option is to look for the visible wind currents. These will push your clouds and give you an easy ride to the next area.


You'll arrive at some very large, bouncy drums. Jump on them in conjunction with your clouds to reach the top, where a launch star sits. In the next planet, use your clouds and the current blowing upwards to ascend. Avoid the various oncoming platforms as they can crush and block your path. At the top, ground pound the button and more clouds and wind will appear. Along with your own clouds, make your way across the gap to reach the next planet.


Continue to the right and use your clouds to dodge the spiked fruit spread across the floor. You'll reach a large shaft that will close and open after a short time. Use your clouds to climb the shaft, pausing along its alcoves when it starts to close, and you'll soon reach the top.


At the very end is a wind current blowing towards spiked fruit and a Power Star. Create your clouds quickly and reach the Power Star before the wind takes you into the hzards.
World 3: Haunty Halls Galaxy
A Glimmer of Bulb Berry
A haunted house level with many of the familiar themes of previous Mario games. Right from the start are platforms that will appear from the left and disappear as they move right. Time your movement and jumps quickly to make it to the other side. There are also plenty of Boos here. To stop their assault, simply face towards them and they will stop in their tracks.


Traverse through a second passage of disappearing platforms and you'll arrive at a pipe. Take it and you'll arrive at an area with Yoshi. As the level's namesake, you'll now make use of the Bulb Berry. After eating this fruit, Yoshi will shine and reveal the hidden terrain. Be warned though, this isn't just a visual aid; if Yoshi runs out of this power the floor will completely vanish, causing you to fall to your demise.


To keep your bulb power full, continually eat fruit along the way. There will be more of those pink enemies that will attach to Yoshi's face, so be quick with spinning them off. Use the flower along the way to swing to the Power Star. Afterwards, you'll meet up with Luigi, who can now be used as a playable character in random stages. To use him, simply talk to him right at the start of each level.
Sneaking Down the Creepy Corridor
The first section of this level is similar to the last level. However, many more Boss, even huge ones, will be quickly on your tail. Quickly jump to launch star at the end as the floor will start to vanish.


You'll come along another moving path, this one littered with skulls that will chew through it. They have an easy pattern to spot, so just keep an eye on their movements to safely move across.


The camera will change to point in front of you, so you'll need to continue without being able to clearly see where you're going. Additionally, more Boos will appear and chase after you. Keep moving towards the camera and you'll soon reach the Power Star.
World 3: Freezy Flake Galaxy
Bowser on Ice
While on this ice world, you'll need to make heavy use of the Fire Flowers to melt the surrounding structures. Start by lighting the the Goomba statue ablaze, it will melt revealing a launch star to the next zone. Destroy the next few Goomba and Bowser statues along the way that will lead to a slide and the next area.


Climb the structure and enter the pipe at the top. This will take you to a large lava area and a huge Bowser in the center. Start by rolling the snowballs around to form a path to the various ice platforms. At the end you'll locate a fire flower. Take it to the center and use your fire power to destroy the Bowser statue.


Three hit from your fireballs will be enough to destroy the statue, revealing a Power Star.
Sorbetti's Chilly Reception
Similar to the previous level, you'll need to make use of your fire powers to destroy Goomba statues. This time however your goal is to acquire the star chips scattered around. After gaining them all, take the launch star to the next area. Here, carefully make your way down the slopes and dodge the enemies. There will be a Luma shop at the end, so purchase any power ups you'll need.


Take the launch star and you'll wind up at the boss, Sorbetti. Most of it's body/head is immune to your attacks and will in fact damage you. Your goal is to hit its nose with a spin attack. Rather than jumping up, it's better to stay low to the ground and spin as Sorbetti's nose touches the ground. Hit him three times to receive another Power Star.
The Chimp's Skating Challenge
Start up Bowser on Ice. Instead of destroying the Goomba statues, use your Fire Flower to burn through the trees. One of them will contain a pipe. Enter it and you'll encounter The Chimp.


He'll yet again challenge you to a new task. This time, you'll need to skate around the area and acquire 500 points in a minute or less. There are several chimp balloons that will pop out of the 3x3 grid. The Green ones will yield 10 points, the orange 50, and the purple spiked ones will instead damn and slow you down. The main goal should be to snag as many orange ones as possible. With some luck, and some repetition, The Chimp will hand you a Power Star.
World 3: Rolling Masterpiece Galaxy
Silver Chomp Grudge Match
This level makes use of the Star Ball. Get used to the movement, as you'll be using it the entire way through. Move ahead and you'll come to an area with many colors and paint brushes. There is a key in the green section that will unlock a path via the red section.


Cross the floating platforms as they quickly appear, moving slowly to keep from toppling over the edge. Next will be blue platforms that you will need to turn yellow and then green. The next area features a huge amount of buzz saws cutting away at the planet. Ease your movements to avoid dropping through the holes and you'll reach the real grudge match.


You'll be in a sumo style match up against a silver chomp. You'll need to quickly and aggressively ram into it in hope of pushing it off the ledge. When it's finally pushed back, a launch leading to the next area will appear.


On this last planet, you can finally discard you're your Star Ball. Climb up the pole straight ahead and leap off to reach the stage's Power Star.
World 3: Beat Block Galaxy
Step to the Beep


This level uses a simple mechanic. Every time there is a beep, blocks of yellow and green colors will appear or disappear. Your goal is to collect the silver stars scattered about. Most of them rest near the final area, but are located on different colored squares. Time your jumps and you'll be able to easily land on top of them. Once all of the silver stars are acquired, the stage's Power Star will appear at the top.
World 3: Bowser Jr.'s Fearsome Fleet
Bowser Jr.'s Mighty Megahammer
This final world stage will make heavy use of Yoshi and his tongue. Be sure to not loose him, or parts of this stage may become unbeatable.


You'll be riding moving platforms as heat-seeking Bullet Bills jet towards you. Use Yoshi to grab the bills and reflect them back at the cannons firing the projectiles. You'll also need to fire some of these bullets at the glass in order to clear a path. Soon, the platforms will start passing through appearing airships. To make sure you're not bumped off, leap from your platform and unto the ship, then descend by down once the platform reappears.


Soon you'll finally arrive at a Luma shop. You should buy any powers you can afford and march ahead for the boss. Bowser Jr. is manning a huge robot. Not only does it have giant mallet, but it will fire a barrage of Bullet Bills. Use Yoshi's tongue to catch a few bullets and sling them back. Your targets are the robot's three glass orbs: two on its chest and one on its back. There are swing stars around the battlefield that will take you to the robot's behind. After destroying all of the glass, your next target will be Bowser Jr. himself. After two hits, he will be defeated, leaving World 3's Grand Star.
World 4: Supermassive Galaxy
Huge Trouble with Big Wigglers
As the name implies, this level contains huge enemies. However, despite their size, many of them can be defeated with standard spins. Start by moving across the giant pipes on the right and ride the last one as it rises and falls. This pipe will take you above, where several Thwomps will hamper your path. Move under them quickly and you'll arrive at a launch star.


In the next area, grab the spin drive and use it to destroy the large Koopas on the other end. Destroying all three will yield your next launch star. Take it and you'll arrive at a platform with some pipes and flashing platforms. Time your jumps quickly off of these as they will disappear after a few seconds.


Finally, you'll come to a tube filled with Wigglers. You need to time your movements and jumps to make your way through the small gaps between them. Finally, you'll arrive at the end where the Power Star sits.
World 4: Flipsville Galaxy
Flip-Flopping in Flipsville
For this level, you'll need to ground pound various grates that will in turn flip, taking you to the planet's other side.


Move to the bottom side's center, which is the lowest point of the planet. Ground pound here and you'll be taken to the highest point on the inverse side. Use the launch star and you'll move to the next planet. There are Chomps around, but you will be able to spot there locations through either of the building's sides.


Up ahead are moving platforms. Ground pound through the grates to make it passed the oncoming spikes and walls. You'll come to a Luma shop where you can buy a power up. The next launch star will take you to a boss fight.


Move underneath the planet and ground pound the grate under the boss to wake it and start the fight. You simply have to ground pound the grate it's currently standing over. It will attempt to move in your direction, which you can use to lure it to a grate of your choosing. Always stay on the opposite side of the planet and the boss will go down without any trouble. Grab the Power Star it leaves behind to complete the level.
Flipsville's New Digs
This level may use some of the same layout as the last, but the flipping grates have been replaced with dirt patches. To get through you'll make use of the spin drill. Like before, locate the lowest point of the underside to reach the highest point on the top side. Take the launch star and you'll come to a new planet.


There is a pipe up high on a ledge, and you'll have to use your drill to dig through. As before, find the lowest points on one side to reach the highest on another. Enter the pipe and you'll end up in an underground side-scroller.


The room's gravity will change after every few sound beats. Use these changes in gravity along with your drill to dig into each room and grab the five silver stars. With all of the stars in hand, a Power Star will form in the center. Grab it to complete the level.
World 4: Honeyhop Galaxy
The Sweetest Silver Stars
Another level with the Bee Mushroom. Grab the power up and fly to the honeycomb above. Use these sticky walls to scale to the right. Avoid any water and continue ahead to a fountain. Even if you loose your powers there is a nearby Bee Mushroom to restore your flight.


Use the flower straight ahead to slowly swing down to the water below. Use the lilly pads to stay dry and grab the bee power. Carefully fly and jump to collect the silver stars scattered about. Two of them are on this lower level, while the next two are higher up.


Defeat the enemies as you ascend and you'll locate the Queen Bee on the top. She'll complain about an itch on her back. Climb behind here and you'll find the fifth and last silver star.


With all five stars in hand, the power star will form in the center of the mountain. Retrieve it to complete the stage.
World 4: Starshine Beach Galaxy
Surf, Sand and Silver Stars
The objective of this stage is to collect the silver stars scattered around. There is one located on top of the huge Pianta statue. You'll need to use Yoshi and his tongue to reach it. A second is stuck in a glass container. Grab a Spiny ball and break it open. The third star is on a high tower. Use a Blimp Fruit to fly to it.


Search for an island with palm tree to acquire the fourth star. The final star is located high above a round structure. Move along the structure to turn it like a ball until its highest edge points to the sky. Jump on this now exposed edge to reach the last star.


With all five stars the Power Star will appear back on the mainland.
Climbing the Cloudy Tower
Your goal here is to reach the top of the high tower. However, this time you don't have Yoshi's Blimp Fruit to make it easy. Instead head to the deepest depths of the under water section. Swim up the long shaft and ground pound the button on top. This will release a cloud Flower in a far off patch.


Leap down and grab the Flower. You'll have to ride the nearby lily pads to make it to the tower without losing your power up.


Once at the tower, use your clouds and backflips to reach the top and grab the Power Star.
World 4: Chompworks Galaxy
Where the Chomps Are Made of Gold
This Gearmo run factory produces and monitors giant Chomps. Right off the bat, climb the platforms on the far right end. They will descend as you step on them, but will retract again once you jump. Climb to the top where the Chomps are rolling. Bounce on top of the platform above the ramp and the Chomps will be able to roll to the lower section. Slide down the ramp and stand on the platform in the center. One of the Chomps will make it into a hole and turn into a launch star.


In the next section you'll need to jump across a bridge overlooking a lava pool. The bridge however is being overrun with Chomps. The Gearmo at the end will destroy any Chomps that make it too far. To cross the bridge, you'll need to jump over to the small ledges on the side and return to the bridge once the Chomps pass. A launch star will form at the end, leading to a new section.


There will be some platforms that will appear and vanish, along with a seesaw. You'll need to lower this seesaw to collect a Chomp and bring it to the other end, leading it to a hole. It will break and a launch star, taking you to one final Chomp. This time the Chomp is gold, but behaves the same. You'll need to lower the platforms on the lower end by standing on them. Also be sure to destroy any enemies around to keep yourself safe. Finally, ground pound the button to raise the green platform, allowing the Chomp to crash into the hole, revealing the Power Star.
World 4: Sweet Mystery Galaxy
Bulb Berry's Mysterious Glow
Another level that requires Yoshi and the Bulb Berry. You'll have to furiously collect more berries as most of the stage has many invisible platforms. The level is rather straight forward, but there are several hazards to be wary of: checkerboard green platforms will shrink and disappear after landing on them, there are also pink sucker enemies that will attach to Yoshi. Spin them off quickly to free Yoshi's mouth.


Towards the end of the level, you'll also need to turn several blue platforms yellow by passing over them. Make use of Yoshi's flutter jump tricky gaps and moving platforms. After switching all platforms, a launch star will appear in the center, leading to the level's Power Star.
World 4: Bowser's Gravity Gauntlet
Breaking into Bowser's Castle
The final stage of World 4, and as expected it is yet another dangerous lava area. From the start, dodge and jump over the fireball rods ahead. Gravity will be contently pointing you in different directions in this stage, so keep an eye out for where the enemy land and move about.


You'll eventually enter an underwater (overwater?) section. Despite being submerged, there will still be plenty of fire and other enemies as you traverse this steam. Afterwards, there is a set of spinning wheels, along with adjacent fireballs. Time your jumps through the changing gravity to make it through safely.


Bowser himself fights similar to his World 2 form. However, his punch attacks add an extra wave of energy and his flame breath will linger for a longer time. Despite this advantages, the basics of the fight are identical to World 2: jump onto the meteorites and ground pound them into Bowser. After four hits, you'll gain a Grand Star and access to World 5.
World 5: Space Storm Galaxy
Follow Me, Bob-omb
The first planet of this level takes place on a cylinder. It's covered in green electrical fences, so time your jumps to avoid being damaged. On the far right hand side is a launch star that will take you to the second planet.


Upon arrive at the second area, you'll notice a path beneath the glass below. At the southern section is a glass cage that blocks your decent. In the north is a Bob-omb dispenser. The Bob-omb below will chase after you along whatever path you take. Your goal is to lure the Bob-omb into the glass and destroy it, revealing an entrance. Through the entrance will be a launch star leading onwards.


In the last area is a planet with many holes, surrounded by Topmen. While the enemies can't outright hurt you, touching will bump you fairly far, making it likely to fall into one of the holes. Keep moving forward and to the right while avoiding the pests and you'll arrive at a few pull stars. Use the stars to arrive at a new location where a Power Star awaits.
Clearing this level will unlock many paths on the World map, giving you freedom of selection.
To the Top of Topman's Tower
For this stage, you'll need to make use of the blue buttons that will slow down time. Even with everything moving slower around you, your character will still move at regular speed, allowing you to easily dodge hazards. One of the main things to avoid is the bubbles that roll out from the walls. These will trap your character and roll them into a bottomless chasm. Avoid these bubbles and hit the switches to open gates, leading to higher parts of the level.


Up top will be several enemies, including Topmen and Thwomps. Using the blue button to slow down time is your best bet to dodge or defeat them. Likewise, make use of the slowed tiem to easily move across platforms. At the very top of the tower is a large Topman and the Power Star. Use the Topman as a stepping stone and gain the star, ending the level.
C'mere, Topman
After completing Follow Me, Bob-omb, you'll eventually get a letter from a Gearmo while aboard the Starship Mario. When this happens, return to Follow Me, Bob-omb. On the third planet of this stage, the one with the Topmen, you'll encounter a Gearmo. This ally will ask you to bring a red Topmen to him.


This might seem a bit tricky with so many obstacles in the way, but there is a trick: you only need to bring him the one single red topmen, and can destroy the other smaller yellow ones along the way. With the Topman in tow, the Gearmo will award you another Power Star.
World 5: Upside Dizzy Galaxy
A Walk on the Weird Side
Another level that makes use of gravity changes. In most sections the gravity is static, you'll need to look at the walls to tell which areas are pointing in each directions, and use this information to hop across platforms.


In other locations, there are switches that will temporary reverse gravity, allowing you to manipulate where you move. In the final area, the gravity is controlled by the beat of the music, so you'll need to listen carefully to avoid smacking into a hazard above or below. Keep moving and you'll reach a Power Star at the end.
Burning Upside Dizzy
Restart A Walk on the Weird Side, but this time around go to the section wit hthe moving platforms. Instead of continuing onwards, move to the left and enter the pipe at the top.


You'll enter yet another Gearmo clean up area. Like the others, you'll be given a Fire Flower at a short amount of time to destroy all of the crates. Like previous areas, stand at the bottom and throw fireballs upward to quickly destroy them all. When successful, the Gearmo will pass along a new Power Star.
World 5: Boo moon Galaxy
Silver Stars Pop-up
The first section of this level is a walk through a dark maze. There are coins and pictures on the wall that will help lead a path, guiding you through the darkness. You'll arrive in a section covered in ooze and a lone block platform. Carefully ride this platform along the ooze, as it will quickly change directions and weave, possibly dropping you to your death. The platform, and the world itself, will fold several times. However, the gravity will also adjust, so don't move off of the initial top, even if visually seems like you may fall.


Use the launch star along the way and you'll come to a pop-up book of a haunted house. Ground pound the button in the far corner and the pop-up will toggle between flat 2D, and three dimensional. Use these changes in height to move around and grab the five silver stars acattered around. With all of them in hand, a Power Star will appear.
Haunting the howling Tower
As with the first level, you'll start in a dark house area. Track down the coins in the are and they will lead you to the next zone.


In the second area, you'll gain a Boo Mushroom, which will turn Mario into a Boo. You can pass through gates by spinning; however this will not protect you from enemies. You'll need to move extremely carefully to avoid trouble, as you can only float very slowly. At the top of the tower is a Power Star, which will finish the level.
World 5: Slipsand Galaxy
Squizzard's Sandy Sinkhole
You'll need to actually climb into the surrounding quicksand to make it passed the spiked fruit and other traps around the area. Ride any loose blocks to reach more stable ground.


Soon after, the ground will drop into a long slope. You'll need to carefully navigate passed the rolling tumblers to avoid being squashed or pushed off the side. After the very long ride you'll arrive at the boss, Squizzard.


Squizzard can only be harmed from use of the nearby Fire Flowers. Grab one of these powerups and wait for him to open his gapping mouth. Launch off a fireball with a spin attack and it will roll into him, causing dmage. As the fight goes on, Squizzard will launch bombs and other projecticles, but the strategy remains the same. After a few hits, you'll be rewarded with a Power Star.
Sailing the Sandy Seas


You’ll be riding a sand block platform for most of this level. Several Magikoopa will attempt to knock you into the quicksand below, so be quick about defeating them or dodge their assault completely. If the platform is hit by a magic spell or the surrounding environment, the damaged section will disappear before regenerating a short time later. Jump across the platform and stay on whichever section remains intact. After a few more Magikoopa and a Chomp, you’ll soon arrive at the stage’s Power Star.
World 5: Shiverburn Galaxy
Prince Pikante's Peppery Mood
The start of the level is covered in lava. You'll need to make good use of the Cloud Flower to move across the lava field. Along the way will be a large button that can be ground pounded. This will turn all of the lava into ice. Skate carefully along the path as there are still electrical traps around. You'll soon reach a launch star to the next area.


Here, platforms will be rotating and moving quickly around a fast lava area. You'll need to run quickly. Avoid jumping as much as possible, as it can easily throw off your timing. If you take too much damage, there is an extra 1UP on the center platform. After this you'll be taken to an icy area with many falling meteorites. There also enemies that fire coconuts, but their projectiles can be reflected back with a spin attack.


The stage's boss, Prince Pikante, works in much the same way as the smaller coconut enemies. He will launch out either fireballs or coconuts and you'll need to spin attack them back at him. Upon three successful hits, you'll beat him and gain a Power Star.
The Chimp's Ultimate Skating Challenge
Restart Prince Pikante's Peppery Mood. Near the end of the first planet is a green pipe to the far left.


Inside, The Chimp will challenge you to yet another skating challenge. This time around, you'll need to score 600 points. Your goal is to to collect as many orange balloons, while avoiding the spiked ones. If you mange to score enough points, The Chimp will award you another Power Star.
World 5: Bowser Jr.'s Boom Bunker
Bowser Jr.'s Boomsday Machine
Right from the start you'll find the broken Megahammer from World 3. Though it no longer moves, it will still fire off Bullet Bills. Use this to your advantage and lure the bills to the barriers ahead, exploding a clear path for you. This will lead to a cannon. Climb inside and fire your way to the bull's eye ahead.


Kill the boomerang bros and other enemies around. You'll need to make use of the Cloud Flower to make it passed the rotating platforms ahead. After a short journey you'll encounter yet another fight with Bowser Jr.


Bowser Jr. Will be riding in a rather large tank. You'll need to use the various cloud Flowers to easily get the upper hand on him. Beware though, shortly before his upper dome becomes vunerable, he will charge himself with electricity, which can damage you if you leap too soon. After each successful hit, Bowser Jr's tank will increase in size, requiring you to use more Cloud Flowers and take riskier jumps. After enough damage you'll finish him off, leading to a Grand Star and World 6.
World 6: Melty Monster Galaxy
The Magnificent Magma Sea
Make use of the swing stars to dodge the oncoming lava monsters and ascend to the next area. Here, lava will constantly move up and down. Try to stay on the highest platforms as you make your way across. After a fresh check point you'll encounter torandos; spin in them to gain an extra height boost and glide to to the next twister.


The final area has a large amount of lava enemies, however they only pass through the darker magma rocks and will leave the more grey stone alone. Quickly move through the gambit and you'll find the Power Star trapped in a crystal. Spin attack it twice and quickly move to where it lands.
The Chimp's Bowling Challenge
Instead of moving forward this time, go to the left and enter the nearby green pipe. You'll encounter The Chimp, who will task you with gaining 5,000 points from his bowling challenge.


Make use of the Rock Mushroom and roll through the enemy pins. You want to aim for the center to strike as many as you can. In later parts of the stage there will be moving platforms. You'll need to time your rolls carefully; remember that Rock Mario has a slight delay between forming into a ball and actually rolling. With enough points the Chimp will hand you another Power Star.
World 6: Clockwork Ruins Galaxy
Time for Adventure
Ride over the wheels on the right; they are constantly turning, so you'll need to remain on whatever piece is currently facing the top. Take the launch star ahead to a new zone. Here, you'll need to free a Luma while dodging the moving blue walls in the background. As you navigate the platforms, stop where the walls are grayish brick, this will prevent you from being pushed.


In the upper left hand side of this area is a arrow switch, this will not only destroy the blue moving wall, it will change gravity. The solid background wall is now your floor, travel through it back to the Luma, and it will in turn become a launch star to the next zone. Pass under the holes inside the giant wheels that roll bay and make your way to the top of the tower.


Several of the rolling walls will require wall jumping quickly, otherwise they will turn again before you have a surface to cling to. Finally, at the top will be a button to ground pound. This will alter the wall and lead to a Power Star high up top. However, there is no means to reach it on your own. Instead, you'll need to ride uptop the giant moving wheels, being sure to keep moving to avoid being thrown off or squished. Make one final long jump and climb the beams to gain the Power Star.
World 6: Throwback Galaxy
Return of the Whomp King
This is a remake of an old classic Mario 64 level. The goal is to make it to the top of the tower where a Whomp awaits. You can quickly run passed most of the enemies on the way, just ascend while moving to the left.


At the top will be the mentioned Whomp, along with a floor symbol marked with a Bowser face. Lure the Whomp over to the symbol and wait for it to smahs into the ground. Jump on its back and ground pound it, revealing a long passage to the stage's boss, the Whomp King.


The Whomp King is similar to his smaller versions, but the main difference is that he can stun you when he slams the ground. To avoid this, jump as he lands to avoid the shockwave. Also, the king is much too large to simply jump on to. Use his feet as ramps to quickly reach his back and ground pount his symbol. After a few hits, he's yield and you'll gain yet another Power Star.
Silver Stars in the Whomp Fortress
The layout of this stage is the same as in the previous one. Instead of a boss, you'll need to collect silver stars to unlock a Power Star. Most of them will require the use of the Cloud Flower. The first silver star is near the start, in plain sight. The second can be found underneath a moving platform: use your clouds to safely grab it before falling, then make more to ascend back up. The third can be found by slading passed a Thwomp and making clouds around the area's perimeter.


The fourth star is hanging on a cloud above a pool of water. Remember, that if you fall into the water you'll lose your clouds. Carefully jump to the star and either jump back, or you can simply fall into the water, making your way back up the tower. For the fifth and final star, ascend the flagpole at the very top. There is a 1UP here you can grab, but you main objective is to use your cloud powers to leap forward. With all five stars, a Power Star will form, completing the level.
World 6: Battle Belt Galaxy
Mini-Planet Mega-Run
This level is all about combat. You'll need to destroy various enemies from Goomba to Boos. While most can be defeated with Spin Attacks, others will need special care: The spike balled enemies can only be destroyed with the Fire flower, Chomps will require you to whack them with green balloons, and Boos can only be dealt with from the light of an underwater turtle shell.


Once every enemy in all of the planets are defeated, a key will drop, releasing the stage's Power Star.
Snacktime for Gobblegut
Start up Mini-Planet Mega-Run and make your way to the ice enemies. Along the way you'll need to collect 20 coins. Kill as many enmies as you can with spin attacks (as opposed to jumps) as this will make them drop coins, rather than star bits. Feed the Luma on the ice planet the coins and you'll be taken to a match up with your old friend, Gobblegut.


Gobblegut remains largely the same, however this time around its whole body is on fire, preventing you from carelessly moving up to it. Wait for each of its red balls to become lodged in the planet and quickly spin attack them. After the first three are destroyed, Gobblegut will pick up speed. Destroy the last three for a brand new Power Star.
World 6: Bowser's Galaxy Generator
Bowser's Fortified Fortress
This is the final stage of World 6, and the last area of the main story. Be ready and collect as many 1Ups as you think you'll need. Upon entering the area, move ahead to encounter a group of Hammer Bros, who will in turn release a giant flower, ride this flower below and take the launch atar to the next area.


You'll be in a large cylinder planet and will make use of your spin drill to bypass the enemy bills. This will lead to a launch star that will take you to a check point and a 2D zone. Use your Cloud Flower along with the wind current to move and ascend. However, you will not have a big enough height advantage and will need to backflip to reach higher areas.


In the next section, you'll need to make heavy use of Yoshi, and if you lose him, many of the oncoming puzzles will become much harder, or downright impossible. Free Yoshi from the egg on the right, advance left through the flowers and lava and you'll encounter several Boomerang Bros and a switch. Finish off the foes and hit the switch. This will reveal a long corridor and a fire pepper. Have Yoshi eat this power up and traverse the long path, dodging the walls before the lava consumes you.
Ride the purple moving platform, being sure to destroy the Magikoop that approach. When the platform separates, use Yoshi's flutter jump to avoid the lava enemies, and then leap back. You can also grab the ballong fruit in hopes of dodging the enemies, but it may be too slow. Make it to the last Bowser door and smahs it open with meteorites, much like previous levels. The final boss awaits you.


Nearly identical to the previous two fights with Bowser, however like before his attacks become stronger and more intense. Everyone one of Bowser's attacks will let out fireballs and shockwaves, making it important to keep moving. He also recovers much quicker, so you'll need to send the meteorites back at him as soon as possible. After six hits he will drop the final Grand Star.


However, the fight isn't over yet. Bowser will rise once again for the final battle. Bowser will fly through the air, advancing until he comes into range to make a punch. Your only hope is to ground pound the various meteorites scattered around. Leap to a new one as Bowser makes an assault. After four hits, Bowser will finally be finished. Grab the Grand Star to complete the main story of Super Mario Galaxy 2.
Got a news tip or want to contact us directly? Email news@gamespot.com
Join the conversation