INTRO:
There are few medieval fantasy stories that are willing to describe what orcs would do when they storm a fortress, beyond saying that the defenders have already lost because the orcs have managed to get inside.
Orcs Must Die! begs to differ, and at the same time, will also tell one extra tale about the orcs: they don't have much experience spotting traps and are terrible at utilizing their numerical superiority indoors.
This is the tale that Robot Entertainment wishes to use for its next game – incidentally after its previous project that was Age of Empires Online, which is an entirely different game. One would wonder how Robot Entertainment could handle such a change in direction, but they had and it just so happens to be so much gleeful fun.
Unfortunately, they were not entirely perfect in their execution, so up until now, the game is saddled with annoying bugs. However, it would be difficult for these bugs to take away too much of the fun from the rest of the game.
PREMISE:
Orc Must Die! is set in two fantasy worlds where there are magical rifts that are used as both sources of magical energy as well as means of transportation between said worlds. One of the worlds is inhabited by peace-loving, magic-dependent people, whereas the other is hell-blasted, no thanks to its barbaric natives.
Considering the importance of the rifts, there is an entire order of warriors and mages that are dedicated to learning the secrets of their use and protecting them. To do so, they have constructed strongholds around these rifts on both worlds. These bastions are simply called "rift fortresses".
The denizens of the dark world have long threatened the rift fortresses, but they were not organized enough to pose a threat beyond just banging on the gates. Lately, they have become more concerted in their efforts; the unprepared order was simply overwhelmed. The marauding mobs passed through the rifts unchecked and brought their menace to the other world.
The couple of war mages that still survive happen to include the oldest and most jaded of them and his regrettably dim-witted apprentice. Unfortunately, a freak accident fell the old man, leaving the apprentice without guidance and mentorship. Yet, he is not exactly saddened and is in fact eager to take charge now that he has "graduated".
PLAYER CHARACTER:
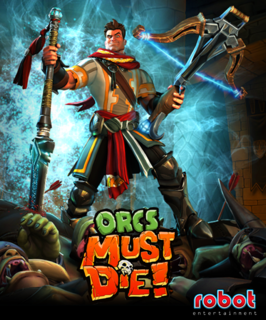
The protagonist has been referred to with many epithets and titles (more of the former than the latter), none of which are truly canonically recognized in this game. For purposes of brevity, this review would refer to him to as the "hero", which is perhaps more appropriate if killing angry orcs that are bent on destruction can be considered heroic.
The hero may be terrible at sorcery, but he is surprisingly gifted at handling magic that creates traps and the summoning of guardians. He is also apparently very physically fit, sprinting at great speeds and fighting tirelessly. He is also difficult to take down, though whether this is due to his connection to the magical rifts or his thick-headedness is up to debate.
It should be apparent to most players that the player character is the main weapon that they will use to defeat the mobs with, despite the game having significant tower defence elements. The player will be making use of the hero's mobility to travel to-and-fro hotspots in the rift fortress that is currently being defended.
Dying does not mean immediate defeat. Due to his connection with the rifts, the hero is resurrected every time he dies, but this takes away strength from the rifts. Oddly enough, his mentor did not appear to have the same benefit from being connected to the rifts; of course, the hero is too dim-witted to wonder about this. (This question was answered in the sequel, though this is for another day.)
Plot logic aside, dying is still a setback, as the player will lose a few precious seconds that will allow the mobs to advance. More importantly, the rift weakens each time the hero dies, so careless players can actually end up losing even if not one enemy made it to the rift.
The hero does not heal naturally. To heal, he must either pick up healing potions that the orcs sometimes – and somehow – drop, or run back to the rift, which will rapidly heal him. Relying on either option too much generally leads to poor performance however, so it is in the player's interest to avoid as much damage as possible.
The hero may be terrible at sorcery, but he has mana reserves that most of his magically enchanted gear will draw form. He regenerates mana over time, but in the vanilla version of this game, the only other default alternative is to retreat to the rift. There are some upgrades that allow him to regain mana through other ways, but they come with opportunity costs.
ARSENAL/SPELLBOOK:
The hero's arsenal is practically his spellbook . There is not much story-based explanation for this, but it is popularly thought that he conjures his equipment and traps into existence.
Every subsequent new fortress that the player has to defend grants a new piece of content to be included in the spellbook. Coincidentally, this new trap or item tends to be more useful than most others in that rift fortress.
The content of this spellbook is retroactive, meaning that the player can return to previously defended rift fortresses and use traps or items that were not available in those fortresses. Considering that the progression of the story is based on the progress of the player across the consecutive fortresses, there is no story-based explanation for this retroactive property of the spellbook.
Before selecting any rift fortress to defend, the player can choose to spend "skulls" to upgrade traps; upgraded traps are generally better than regular traps, or they have capabilities that regular ones do not. The traps that are cheaper to build during actual gameplay require fewer skulls to upgrade, while the more expensive ones typically require more skulls.
These skulls are obtained from completing levels; this will be elaborated further later. There can only be so many skulls to be had before the player runs out, so the player may want to pick upgrades carefully.
There is no story-based explanation for the skulls either, other than they are both meta-game rewards and badges of performance of sorts.
U.I. DESIGN – SPELLBOOK SCREEN:
In the spellbook screen, the traps have icons with background colours that delineate which type it is, or more precisely, where it is set. For example, traps that have icons with blue backgrounds are floor-set traps, whereas traps that have icons with green backgrounds are traps built into walls.
This thoughtful design could have been more useful, if not for the icons for items mingling together with those for traps. They have background colors with no particular associative logic to them, and unfortunately there does not appear to be any way to segregate icons for traps from icons for items.
In fact, there is no way to rearrange the icons in the spellbook either. They appear in the order that they are introduced to the player, but this is the only arrangement that the player gets.
Any item or trap that the player has picked goes into the slots in the hotkey bar at the bottom of the screen. The items and traps are arranged in the order that they are picked. Unfortunately, there is no way to rearrange them after that, short of removing them and re-picking them again.
The spellbook screen is only accessible before the start of the first wave in any rift fortress; an obnoxiously huge prompt appears on-screen to inform the player of this. However, the game does not inform the player that if the player builds any trap or even uses any item during this phase, the spellbook screen is disabled, thus locking the player into using whatever he/she has chosen.
ITEMS:
Items are gear that the hero can equip in lieu of traps. They do not require currency to be used, but almost of them draws from the hero's mana reserves.
Every item has a default firing mode and a secondary mode; both have different effects. However, the secondary mode for any item almost always consume more mana, as it is usually more tactically potent, e.g. usually having area-of-effect properties.
The default item that the hero is always equipped with is the crossbow. It may seem odd and even restrictive that the player is required to always have it, but it will turn out to be the most useful and reliable weapon in the game – assuming the player is a good shot.
This is because a shot from the crossbow to the head of any enemy deals tremendous damage, usually killing the target outright unless it is a bruiser like an ogre. The crossbow also has a rather large hitbox, making it easier to hit heads with; it just so happens that the enemies in this game have large heads, which should make headshots even easier.
In fact, a skilled player may be able to successfully defend the earlier rift fortresses with just the crossbow alone, except perhaps on the highest difficulty setting and only in rift fortresses where the mobs can be easily funnelled.
The crossbow's secondary fire sends a bolt that explodes on impact to slightly damage and stun a small group of enemies. The stunning duration is rather short, which can have players wondering about its usefulness. However, more observant players will notice that it can stall the mobs long enough for them to bunch up, which makes them very vulnerable to traps and items with area-effect attacks.
Like the crossbow, the bladestaff, which is practically a sword, has a primary attack that does not use mana. Its secondary attack pops up enemies that are directly in front of the hero, making them vulnerable while they are falling down. The bladestaff has wide arcs of attacks, making them very handy against bunches of enemies. With enough practice and study of the animations, the player can even kite the mobs around.
However, the wise player would discover that the bladestaff is a risky weapon to use. The mobs may lack finesse in their attacks, but their numbers more than compensate. More importantly, the player will be spending too much time kiting that could have been spent on killing more enemies, which is not wise to do in levels where the hordes have more than one path of approach to the rift.
As mentioned earlier, the hero is simply terrible at casting spells. However, he is at least still capable of using items that can release spells of their own. These spells would be recognizable by veterans of medieval fantasy games, such as spells that burn enemies, freeze them or some other effects.
However, the most useful of these spell-releasing items is the Wind Belt, which tosses enemies around, with the exception of the ogres. The rift fortresses tend to have many hazards, so the player would eventually realize that forcing mobs into them is one of the easiest ways to get rid of them quickly.
Its secondary attack mode picks up objects and suspends them in front of the hero. This can be used offensively, such as picking up and dropping individual enemies into hazards, which uses far less mana than tossing them about with the primary attack but is of course more time-consuming. If anything else, the player can suspend an enemy in front of archers for them to pepper it with arrows.
The Wind Belt is also the only means to retrieve loot drops from hazardous places. Enemies that die in hazards will release their loot drops in said hazards, making them impossible to retrieve safely. However, there are many problems that hinder such efforts, as will be described later.
TRAPS – OVERVIEW:
Traps are the main means of disposing mobs. The hero can only be at one place at any time, even if the player is familiar with the layout of any rift fortress. Furthermore, traps often deal with enemies that they harm very decisively. In addition, the meta-game of Orcs Must Die! happens to rewards kills with traps more lucratively than kills with items.
There are several categories of traps in the game that function differently from each other and with varying effectiveness, so they will be elaborated separately. The wise player will eventually learn how to place them together such that they complement each other, or at least catch enemies that slipped past the earlier traps.
However, all traps have one similarity: they do not affect the hero, who does not appear to be able to trigger them either (though attacks with the Wind Belt appear to do so). Even physical traps simply clip through the hero's model, though this does not mean that there is no discomfort from this; this will be elaborated later.
All traps can be upgraded with skulls, which impart more properties to them, as mentioned earlier.
FLOOR TRAPS:
One of the first two kinds of traps that the player will be introduced to is a trap that is set onto the floor. Each floor-set trap takes up quite a sizable amount of space on the floor; they are almost big enough to affect three orcs that are very close to each other. As to be expected of such traps, they are triggered by having enemies step on them.
Spikes that jut out from the floor are the first to be introduced among these. This is quickly followed by the less-lethal but perhaps more tactical tar trap, which slows down mobs that step into it. Spring traps are introduced in a rift fortress that has vast pits of dangerous liquids, and will become the trap of choice in similar rift fortresses.
Eventually, there will be more entertaining traps, such as Brimstones and Spore Mushrooms.
A few floor traps can be difficult to appreciate though. One of these is the Steam trap, which causes the mob that triggered it to be suspended in the air helplessly for a while; it does not do any damage. It could have been more useful if it can lift any further mobs that move over it, but it does not.
WALL TRAPS:
The first wall trap that the player obtains is the Arrow Wall. An observant player will notice that the wall has a very long range but fires down a narrow corridor; this makes it more useful against mobs that are moving towards it instead of past it. Watching it at its utmost effectiveness can be quite enjoyable.
The push trap is practically the wall-mounted version of the spring trap, so it is not much of a surprise. However, this trap is associated with one of the camera issues in the game, which will be described later.
Wall Blades are perhaps the least useful of the wall-mounted traps, as it has a very small triggering range and it can only inflict heavy damage on a few targets before having to spend time to reset itself. It is best used against tough mobs like Ogres, but there are more efficient ways to deal with these enemies.
Grinders practically turn an innocuous segment of wall into a hazard. It does not sit around waiting for the player to toss mobs its way either; it vacuums in any mobs that come too close, churning them until they jam after having sucked in a number of enemies, upon when they have to reset.
It should be noted here that wall-mounted traps can be placed at any height on a wall. Presumably, this is so that they can attack flying mobs, which can trigger them if they come within the range of the traps. However, in practice, gauging where to place them is difficult as they do not always follow a straight path of flight.
CEILING TRAPS:
The mobs never look up (or down either), so it would not be a surprise if they are quite susceptible to traps that are mounted on the ceiling. However, ceiling traps are the smallest category of traps, perhaps understandably so as most rift fortresses were not designed to have flat and low ceilings (which is probably a strategic mistake).
The player is introduced to the Pounder first, which is only effective against targets that are just underneath it. It is quickly outclassed by the Swinging Mace, which is much larger but is more cost-efficient, especially when it is set along the path of the mobs instead of across it.
In fact, the Swinging Mace may be a tad overpowered when paired with tar traps, especially when both have been upgraded.
The auto-ballista is a hybrid of a trap and a guardian (more on guardians later). On paper, they would seem to be better than the archers, as they have much better damage per shot and longer range; they are also not targeted by the mobs. However, they have limited arcs of fire and slow firing rates, which are perhaps understandable balancing drawbacks.
OTHER 'TRAPS':
There are other 'traps' that do not exactly fall into any of the categories above, as they are more utilitarian in nature. They are still set in the same ways as the other traps, but they do not exactly inflict harm on the mobs that will pass by/through/over them.
Barricades are the most useful of these, because they can direct the mobs into following terribly inefficient paths – the orcs and their cousins are not very smart. However, there are enemies that can circumvent barricades, chief amongst these are flying imp-like creatures. There are also a few rift fortresses where the mobs will attack any barricades that block their paths anyway.
The player can attempt to wall off a rift, or even a corridor, to divert the mobs, but if the player gives them no clear routes to the rift, they start to attack the nearest barricades that block the shortest route to the rift. This is undesirable, because as durable as the barricades are, the mobs' momentum of numbers will blow through them quickly.
Barricades are the only traps that can be damaged by the mobs. Any barricades that are destroyed are permanently lost; the player will have to spend resources to replace them. However, if the player can preserve them until checkpoints in the waves are reached, any damaged but still functional traps are restored to full health. The player can also attempt to sell them and then replace them during lull times (more on these later).
Boom Barrels are barrels of ordnance that are not automatically triggered in any way. Instead, they need to be directly attacked to detonate, and most mobs are not stupid enough to do so. Attempting to trigger them while they are surrounded by mobs can be tricky, as the mobs obscure the barrel.
However, the design that discourages players from using Boom Barrels the most is that they are not replaceable: any Boom Barrel that has been detonated is permanently lost. It can be argued that they are effective against certain tough creatures, but there are other cheaper ways to deal with them.
The Decoy is an improvised version of the Boom Barrel, and one which mobs actually attack – to their explosive detriment. However, like the Boom Barrel, Decoys are one-shot devices that can be wasted carelessly.
GUARDIANS:
Guardians are living defenders that the player can place on just about anywhere where there is a floor. They do not occupy the space that is used by floor traps, so floor traps can be placed under them for some interesting combinations.
However, guardians can be targeted by the mobs and can be incapacitated, rendering them useless until the next break.
There are only two types of guardians in the game: elven archers and paladins. The elven archers act a lot like towers in tower defence games; they stand on the spot and fire on any enemy within their (considerable) range. The player can change their initial facing, but this is unimportant as they do not have any limitation to their arcs of fire.
Elven archers can attack any member of the mobs, making them the more useful of the two guardians. However, archers are rather weak and fall easily, especially when attacked in close combat.
The paladins meander about the spot that they are placed on, waiting for any enemies to come over. They are more mobile than the archers, though this is a double-edged sword as they may end up chasing enemies instead of killing them; they are not exactly fast.
Anyway, when they do what they are supposed to do, they can tie down half a dozen or so enemies, as well as attract a lot of ranged fire (which they shrug off with magical shields as long as they are not engaged in close combat). A few of them in a corridor can stall the orcs as they saunter over, but any other enemy would present a problem, e.g. kobold runners simply move past them, whereas ogres are especially effective against them.
Overall, it would appear that the elven archers are the more utilitarian of the two, leaving the paladins as niche defences with very specific uses.
WEAVERS:
Sometime into the game, the Weavers will be conveniently introduced. They are members of the same order as the War Mages, but unlike the latter, the Weavers are researchers and inventors who invest their effort into creating tools and improvements for the War Mages to purchase and use.
At any time during the defence of a rift fortress, the player can bring up a screen that puts the game on pause and allows the player to purchase upgrades from the Weavers. There are up to three Weavers in the game, but they are all mutually exclusive; picking one prevents the player from perusing the others' upgrades.
The Steel Weaver is likely to be a favourite of many players, as she has upgrades that improve guardians' durability and offensive power and the efficiency of traps. For players who prefer to have the hero doing most of the heavy lifting, especially in maps where the mobs can be corralled, the Elemental Weaver offers upgrades that greatly increase the fighting prowess of the player character.
If there are any possible tactical upgrades that the two aforementioned Weavers do not offer, the Knowledge Weaver has them. These include a lucrative upgrade to the movement speed of the hero, which is very handy in maps with multiple rifts to defend.
ORCS & KIN:
The orcs are the core of the dim-witted hordes that would come crashing into the rift fortresses. They are susceptible to traps, most of which kill them outright. As individual opponents, the orcs are laughably weak.
However, there are many of them – so many that they can leak past the first set of trap-filled corridors and chokepoints. Therefore, the player must plan for further sets of kill-zones to catch any leaks, or at least stall them until the player can have the hero handling them himself.
On higher difficulty settings, the orcs become smarter and bring along shields that can absorb the damage from the first attack that hits them from the front. However, as long as they still have their shields, they move a bit slower. Wiser players may consider using tactics that get rid of them while they still have their shields, such as tossing them into hazards.
Some other orcs happen to be taller than the rest and have skin that is ochre instead of green. They use crossbows instead of melee weapons, which make them more dangerous than the rest. However, they have to stand still while aiming and firing, and their projectiles cannot shoot past other orcs.
Kobolds are the lowliest of the mobs, but they are also the smallest and fastest. Typically, they are either sent as the vanguard, or somewhere in between the waves of hardier mobs. Kobold runners are easily stopped with barricades, which they have a lot of trouble destroying. Kobold sappers are suicide bombers who run into the closest barricade, guardian or the hero, whichever is closer, to blow themselves up to great effect.
Ogres are the toughest of the mobs, whose presence if not seen can be heard some distance away. They appear to lumber slowly at first, but upon catching sight of the hero or any guardians, they charge forward surprisingly quickly, delivering strikes that can stun their victim, often leaving them open to another strike (which fortunately does not re-apply the stunned state). In addition to the vanilla ogre, there are a few others, such as element-specific ogres that are vulnerable to the attacks of certain items.
A few ogres happen to be armored, and these are the toughest enemies in the game, mainly because they are very difficult to stun. However, like other ogres, they can be affected by upgraded physics traps, which can make their elimination somewhat trivial. On the other hand, this requires the player to take the path of the Steel Weaver, which may not be the choice of every player.
There are only two flying enemies in the vanilla version of Orcs Must Die!, but they are a handful enough. This is because they completely circumvent floor-set traps and they are not affected by the physics-scripting for enemies that move on foot, e.g. using the Wind Belt on them does nothing.
This severely reduces the player's choices for dealing with them; the only few things that are effective against them are the elven archers, the auto-ballista and of course, the hero's crossbow. As mentioned earlier, trying to place wall traps in their path can be tricky due to the vision perspectives that the player is limited to having.
Gnoll Hunters announce their presence with howls (which is odd, since they are supposed to be anthropomorphic hyenas, which do not howl). If these are not enough, the loud grunting that they make as they run would. Gnoll Hunters do not go after the rifts, but instead go after guardians and the hero, usually in that order.
They happen to be quite tough and are very fast. Their strikes slow down their target, which makes it even harder to escape from them. They are also only a tad larger than most orcs, making them difficult to pick out from the crowds, at least until they burst forth. They also run over barricades.
Such advantages mean that the player should consider getting rid of them first. In any case, they will take precious time away from dealing with the more numerous mobs.
If there is one trait that all of the enemies in this game share, it is that they have disproportionately huge heads. This makes landing headshots with the crossbow quite easy – for the composed yet twitchy player that is. There are many targets to hit and the hordes would seem to meld together into one intimidating tide that can unnerve inexperienced players into spamming shots without finesse.
Furthermore, on any difficulty setting higher than "Apprentice", the numbers of the mobs have been designed to overwhelm even players that are crack-shots, thus forcing them into utilizing tactics that stall the mobs or cluster them together into bunches for area-effect attacks.
The Hobgoblin Shaman will also discourage the use of headshots. Headshots leave corpses intact, which the Shamans can use to revive and return mobs to the fray. Corpses do eventually disappear, but only if there are no Shamans around to revive them. They can even revive very tough monsters, such as the Gnoll Hunters and Ogres.
However, they do have more than a few limitations and drawbacks. Shamans are as weak as kobolds, and do not actively go for the rift (though they will move towards the nearest corpse that they can see). Shamans also cannot revive anyone that has been gibbed, fried or otherwise died a horrible death that damages its corpse beyond repair.
The presence of Shamans makes traps and items that obliterate corpses or otherwise fling them into hazards quite valuable.
LOOT DROPS:
Each enemy has a chance to drop one of two types of loot; the more powerful enemies have higher chances to drop them when they are slain. Both loot drops float and spin in mid-air, as well as sparkle, which makes them quite easy to spot from afar. Loot drops also persist throughout the defence of a rift fortress, which is convenient.
The more common of the two loot drops is the healing potion. Having the hero retrieve one heals him by more than half of his health bar. The less common one is the golden coin, which gives the player a varying amount of resources to spend; ogres are guaranteed to drop golden coins.
Generally, the player must have the hero running over the models of these loot drops to pick them up. However, if they fall into hazards that the hero cannot go into without dying outright, the player must use the Wind Belt to retrieve them; there is no other way. Yet, even the Wind Belt has its limitations: it cannot pick up things from too far away (the limit on its range is not immediately clear), and the player needs a clear line of sight (and what constitutes a clear line of sight is not clear either).
Unfortunately, sometimes, the models and particle effects of these loot drops fail to appear; the only way the player will know that they are there is through the mini-map. Even so, the mini-map also has its own problems, which will be elaborated later.
SKULLS:
Half of the meta-game in this game concern the collection of skulls, which are used to upgrade traps, as mentioned earlier.
Skulls are mainly awarded by making sure the rifts are not weakened, either by having the hero survive the defence of the rift fortress without dying once. At the default "War Mage" difficulty, completing the defence with the rift intact grants four of the five skulls; at the lowest "Apprentice" difficulty, this reward is limited to just one skull.
The fifth skull has to be obtained by completing the defence of the rift fortress under its official par time. Any time that the player spends dallying during the breaks in between waves is counted too, so the player might want to make decisions quickly or already have a plan beforehand. However, any time that passes while the game is on-pause is discounted, if only so that the player can take a toilet break.
LEADERBOARDS:
The other half of the meta-game concerns the accruing of achievements and races up the leaderboards. The achievements can obtained with enough determination and knowledge of the best strategies to be used to defend the rift fortresses, but the leaderboards are a different matter.
As the player pursues the defence of a rift fortress, he/she will rack up points from the slaying of mobs.
Unfortunately, being efficient at slaying mobs is not rewarded much. If the player resorts to strategies that remove enemies as quickly as possible, he/she would forgo on many opportunities for bonus points. Quick players do get bonus points for completing the defence of a rift fortress below the par time, but the amount rewarded is very lousy: one point for each second saved. Any money saved does not grant any bonus points whatsoever either. This discourages any attempt at speed-runs.
To rack up more points, the player must play at higher difficulty settings where there are more mobs to worry about and subject as many enemies as he/she can to overkill.
Having an enemy suffer many hits from multiple traps or guardians before death racks up a combo multiplier for the point rewards from eliminating this enemy; this must occur in a very short period of time. Orcs happen to be preferable targets for this purpose, as any other enemy either takes too long to die or die very easily.
Most score-racking strategies will require the player to have the hero actively participating in the application of damage, so they will require not only fantastic planning to pull off, but also amazing twitch skills on the part of the player.
Unfortunately, for the Steam version of this game, getting to the very top of the leaderboard with honest effort is pointless and impossible; there are dubious score ratings that hog its highest rungs that strongly suggest cheating.
BREAKS & SELLING THINGS:
Every wave of mobs is followed by a lull, either temporary or indefinite until the player decides to continue. The latter is always present on the "Apprentice" and "War Mage" difficulty settings, and it happens to be a crucial calm-before-the-storm that players would use to make preparations. However, any time spent preparing goes to the time record for the player's session.
Temporary lulls happen to be just 10 seconds each, just enough to make quick tweaks to the player's defences.
Both kinds of lulls are the only times during the defence of a rift fortress that the player can sell traps and guardians; their sales always let the player recoup their costs completely, even on "Nightmare" difficulty. However, on "Nightmare" difficulty, the timers are severely reduced to just a few seconds.
DIFFICULTY SETTINGS:
There are three difficulty settings in the game, though only two are available by default.
The "Apprentice" setting is perhaps the best one to start an unfamiliar rift fortress with, as the game can be surprisingly hard sometimes. Enemies appear to be less numerous, making them easier to handle. However, the skulls that the player can gain are capped at just two for each successful defence at this setting.
The default "War Mage" setting releases the cap to allow the player to get up to five skulls for each rift fortress. The hordes are more naturally numerous and leaks can easily ruin the player's performance.
The perhaps appropriately-named "Nightmare" difficulty is only available after the player has successfully defended all rift fortresses at the War Mage difficulty setting. "Nightmare" has a tally of skulls that is separate from that for "Apprentice" and "War Mage", which share the same tally.
This separate tally is intended to give the player more skulls to upgrade traps with, but working for them is far harder than one would think.
"Nightmare" greatly increases the size of the mobs, as well as includes powerful mobs in the waves of earlier rift fortresses. For example, the very first rift fortress will culminate with an armored ogre at "Nightmare". In addition, all indefinite breaks are removed completely and replaced with timers. The rift is also substantially weaker, at almost one-third of its strength in other difficulty settings.
Meticulous planning, practice and impressive twitch skills are required in order to succeed at the "Nightmare" setting, especially if the player is gunning for full five-skulls performance and high leaderboard scores. This makes the "Nightmare" setting more suitable for hardcore enthusiasts of this game than anyone else.
If the different difficulty settings do alter the durability of enemies, the differences can be difficult to discern. This is because most traps and items kill orcs and weaker mobs outright at just about any difficulty setting. The differences are perhaps easier to see in ogres and gnoll hunters, but skilled players will have developed ways to deal with them very quickly, making the differences quite pointless.
CAMERA DESIGN & MINI-MAP:
The camera always follows the hero, watching over his back and giving the player a good view of what is ahead of him without having his burly model obscuring too much of the screen. However, this is not always the case.
Physical traps clip through the hero's model if they happen to be triggered while he is adjacent to them. Although he is not affected in any way by the trap, the clipping does cause the camera to go haywire, attempting to reposition itself in order to prevent the hero from being visually obscured. A similar occurrence also happens if the model of the trap is moving through the camera's position, e.g. when the hero is just in front of the trap.
This repositioning can cause some visual discomfort, as well as obscuring the action when visual clarity matters most. Otherwise, the camera is mostly competent at what it does.
The mini-map, unfortunately, is not as reliable. It sits in the upper right corner of the screen and is useful for small rift fortresses, but for the bigger ones that are seen later in the game, it may be inadequately small.
This is because mobs are represented as red dots on the mini-map, and the sizes of these dots scale according to the size of the rift fortress in play. Bigger rift fortresses are squeezed into the mini-map, and consequently the red dots are smaller.
This becomes worse when one considers that the game uses a terribly simple way to depict whether an enemy is on the same vertical level as the hero or not. The red dot for an enemy is bigger and brighter when it is, but when it is not, the red dot is dimmer and smaller; only a black outline denotes its presence on the mini-map. If there are differences between red dots for enemies below the hero and red dots for enemies above him, they are too subtle to be of any use.
The mini-map is at its most useless in the Tower, which is the rift fortress with the greatest verticality in the game.
One more problem with the mini-map is that it is very poor at keeping track of the dots for healing potions and coins. An observant player may even have the impression that the developer has not given the same effort into tracking loot drops as they had for tracking mobs.
Another feature of the mini-map that is mildly interesting at best and simply obstructive at worst is its mapping of kill-zones. As more and more mobs die on a certain spot in a rift fortress, that spot will be represented with splatters of colour in the mini-map during break intervals; areas with low deaths will be colored green, whereas particularly nasty areas will have red splatters.
Some players may be amused at this, but most players would notice that when the mini-map shows the colour splashes, it removes the dots for loot drops. This can be an annoyance if the player prefers to look for loot drops during break intervals.
PHYSICS:
Perhaps the most nuanced and yet most unpredictable aspect of Orcs Must Die! is its virtual physics.
However, firstly, it has to be mentioned here that the physics scripting in the game is mainly for the mobs; the player character, traps and guardians have very rigid physics, perhaps for the purpose of tighter gameplay.
The physics in this game can be seen when enemies are tossed about by the Wind Belt or physics traps. Unlike many other games that resort to silly ragdoll physics to simulate the tossing of bodies with mass, Orcs Must Die! makes use of models with restrictions on the movement of their appendages when simulating models that are being hurled through the air.
This makes the plight of orcs and their kin being tossed through the air or shoved about with great force quite the amusing yet believable sight (as believable as these fantastical creatures can be).
An observant player will notice that their necks are rendered rigid for the purpose of these animations, which may be for the better as any odd twisting of necks would have caused quite a lot of disbelief.
However, the trajectories that enemies will take when they are subjected to physical traps and items can be unpredictable. Spring traps, in particular, can hurl enemies out of the rift fortress if it is not entirely indoors or it has windows leading to the outside. This in turn leads to more problems that will be elaborated later.
The effectiveness of physics traps and items is also affected by a damage application bug, which will be described later.
Enemies that had been tossed about takes damage from hard impacts, including from any bouncing that might occur when they are tossed about particularly hard. However, it is rare that damage from such sources can accumulate such that they die even before hitting the ground.
FORTRESS DESIGNS:
The player may be able to develop workable tactics for each member of the mobs, but whether the player will be able to deploy these tactics or not in the rift fortresses are a different matter. Each of the game's two dozen rift fortresses is very different from the rest in terms of layout.
The first few rift fortresses are very simple. Typically, they have the mobs moving down linear corridors that can be lined with traps. Eventually, the game will introduce rift fortresses with corners, stairways, overhangs, bridges and such other architectural features that the player should learn to utilize to great effect against the mobs.
The last few rift fortresses are the culmination of the designs, having so many fixtures, corridors and other features such that they are almost-believable fortresses.
Rift fortresses also have built-in hazards and defences, as well as pre-existing guardians. While the guardians are mainly only there to catch any possible leaks, hazards and built-in defences are there for players who prefer quick and free ways of getting rid of the mobs.
There are lava and acid pits as mentioned earlier, though their sizes vary tremendously. Some are no bigger than fire places, making them only useful when the player is using the Wind Belt. Others are massive, yawning pools that work very well with spring traps. Yet a few others are practically moats surrounding the main body of the rift fortress, presenting very convenient ways to get rid of the particularly massive mobs that will come crashing into it.
Built-in defences include chandeliers, cauldrons of deadly liquids, rolling logs and mountable ballistae. Some of these defences can be overlooked by unobservant players, but for players who explore and experiment a lot, they may discover their usefulness very quickly.
The chandeliers, with their rather thick wooden structures, seem oddly out of place in many rift fortresses. Eventually, the player would realize that they serve another purpose other than being decor; dropping them on any enemy (by shooting them with the crossbow) is a sure-fire way of killing them, even armored ogres. However, gauging when to drop them can be challenging, though fortunately they drop vertically straight.
There are two types of cauldrons: one pours acid and the other lava. There are a few enemies that are immune to damage from the lava version, but there is nothing that is immune to the acidic one. However, the lava cauldron imparts burning damage to its victim, if it survives – most mobs do not.
The effectiveness of the cauldrons can be a bit disappointing though. Despite pouring their contents onto hard stone floors, the liquids do not spread out; it is as if that right underneath the cauldrons, there are invisible drains. Consequently, they only affect limited areas. Yet, cauldrons can somehow refill their contents after a short while, making them reusable.
Rolling logs are conspicuous one-shot traps, but they practically kill anything they roll over once they are released (by shooting at them).
Lastly, there are manually-operated ballistae. These fire bolts that are far more powerful than those of the crossbow, but they still move at the same speed. The ballistae do not have any issues of accuracy from repeated fire, but that is because it has a far lower rate of fire. The game makes use of a first-person perspective when the hero is operating a ballista too, reducing the player's visual awareness.
Despite being called "fortresses", most players would eventually wonder whether their architects have thought of security when designing them. Some fortresses have multiple routes and entrances to the rifts, of which there may be more than one yet all of which share the same number of "lives". Even the hero mentions this concern early in the game.
Of course, from the perspective of gameplay, this is just additional challenge – which the hero will remark on too, albeit without breaking the fourth wall too much.
BUGS & CRUDE WORK-AROUNDS:
There are a few bugs in the game, and although they are few, they can be game-breaking at times.
The worst of these and which remains unresolved is a bug that prevents enemies from dying after they have been thrown into lava or acid pits by physical traps. This happens very rarely for orcs, but a rare one or two may still somehow stand in the lava or acid for a while before the immediate-kill scripts kick in.
In some conditions, this happens more often than not. In the rift fortress that is Balcony, having a Gnoll Hunter tossed from the drawbridge by a spring trap and then hitting the walls around the lava moat causes it to become immune to the lava when it does fall into it. The player will have to pick it out from the lava with the Wind Belt and kill it with other means.
Another less frustrating but no less disconcerting bug is that blocking the routes of enemies sometimes causes their pathfinding A.I. to break. For example, blocking the upper corridor in the Chaos Chamber might cause the mobs that enter through the upper gate to accumulate in front of the gate, seemingly turning to their left to face a wall. This bug can make this otherwise very challenging level a cake-walk.
If the player makes use of lava or acid pits, he/she would eventually have to fish loot drops out of them with the Wind Belt. There is a chance that their particle effects may be left behind when they are retrieved, which makes them harder to spot from a distance.
Furthermore, sometimes, the player is unable to use the Wind Belt to levitate loot drops around; the game merely plays the sound clip for "invalid targets", but otherwise sends the loot drop over to where the hero is. Out of these occasions, there are also rare occurrences where models for the loot drops do not reappear.
Kobold shamans can resurrect other mobs as long as their corpses are intact, but it would appear that they can resurrect enemies that had been killed with acid from cauldrons. This results in skeletons walking and running about, which is a sight that would have been comical if not for the player's dismay that he/she has to kill them all over again.
If enemies somehow end up out-of-bounds due to spring traps, they will eventually die when they are unable to return to main areas of the rift fortress within a quarter of a minute; the player can see their red dots move about outside the boundaries of the rift fortress before they die. This is a crude work-around that could have been averted if enemies that had been tossed outside of the rift fortress would immediately die.
Another ugly work-around that the player may see is what the game does to get orcs that have been thrown onto nook and crannies that are not outside the rift fortress but away from the paths that they would take back to said paths. The solution that the game uses is to simply remove their models and then placing them back onto their paths at the nearest point. This transition can be jarring to look at.
As mentioned earlier, the player can place guardians anywhere as long as there is enough floor space for them. There are places where the player can place them, such as small ledges on walls or protrusions from pillars, but the game considers these places to give too much of an unfair advantage to the player. If the player attempts to place them anyway, the game removes and replaces their models somewhere nearby.
Up to this time of writing, these bugs have yet to be solved and the work-arounds have yet to be improved upon, at least for the Steam version of the game.
GRAPHICS – CHARACTERS:
Orcs Must Die! makes use of a comical artstyle, which is appropriate as the game is about uproarious fun.
The hero is a hilariously burly dude that has amusingly exaggerated facial expressions. Unfortunately, the player cannot see these most of the time, as the camera always hover behind and above the hero, though his face can sometimes be seen when he performs his victory dances.
Speaking of victory dances, he makes very silly performances when the player successfully defends a rift fortress. He has several of these, which are picked at random, but all of them can be very entertaining.
The hero is described as being particularly fond of killing orcs and their cousins. This eagerness can be seen in his posture and stance, giving his character a hyperactive vibe that is quite fitting.
The mobs come in many shapes and sizes. There are the regular orcs, which have several variations to their models that can be difficult to discern when they are flowing down corridors and stairs. Still, there is enough variety in their models and lack of synchronization in their animations to make their romps through the rift fortresses seemingly believable and natural – as natural as their comical waddling and disproportionate body parts can be of course.
The mobs that are not orcs have fewer variations in their models, unfortunately, but then, they are not the core of the hordes after all. Nevertheless, they have models that are distinct and easy to recognize, provided that they are not obscured by the green/ochre tide.
Speaking of the tide, the flood of orcs tend to be a lot more visually distressing than the silhouettes of ogres, kobolds or gnolls looming behind or among them. Depending on the player's perspective, this can seem appropriate as the orcs are supposed to screen them, or not, as these non-orc mobs are actually more dangerous and the game should have made them easier to spot among the orcs.
Despite the comical and perhaps even cartoonish designs of the characters in the game, there is quite a lot of gore to be seen, or more precisely, severed body parts; in fact, there are more severed body parts than splurts of blood (and incidentally more models than there are decals).
Perhaps this was intended to preserve the game's "T"-rating in the eyes of the ESRB, but it can be odd to see orcs explode into chunks resembling arms, legs and heads without much blood when they are killed by powerful traps. Still, watching the chunks clatter about can be a satisfying reward for having set up effective chokepoints.
GRAPHICS – TRAPS & ITEMS:
Traps have animations and particle effects that are befitting of them. The player can see arrows being loaded into the slots of arrow walls as they reset, spikes retracting from spike traps and the moving contraptions in physical traps. Traps that do not resort to lacerations or blunt trauma have brilliant particle effects that accompany their triggering, followed by clear dimming of their textures as they reset.
Traps do indeed look brilliant, especially when they kill the mobs by the droves. However, it is not likely that the player would have the time to appreciate every bit of their visual designs.
The items are generally less visually impressive than the traps, due to their having relatively dinky-looking primary attacks. In fact, the particle effects for the primary attacks of the Flame Bracers and the Ice Amulet are practically palette swaps of each other.
Their secondary attacks are much more impressive, but because they take so much mana to use, they do not appear on-screen often enough to be appreciated.
Furthermore, the models of some items do not appear on the model of the hero, if there were any models for them at all. The Wind Belt, Flame Bracers, the Ice Amulet and Lightning Ring only appear on the hero's person as particle effects that are surrounding his hands. At the very least, their particle effects are quite easy to differentiate.
Fortunately, the use of the crossbow and the bladestaff is visually apparent, thanks to clear models and the very distinct stance that the hero takes when using either.
GRAPHICS – RIFT FORTRESSES:
The rift fortresses are perhaps the reason for the rather massive disk space requirement that the game has.
As mentioned earlier, every rift fortress is designed very differently from the rest and also happens to look quite different. They do share many assets, such as sets of statues, but they are so detailed that any similarities would be difficult to notice, other than the fact that all of the rift fortresses are made from sturdy wood and cut stones.
Yet, the rift fortresses load surprisingly quickly when it runs on a machine that reaches above the minimum hardware and software requirements.
The start of a defence session on the lower difficulty settings is the best time to check a rift fortress out, examining its layouts and architecture, much of which does look convincingly like they belong to a medieval fantasy fortress.
If the player looks out of the rift fortress at the sky, he/she will always see the forebodingly amethyst sky of the orcs' homeworld. The skybox is rarely seen though, as much of the action occurs fully indoors.
To aid the player in the defence of a rift fortress, there are visual indicators such as small puddles of lava or acid that denote where cauldrons of said fluids will pour their contents on and the sheen that envelopes a trap that can be triggered or sold.
At first, the lava or acid pits seem quite impressive, being bright sources of light; acid pits even have their own gaseous particle effects. However, any sense of awe is struck down when enemies fall into them; there are hardly any particle effects for splashing or any fluid physics.
The only way for the player to know that enemies that fell into them had died is if the player sees the text that pops up when they die (which shows the money that the player has earned), as the pits are deep enough to obscure death animations. They also happen to hide the models of any enemy that has been afflicted with the lava/acid pit bug that has been mentioned earlier.
Problems like these detract from the otherwise impressive visual designs of the rift fortresses.
SOUND EFFECTS & MUSIC:
Most of the sound effects that the player will be listening to are the sounds of the mobs dying in nasty ways.
The shanking of arrows, sudden jutting of spikes, meaty thuds that clockwork maces make when they slam into orcs and other sound effects are designed with discernible aural qualities. They can be delightful to players who love to use traps.
Spells and weapons also have their own distinct sound effects, though they are mainly there for cosmetic purposes, unlike sound effects for traps, which do happen to alert the player that they are being brought into effect.
There are random dinking noises that can be heard when the player hovers the mouse cursor over icons and labels in the various selection screens, though they are so subtle that they are often drowned out by the music.
Chris Rickwood is the composer of the music in Orcs Must Die! Although he has only composed a few distinct tracks for the game, all of them are quite appropriate for the themes of the game. The tracks for when battle commences are ominous yet playful, which fit the gameplay well provided that the player likes slaying orcs as much as the hero does.
The most notable track among them is "Bar Fight", which is a surprisingly catchy blend of electronic, rock and artificial orchestra.
VOICE-OVERS:
The best sound designs in the game are perhaps the voice-overs. They can be entertaining, if the player happens to have a liking for dim-witted characters, of which the game has more than a few.
The poorly educated and brash hero will be providing most of the voice-overs in the game. Granted, he may come across as obnoxious, but considering the characters whose nerves he grates on, such impudence is perhaps quite appropriate. If not, it still makes for a good contrast between him and the other archetypal medieval fantasy characters in the game.
The slightly fatalistic and cynical attitude of the hero's mentor is also quite amusing, which is good, considering that he is the narrator for the game.
The same voice actress voices all of the Weavers in the game, which is not entirely unacceptable as they do appear to be triplets. Each has quips and remarks that portray their different personalities, though their different qualities are of course lost on the hero, who treats all of them in the same slightly juvenile way.
The hero, along with one certain other character, has voice-overs that occur during the defence of a rift fortress. These advance the progression of the story, which makes it all the more a shame that the player will not be able to listen to all of them clearly.
While the player can listen to the voice-overs that occur in the first preparation phase of the defence, he/she would be barely able to listen to the rest, which for whatever reason, play when the player is busy killing the mobs.
Last, but not least, are the mobs' voice-overs. The orcs dominate most of the mobs, so it is fitting that they are the ones providing most of their voice-overs.
The things that they say can be silly, though the humour of quips such as "Can I be the good guy?" and "I am only half-orc!" would only be apparent to people who are familiar with the tropes of medieval fantasy story-telling.
On the other hand, the silliness of their quips does sometimes clash with their brutishness, especially when one considers that they look like they are perpetually yelling (which is likely a deliberate gag by Robot Entertainment); they do not have any lip-synching, by the way.
In contrast, the non-orc mobs do not have much in the way of voice-overs. Most of them merely grunt and pant as they move about, especially the Gnoll Hunters and Kobolds. Ogres, despite their prominent size and ferocity, are surprisingly taciturn.
CONCLUSION:
In Orcs Must Die!, kitting out fortresses with traps is a surprisingly fun endeavour that is made all the more entertaining when orcs and other inhuman things die from them, supplemented by the carnage from the player's deadly attention. The presentation of the story, settings and characters can be off-putting to players who do not like silly takes on medieval fantasy, but for other players, they are light-hearted enough to put the spotlight on the game's titular focus on killing orcs. Unfortunately, bugs that remain to this day mar this otherwise splendid game from Robot Entertainment.