Final Fantasy 7 Remake Walkthrough Chapter 9: The Town That Never Sleeps (Spoiler-Free)
Find every side-quests, beat every mini-game, and nab every collectible in FF7 Remake's Wall Market in Chapter 9.
One of the most interesting and activity-filled areas of Final Fantasy 7 Remake is Wall Market, the place you visit in Chapter 9. There are side-quests and mini-games here, as well as a whole bunch of collectibles, weapons, and other things to find.
We've gone over every inch of Wall Market to help you find everything it hides. Our guide will help you unlock all the side-quests--including some hidden ones--and make the most of your time in Sector 6's red-light district.
Check out the rest of our Final Fantasy 7 Remake guides so you don't miss a single secret or collectible. You can also read our FF7 Remake review.
- Chapter 1
- Chapter 2
- Chapter 3
- Chapter 4
- Chapter 5
- Chapter 6
- Chapter 7
- Chapter 8
- Chapter 10
- Chapter 11
- Chapter 12
- Chapter 13
- Chapter 14
- Chapter 15
- Chapter 16
- Chapter 17
- Chapter 18
Chapter 9 Walkthrough: The Town That Never Sleeps
Collapsed Expressway
Head into Aerith's shortcut and keep pushing forward. You'll fight a few enemies you've seen before, and then hit one called the Sweeper Prototype. This thing is weak against Lightning attacks, but watch out--once you hit it for a certain amount of damage, it'll go berserk. When that happens, focus on spells and Punisher damage to knock it out of its rampage and fill its stagger meter.
Just ahead, you'll take a ladder down. Check the corner beside it for a chest with two hi-potions.
Right after fighting three Terpsicolts, look for a ramp heading down on the east side of the area. Follow it down to a pipe under the street and a chest, which contains 1,000 gil.
The path will split ahead, and you'll need to head up the ramp to find controls for the big robot hand just ahead, in order to unblock the path.
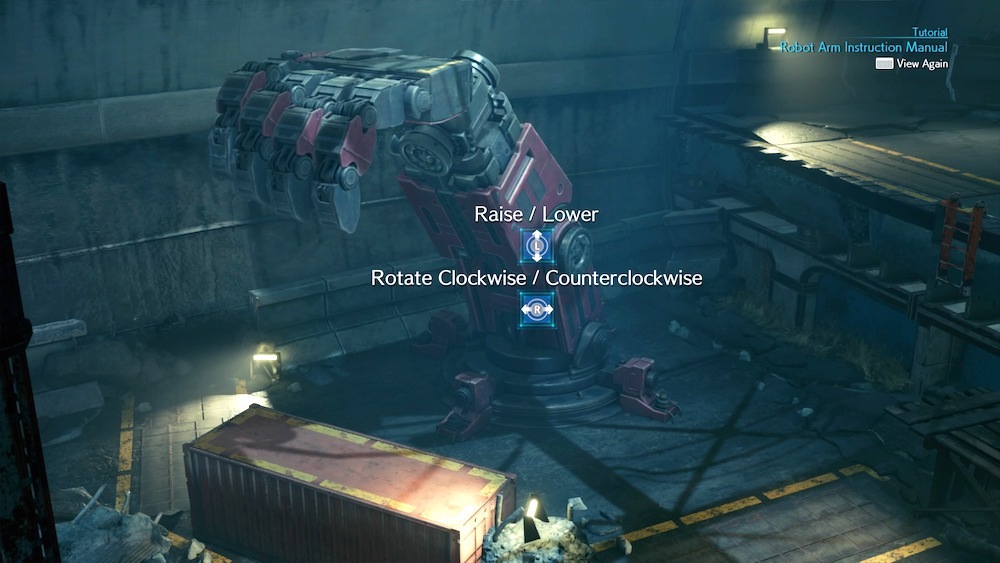
Use the hand to pick up the cargo container and move it to the right, so that it makes a path with the wood walkway nearby, which has a Binding materia on it. When Aerith heads down, pick her up and place her on the cargo container. She'll run over and grab the materia for you. Then place her up by the ladder to open the path forward. When you drop down the ladder into the area, check behind the wall where you first moved the cargo container to find a chest with a mega-potion.
Up the other ladder, make sure you proceed all the way south on this path to find a vending machine that contains the Cosmo Canyon Music Disc.
Fight through Beck and his bandits--they're weak to Fire, but not especially difficult--until you get to the next robot arm section. There's another materia, this one a Magnify, you can grab by moving the first container up and to the right to make a path to it, then dropping Aerith off on top.
To open the path forward, place the crate you used to get the materia in the yellow box on the left side of the area. Switch robot arms with Triangle, then grab the second container from the wood walkway and stack it on top of the first one. Switch back to the first arm and pick up Aerith. Drop her off on the stacked crates, switch arms, and then carry her over to the walkway with the ladder.
Evergreen Park
After a quick cutscene, check the southeast corner of the area for a little tunnel that leads to a chest with an ether inside.
Outside the gates to Wall Market, after talking to the chocobo driver, check the north end of the area for a chest with a phoenix down.
Wall Market
This chapter will include several side-quests, some of which are only accessible if you make certain choices along the way. You'll need to get both different sets of missions to complete the "Best in the Business" Trophy and the "Dressed to the Nines" Trophy, but it'll require returning to Chapter 9 using the Chapter Select menu that becomes available once you finish the game.
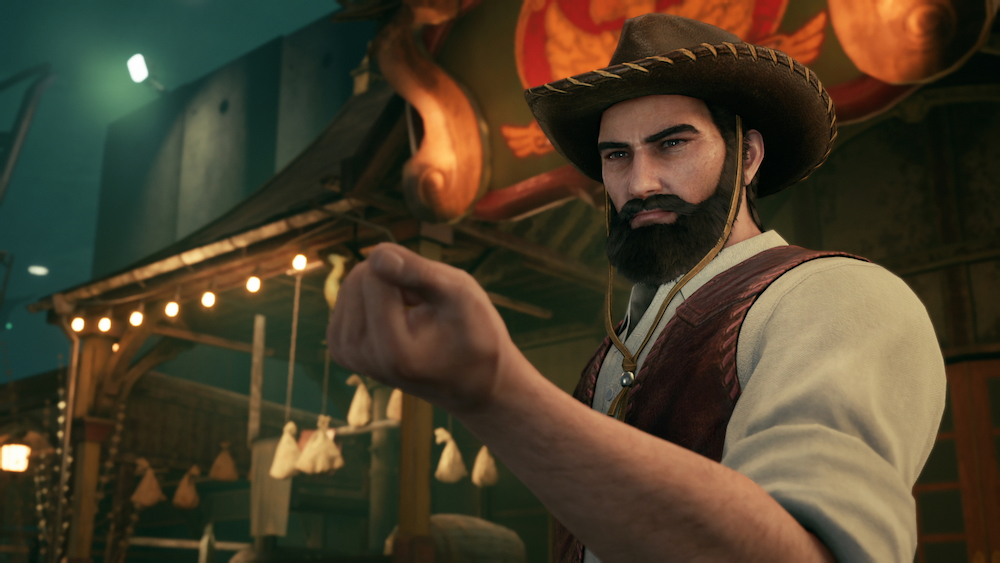
The two sets of side-quests are broadly either aligned with Chocobo Sam or with Madam M. To get the Chocobo Sam quests ("The Party Never Stops" and "Dynamite Bodies"), agree with Johnny at the Honeybee Inn, choose heads or tails at the coin toss, and choose the "poor man's" option for 100 gil at Madam M's. You can also talk to Johnny's dad in the inn and near the Corneo Colosseum.
To get Madam M's side-quests ("Price of Thievery" and the "Shears' Counterattack") disagree with Johnny at the Honey Bee Inn (or don't follow him there), choose not to play at the coin toss, and choose the "luxury" option for 3,000 gil at Madam M's. You'll also want to avoid talking to Johnny's dad inside the inn or in front of the Corneo Colosseum.
If you mix and match your responses, the side-quests you receive will be based on whichever set of answers you favored most. So disagreeing with Johnny, but calling the coin toss and choosing the poor man's massage will still get you Chocobo Sam's quests.
The rest of this guide follows the Chocobo Sam slate of side-quests, since these seem to occur more often if you talk to everyone and do everything in Wall Market. Check the end of the section for a rundown of the Madam M side-quests. Note that after you finish the entire game once, you can use the new Chapter Select menu to return to Chapter 9 and make new choices to complete the other side-quests.
Inside the market, duck into the Item Shop to buy the Honeybee Inn Music Disc. On the south side of the street, you can enter an Inn; check inside the room across from the bathroom for a chest containing an adrenaline. Go down the alley on the west side of the inn, heading south, to find a jukebox containing the Under The Rotting Pizza Music Disc. Keep going south from the jukebox to the end of the path to find a treasure chest with a celeris inside.
Find Chadley to the west of the Item Shop to get some new Battle Intel contracts, including one to get a new summon from a VR battle: Fat Chocobo.
Optional Boss Battle: Fat Chocobo

Fighting Fat Chocobo is a whole lot easier than Shiva, but you still need to keep your wits about you. The summon creature doesn't have any major weaknesses, so you'll just want to hit it with your toughest attacks and spells. The best way to pressure Fat Chocobo is with ATB abilities, like Cloud's Braver and Focused Thrust. Go with the ones you like best and that deal the biggest damage, while having Aerith keep up a variety of spells, and keep hammering at Fat Chocobo in an attempt to stagger him.
Fat Chocobo his back with physical attacks, so if you have Barrier materia, use it to protect your squad. His Wark attack has him throwing random garbage at you, which you can easily avoid. When you get in close, watch out for Boom, in which he pops up into the air and drops back down for a big area-of-effect strike. After a bit, he'll start rolling around with Roly Poly, which you can dodge clear of if you're quick.
Meanwhile, the moogle that floats around with Fat Chocobo will occasionally summon spectral enemies to come after you--specifically, Bombs and Tonberries. Knock these out quickly if you can with something like Triple Strike, or let Aerith handle them with her magic while you keep up your assault on Fat Chocobo. You'll occasionally want to switch to Aerith to speed her ATB gain for healing spells, especially if Cloud gets walloped with a few of Fat Chocobo's big attacks.
When you get a chance, summon Ifrit or Shiva into the battle to future pressure Fat Chocobo--the further into the fight you get, the more minion enemies will get spawned in to add to your battle. They shouldn't bother you too much, but if you're finding yourself taking a lot of damage, peel off and take a second to deal with them before returning your focus to the boss.
Wall Market
Take the stairs just east of Chadley all the way to the top to find a chest with an elixir inside. From Chadley, head north up a flight of stairs. Talk to the woman in the cowboy hat to get the Farm Boy Music Disc. Go around the corner and down some stairs from there, to the south, and hug the western wall to find a narrow street; follow it to its end to find a Barrier materia on the ground.

Finding Johnny
When you've explored the north end of town, head toward the Weapon Shop in the south. You'll see Johnny from Sector 7 run by. Follow him back to the Honey Bee Inn in the northwest corner of Wall Market for a quick scene.
Heading back south toward the Weapon Shop, duck into the gym on the west side of the street and look in the back room for a chest containing a Headband accessory.
Cross the street and go into the building on the east side to find a guy doing karaoke. Talk to him and he'll give you the Midgar Blues Music Disc. Ahead at the Weapon Shop, you'll find Hardedge, a new sword for Cloud.
The Trio
Keep moving south and you'll spot Don Corneo's estate. Before you cross the bridge, turn right toward the west to find a chest with 1,200 gil inside. As you approach the front door, go around the corner to the east to find another chest containing an ether. When you've got everything, go inside.
Return to the entrance to Wall Market to talk to the first member of the Trio: Chocobo Sam. As you approach him, check on Johnny, sitting right in the entrance to Wall Market. Note that your answer to the coin toss will affect which side-quests you get: Choosing heads or tails will push you toward the Chocobo Sam set ("The Party Goes All Night" and "Dynamite Bodies"), while choosing not to play will push you toward the Madam M set ("The Price of Thievery" and "Shears' Counterattack").
When you're done with him, head to Honeybee Inn. You'll finally need to go to the north to talk to Madam M, then back south to the Colosseum. At the bottom of the elevator, use the bench and vending machine to prepare, then go into the next waiting room to find Johnny. You can also try the "Mystery Drink" found on the edge of the table before you go.
Sanguine Stalkers
The Beastmaster and his guard dogs aren't too difficult to deal with if you prioritize the dogs first. Note that they'll evade magic spells, but are weak to Ice magic, so if you can infuse Cloud's sword with an Ice elemental strike, you'll have an edge. The dogs hit hard, so be ready with Cura and Barrier spells to protect yourself. Focus fire on one of the dogs until it's down, then hit the other, using ATB attacks like Triple Strike to spread the damage around. Finish off the Beastmaster once his pets are down to win the fight.
Beck's Badasses
You walloped Beck and his Badasses in Aerith's shortcut on the way to Wall Market, but there are more of them this time. All the enemies are vulnerable to Fire spells and attacks. Try to focus on using Cloud's attacks that hit lots of enemies at once, including Triple Slash, to try to knock out lots of enemies quickly. Watch out for the electric mines Beck's men will leave on the ground, which can stun you and take you out of the fight. Keep Aerith focused on healing and you should be able to best all eight combatants.
Cutty and Sweepy
You've fought Sweepers and Cutters before, so this fight shouldn't be all that difficult. You'll want to pick one of the robots and focus on bringing it down. The Cutter is the bigger threat, so go after its arms first; have Aerith fire off powerful spells while Cloud uses ATB abilities on the arms to raise the Cutter's stagger meter. Focus on crippling the robot by breaking down its arms to minimize what kind of damage it can do to you, and keep clear when it starts to rampage--use Aerith to hit it with a spell and calm it down.
When the Cutter's dealt with, focus everything on the Sweeper. Spells will soften it up, allowing you to get in close, stagger it, and put it down with Punisher attacks.
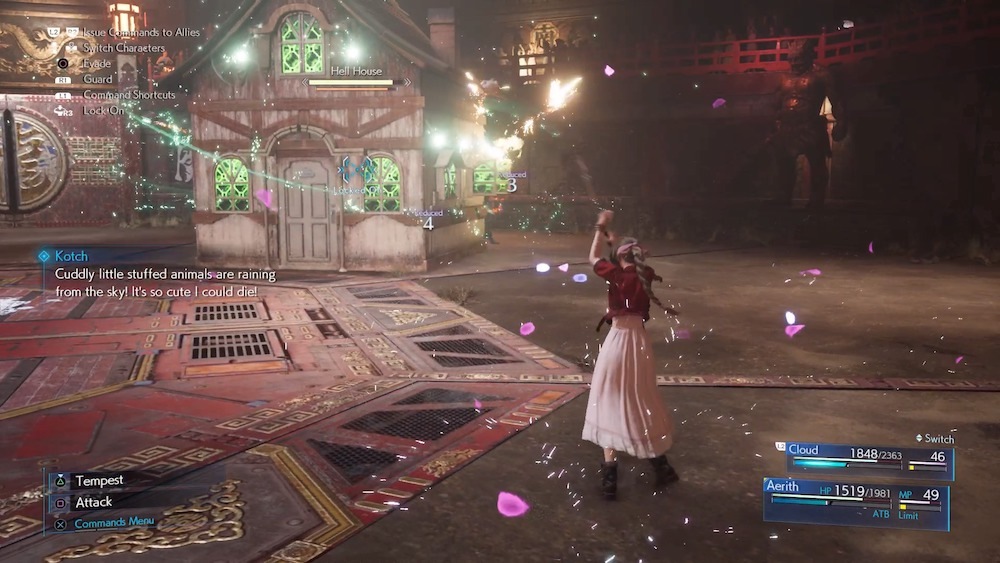
Boss Fight: Hell House

The Hell House is a tough fight, so make sure you're prepared. Spread magic materia between Cloud and Aerith so you have spells covering all four elements: Ice, Fire, Wind, and Lightning. It's also a good idea to remove Elemental materia from your weapons for this fight. You need a balance of elements because the Hell House will constantly change its elemental affinity, using a barrier that will defend it from your attacks. That means that if you're using Elemental materia and the wrong barrier is up, your physical attacks will be useless, putting you at a big disadvantage. You also want to bring plenty of ethers to this fight.
At the start of the fight, watch the Hell House's windows. When they're red, the house's barrier is tuned to Fire; green is Wind; yellow is Lightning; and blue is Ice. You want to cast spells of the opposite type of whatever the barrier is in order to run up the Hell House's stagger meter--so if the barrier is Fire, use Ice, and if it's Wind, use Lightning, and so on.
In the first phase, the house will fling explosive furniture and toys at you, so stay well back. The Chair Salvo attack will launch a bunch of chairs that will track you like missiles, but you can avoid them fairly well if you just run around the arena and try to keep moving. When the house sprays out stuffed animals, stay clear of them--they're all bombs. And when it uses its Hospitality attack, try to run away; it'll suck one of your characters into the house, taking them out of the fight briefly while inflicting a bunch of damage. If you can hit the house with a spell opposite its barrier during that attack, do so.
The first phase isn't too tough if you have the magic to deal with it. After the house takes some damage, it'll flip to a much more aggressive second phase. You'll get fewer indications of the house's barrier from here on out; what magic to hit it with will be dictated by its attacks, which you can interrupt with the right spells. Keep back from its Jetstream attack, in which the house will spin around and spray fire, then use Ice. Do the same for the Double Rocket Charge attack, where the house will shoot itself straight at you--run to the side to avoid the first charge, but know that the house will follow up with two more. The Housing Shock attack will see the house chasing you around to do electrical damage, so try to hit it with Wind. Renewed Hospitality is a Wind attack, so use Lightning.
The tough part of this fight, really, is dealing with God House Mode. The house will create a barrier for itself that severely reduces both physical and magical attacks and isn't tied to an element. When that happens, change targets to the Hell House's arms and focus fire. A couple of big spells from Aerith or ATB attacks from Cloud should be enough to damage the house and drop the barrier, opening it up for your regular slate of attacks. You'll really need to be on your toes for this one, though; as soon as the barrier is down, hit the Hell House with whatever spell will stagger it most based on its window color, since you have a brief period after God Mode drops where you can get a big boost on stagger.
This battle will put you through your paces because it'll require you to be ready with the right spell at the right time, but it also makes charging your ATB meters difficult as you deal with the barriers. When you do get a big hit with the right element, close the gap with Cloud for Punisher attacks and ATB abilities in order to run up as much stagger as you can. Above all, though, be careful about keeping your team alive; don't be afraid to use a lot of items and healing spells here, because you're going to need them.
In the last phase, Hell House will add an attack called Heavensward, where it'll fly around the battlefield, shooting more chairs and other explosives at you. If you keep moving, you should be able to avoid the missiles, but eventually the house will shoot itself back down at you. You'll have a brief window before it hits it with a spell, if you can land it, so pay attention and get your ATB bars charged ahead of time.
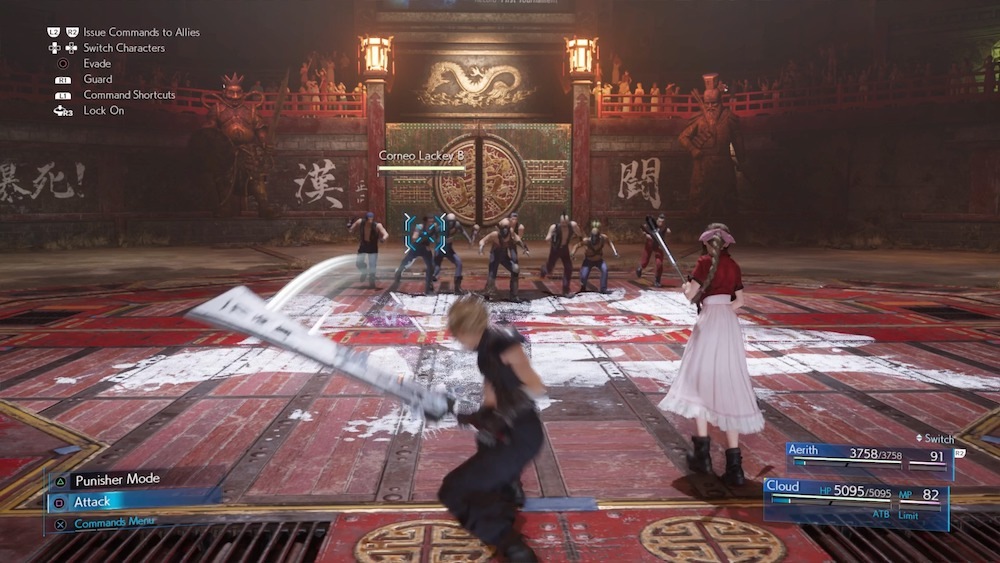
After winning, you can now return to the Colosseum to fight additional battles to earn rewards. If you mean to go through the Colosseum fights at any point, take a moment to clear the two Aerith-specific fights: Aerith vs. Wild Animals and Aerith vs. Shinra Thugs. If you don't do these fights now, you won't be able to access them until you finish the game and unlock the Chapter Select menu.
Both the "Cloud vs. Wild Animals" and "Aerith vs. Wild Animals" Colosseum fights are worth doing before you move on, as each unlocks a new limit break for the character who fights. Your rewards are the Legacy: Ascension Limit Break for Cloud and Legacy: Planet's Protection Limit Break for Aerith. You'll want to do Aerith's specific fights now, as you won't get another opportunity because of the way the chapter plays out.
When you're all done, head back to Madam M's. Make sure you complete anything else you need to get done in and around Wall Market before you agree to have Aerith put on her dress, as this is a point of no return. After that, talk to Chocobo Sam to trigger a new slate of side-quests.
Side-Quest: Burning Thighs
It's squat time. Head to the gym on the south side of Wall Market, near the weapon shop, to engage in a squat minigame. It's pretty straightforward, and you only need to beat the first competitor to complete the quest. If you stick around and challenge the other two, you can earn a Luck Up materia and a Champion Belt accessory (plus the "Sultan of Squat" Trophy).
Side-Quest: The Party Never Stops
Just north of the gym on the same side of the street is the clothing shop. Talk to the owner, who will dispatch you to go find his father at the bar across from the gym. You mostly just need to follow Johnny around Wall Market, talking to people. Your performance will be based on the quality of your materia: Assess, elemental materias like Fire and Ice, and Cleanse. If you've leveled them up, you'll earn Moogle Medals at each step.
The Materia Shop owner will send you to the Inn to use a vending machine, where your Assess materia will be tested. After that, drop by the restaurant and help the owner with whatever your best elemental materia is. Finally, the Item Shop owner will send you to deliver medicine; depending on the level of your Cleanse materia, you'll deliver more medicine for more rewards. Check the bathroom at Drunkard's for your first delivery to get a sedative. The second goes to the alley behind the gym, accessible from the northwest side of the map, and gives you a celeris. The third is for the narrow alley just north and east of the Item Shop, which will earn you a pack of three Big Bombers. After you're done with the medicine, the Item Shop owner will give you the "Inspiration" to bring back to the dressmaker and complete the quest.
Side-Quest: A Dynamite Body
After speaking with Sam, go to the Colosseum for more fights. If you can, combine a Fire and Elemental materia on your armor to give yourself additional protection. You'll fight two Bomb enemies, which don't have any major weaknesses, but are strong against Fire attacks. How you fight these guys is the key, though--you'll want to catch them with attacks while they're in the middle of doing attacks of their own, like the Flamethrower or Fireball, to raise their stagger meters. The best way to do this is to stay out of range, flinging Blizzara spells at the Bombs when they blow fire your way.
Avoid hitting the Bombs when they do the Inflame move, because that'll cause them to grow in size, making their attacks more potent and expanding their range. Do your best to keep away from the Bombs and keep pushing their stagger meters up until you can close the gap and take one out with Punisher attacks and ATB abilities. At that point, finishing off the other should be pretty simple. You'll get an Arcane Scepter weapon for Aerith for your trouble.
When you're done with all the available side-quests in the Wall Market, head back to Madam M. Make sure you've done everything you've wanted before you visit her, though, because this is a point of no return.
Alternate Side-Quests
As mentioned above, if you gave the Madam M answers to various questions, you'll access two different side-quests that don't appear in the group above.
Side-Quest: The Price of Thievery
Head just outside of Wall Market and talk to Mirielle. Return to Evergreen Park and enter the Collapsed Highway again, where you'll find Beck's Badasses. This time, they've got a big Grungy Bandit backing them up, who will like to charge at you and pick you up. He's slow and weak to fire, however, so just avoid him and hit him with magic attacks or Punisher strikes until you put him down.
Side-Quest: Shears' Counterattack
Once you finish both "The Price of Thievery" and "Burning Thighs," head to Madam M's to get a new challenge in the Colosseum. You'll face the Jury-Rigged Cutter in the battle. It's a powerful but slow opponent, and at this point, you'll have fought through a bunch of Sweepers and Cutters--deal with this one the same way, with Lightning magic and Punisher melee strikes. Keep clear of its attacks by dodging and you shouldn't have much issue.
Honey Bee Inn

After some cutscenes, you'll reunite with Aerith and head to the Honey Bee. Check the room at the south side to find a chest with a sedative inside. When you're prompted to practice your dance moves, keep trying until you get 10 Great marks to unlock the Let The Battles Begin Remake Music Disc.
You'll soon find yourself in Don Corneo's mansion. Before you're called into the audition, head to the south end of the room and interact with the Don Corneo-themed vending machine to get the Don of the Slums Music Disc. There's also a chest to the right of the vending machine with a turbo ether inside.
After Tifa and Aerith get their gear back, check the room for a chest with a molotov cocktail. Leave the room and head to the room at the east end of the walkway. Inside, interact with the run in front of a bookcase on the southern wall to open a passageway to a staircase. You'll find a chest and an Otherworldly Crystal accessory inside. Back in the main foyer, go downstairs and fight Corneo's men, then slip through the narrow passageway on the western wall to get a chest containing a Fury Ring accessory.
Getting More Wedding Dresses
You'll get the "Snappy Dresser" Trophy for unlocking any three dresses in this chapter, but after you finish the game, you can unlock two more dresses each for Tifa, Aerith, and Cloud, for a total of nine. Getting all the dresses to unlock the "Dressed to the Nines" Trophy. Check out our Wall Market Dress Guide for more details, but here's a quick rundown unlock the other six.
Tifa's Other Dresses
The choice you make with Tifa in Chapter 3 in the "Discovery: Alone At Last" scene determines what she wears to Don Corneo's mansion, so to get the other two dresses, you'll need to replay Chapter 3 and make the other two choices. Check out our What Would Suit Tifa guide for a rundown of what each choice will get you.
Aerith's Other Dresses

Which dress Aerith gets from Madam M is actually determined by the side-quests you complete in the Sector 5 slums in Chapter 8. Completing no side-quests will get Aerith one dress; finishing three of the six side-quests unlocks a second dress; and doing all six side-quests gets you a third option.
Cloud's Other Dresses

Cloud's dresses are determined by your actions in Chapter 9 in Wall Market. One dress is unlocked if you do zero side-quests in Chapter 9; one dress comes if you do Chocobo Sam's side-quests; and one dress is unlocked if you follow the process to unlock Madam M's side-quests.
Continue with our spoiler-free walkthrough in Chapter 10: Rough Waters.
Final Fantasy 7 Remake News
- Final Fantasy 7 Remake Intergrade Review - Materia Improvements
- Final Fantasy 7 Remake Dress Guide: How To Get Every Dress In Wall Market
- What Would Suit Tifa Choices: Final Fantasy 7 Remake Dress Guide
- + Show More Final Fantasy 7 Remake News Links (2)
- Final Fantasy 7 Remake Guide: Corneo's Secret Stash Locations
- Final Fantasy 7 Remake Materia Guide: Essential Materia You Might've Missed
Got a news tip or want to contact us directly? Email news@gamespot.com
Join the conversation