Prey Walkthrough
It’s time to save the world – and your girlfriend. No, it’s not Super Mario Bros., it’s Prey! Here’s GameSpot’s complete Walkthrough.
Design: Randall Montanari
It's time to pick up another summer FPS in Prey, the highly anticipated title from 3DRealms and Human Head. In it, you take on the role of Tommy, a shiftless Cherokee native who wishes only to leave the reservation and start a life in the outside world...but he's anchored in place by the wishes of his grandfather, Enisi, and especially those of his girlfriend, Jen, who owns a bar on the reservation and doesn't wish to give it up.
Things change abruptly when Jen, Enisi, and Tommy are all abducted by an alien spaceship known as the Sphere. The denizens of the Sphere are all biomechanical in nature, and wish only to "harvest" humans for food supplies, as sources of protein for the enigmatic being known only as the Mother. Tommy is eventually freed from his gruesome fate, and is forced to fight against the Sphere's inhabitants to save Jen before she's consumed in the engines of harvest.
Prey brings some interesting twists to the traditional FPS gameplay, with features such as portals and gravity shifting. GameSpot's Game Guide to Prey will guide you through all of the game's many challenges, offering up tips on the weapons, enemies, and boss fights you'll be encountering, with some video thrown in for good measure. Enjoy!
Weapons
Rifle
The Rifle is the earliest alien weapon that you’ll possess. It has a large supply of ammo, and all enemy Hunters will drop it as well, making ammo easy to find. While it doesn’t possess much firepower, it’ll be more than enough to deal with the weaker enemies that you encounter in your path, such as Hunters and Fodder. If you fire for too long, though, you’ll choke the weapon and have to wait a moment for it to reload with new ammo.
The Rifle’s secondary firing mode will flip it to sniper mode, allowing you to snipe away at distant enemies. This takes up quite a bit more ammo than does the normal firing mode, but is handy for dealing with enemy Hunter snipers. In point of fact, that’s about all you’ll ever need to use it for; most other enemies will move too quickly for this mode of fire to be effective against them.
Note that if you run out of ammo for the Rifle, it will slowly regenerate ammo up to a set amount, making it useful for shooting organic explosives, gravity switches, and the like.
Crawler
Crawlers are essentially alien grenades, which is odd, considering they’re crawling all over the ship. Sounds like a good idea to us. Anyway, you’ll pick these guys up when you walk over them, and will be able to use them as you like from then after.
There are two firing modes for the Crawler, which you can cycle through by pressing the alternate fire button. If the Crawler is legs-down on your hand, it will act like a proximity mine; if you throw it on a spot, it’ll stay there until an enemy (or you) walk past, at which time it’ll explode. If it’s legs-up, then it’ll detonate a few seconds after it hits the ground. Pretty standard, really.
Leech Gun
"This will rock some ****!" As eloquently as Tommy puts it, who are we to disagree? The Leech Gun possesses only one firing mode; its alternate fire will simply suck in energy from Leech Stations that are scattered around the Sphere. You won’t find any ammo anywhere else, so keep an eye out for Leech Stations.

There are four types of ammo for the Leech Gun. The first you’ll encounter is plasma ammo, which sends out rapid bursts of plasma energy towards your enemies. It’s not very accurate, but it’s powerful enough to rapidly take down Hunters and other weaker enemies. Alternately, you can also access cold ammo, which will freeze your targets to death a bit more rapidly. You have to be right on top of your foes to use this ammo, though, and you can’t store very much of it.
Later in the game, you’ll gain access to lightning ammo, which essentially converts the weapon into a zoomless sniper rifle or railgun. These shots are going to kill almost anything in just one or two hits, but you can only store six or so shots for it, so aim carefully.
Lastly, in the last couple of levels of the game, you’ll obtain pure energy ammo. This acts like a lightning gun from Quake. You’re going to discharge a huge amount of energy in a constant beam in front of you. It’s so powerful that you’ll actually be moved backwards by the force of the blast! If you can keep it focused on your enemy, though, you’ll be able to kill them with a minimum of trouble.

Auto Cannon
The Auto Cannon is first obtained when you slice it off the arm of a Centurion, the first boss in the game. It’s a powerful nailgun/grenade launcher that has plenty of ammo scattered around. It’s mostly useful for dealing with Hunters, as they’ll fall quickly to either firing mode. Overall, a powerful weapon for constant use. Keep in mind that Harvesters will capture the grenades from this weapon in their goop shield, making this somewhat less useful when you start encountering large numbers of Harvesters late in the game.
Acid Gun
This is Prey’s version of a shotgun. The Acid Gun fires a fusillade of acid at anything in front of you, but the shot will spread out rapidly, meaning that you’ll have to be firing from pretty close range in order to make maximum use of your ammo. Still, if you’re on foot (as opposed to being in a vehicle), you’ll usually have enemies close at hand, so this is going to be a useful weapon to wield against organic foes like the Hunter and Harvester.
The secondary fire here will launch the Acid Gun’s current ammo cartridge at an enemy all in one go. It’s powerful, sure, but will quite often miss your target, especially when attempting to hit something that moves about or that can dodge, like a Harvester. When you do miss, it’ll be a few seconds before you can fire again. This mode of fire is best used on bulky enemies that can’t dodge very well, like Centurions or the upgraded Hound you encounter near the end of the game.
Crawler Launcher
The Launcher is going to be the last weapon you find in your travels; you’ll cut it out of the hand of a dead Harvester the first time you see them. And then it’ll be yours to do with as you will. It’s an interesting weapon, combining a rocket launcher with a portable personal shield.
The primary fire here shouldn’t be too difficult to deal with; it’s a rocket launcher that fires rockets that move quite rapidly. You’ll be able to easily kill Hunters with these rockets, but faster-moving enemies, such as most enemies, will be able to dodge the rockets before they impact, making it less useful against them, unless you’re right up close to them, in which case you’ll probably wind up taking a bunch of damage yourself. Also note that, like the Auto Cannon’s grenades, these rockets will be rendered inert by Harvesters. Curses! Foiled again! Apart from that, you can profitably use them on bigger enemies like Centurions.
The secondary fire mode is interesting; it’ll disperse a gel-like substance into the air in front of you that will temporarily prevent both you and your opponents from firing through it. Useful when you know that an opponent is charging up a grenade or a rocket at you, but since it prevents you from firing back, it won’t often be super-useful in single-player mode. In multiplayer, you may be able to use this to temporarily plug up a doorway or save yourself while running towards some health, but hey - if you’ve got a rocket launcher you’ll probably want to just use it to, you know, launch rockets.
Enemies
You're going to come across plenty of enemies in Prey, with some only appearing once or twice throughout the entire game. Since you can effectively come back to life any time you die, strategy is somewhat irrelevant; just pick the weapon you like the best and go to town. That said, this chapter will cover the enemies you're going to see the most of in Prey.
Fodder
Fodder are exactly that - small enemies that deal light damage (melee only) and which can be easily killed by a few shots from your Rifle. Little more than mouths that move, really. On occasion, Fodders will be thrown into a room in small host pods that will soon open and discharge their payloads. Even then, they’ll usually just be small annoyances to distract you from the real fight.
Hunter
You’re going to see far more Hunters than you will any other kind of enemy in the game; they’re going to be popping out of portals pretty much all the time. Luckily for you, they’re neither very smart nor very powerful, and their only strength comes in numbers. All Hunters wield Rifles, and occasionally throw grenades at you, but usually they’re just going to stand around and wait to get shot. Fun stuff.

Note that, if you get far enough away from some Hunters, they’ll automatically shift into sniping mode and attempt to whittle your health that way. Use your own Rifle’s sniping mode to shoot them in the head, and you’ll end that threat soon enough.
Hound
These vicious animals are the result of some of the Sphere’s biological evolvement programs - they’ve been mutated into bloodthirsty creatures much larger than they once were. Like Fodder, they possess only melee attacks, but are much bigger and badder than their diminutive cousins. With any luck, you'll be able to see them before they charge and take them down quickly - they're not that tough. If they get up close, though, they can move around you in some confusing patterns. Try to take them on with the Acid Gun if you have it, or your Leech Gun with plasma ammo.

Gasbag
Gasbags appear fairly rarely in the game, usually coming out to play only when you're in large, open areas. While they're tough, and can dodge projectile weapons with some degree of proficiency, their only attacks are an easily-dodged acid spit and a pick-up-and-drop maneuver. Since you don't take much falling damage in Prey, this last attack isn't so distressing.
Mutate
The last of the melee-attacking creature line, Mutates are essentially tougher versions of Hounds. They'll attempt to rush you and attack you with their built-in sword arms, and do a good deal of damage when they connect, but they possess no ranged attacks. They're tough enough that they'll almost always be able to close in before you manage to kill them, though, so get used to their pirouettes and attempt to fire on them with the Acid Gun or another non-explosive weapon.

Harvester
Harvesters are one of the last enemies you'll regularly encounter in the game, and are definitely going to be the biggest thorns in your side among the regular enemies. They come in two varieties: aerial and ground-based. Both will be annoying.
The groundpounding Harvester will normally appear near organic flaps in the ground. Most of the time there'll be numerous flaps in any given area, allowing Harvesters to disappear in one and reappear in another. They may also regenerate health while in one of these flaps, so it's a good idea to shoot them before they manage to escape, if they happen to be running for a flap. Doing so can be difficult, since they wield Launchers, and will use their secondary fire capabilities to capture and render inert explosives, such as Crawlers, grenades from the Auto Cannon, and your own Launcher fire. You'll have to use more conventional weapons, like the Acid Gun or the Leech Gun, to destroy them, with the Acid Gun being preferred since it kills them outright; other weapons will occasionally kill only the bottom portion of the animal, allowing the upper portion to crawl away.
Both the ground-based and aerial Harvesters use the Launcher's rocket fire on you, with the ground version firing two rockets in quick succession, but the aerial one only firing one rocket at a time. Either way, these weapons are tough to dodge; if you can hide behind a pillar or a wall while fighting them, it'd be best to do so.
Walkthrough
Last Call
It’s last call at the roadhouse. Roundabouts 1:50 AM, time to get one more beer in before you hit the road. Of course, when your girlfriend’s the bartender, the rules can bend a bit in your favor. Tonight, though, no one’s going to stay late...
Feel free to walk around the bar and attempt to use all of the objects that you encounter. The urinals can be flushed, you can plop soap out of the soap dispensers, use the sink, etc. Fun stuff! It’s the most interactive toilet in the history of videogames, and you’ll probably be in it for all of 10 seconds.
When you reach the bar proper, start looking around at your grandfather Enisi and girlfriend, Jen. They, along with the two bikers here, will be who you need to interact with before you can get the game started properly. Keep in mind that the other characters won’t talk to you unless you’re close to them and looking their direction, so if you want to take your time and play some video poker, feel free to do so.
Eventually, the two bikers will get rowdy and refuse to leave the bar at closing time, leaving you with little to do but beat them mercilessly with your wrench. After they’re both on the ground, the aliens will finally attack, sucking you and your family up into the sky...and onto the Sphere.

Escape Velocity
The beginning of this level is a long rail ride into the unknown. You’ve been captured by aliens, that much is sure, but why? And how? And better yet, what are you going to do about it?
You won’t have to wait too long to find out the answer to the last question, as Tommy is freed from his captivity soon after arriving in the Sphere - apparently there are freed slaves wandering the interiors of the area, attempting to set free other captives and...then let them fend for themselves. Even after you manage to get free of your restraining cage, your benefactors won’t be around to help you out, so it’s going to just be you and your wrench against the world.
Fodders
Start heading down the passageway here, killing off the first Fodder enemy that you spot. These little guys have a bite attack, which can deal some damage, but aren’t particularly threatening. Beat the first one down, then either ignore or kill the human nearby. Nothing bad will happen if you decide to whack him with your wrench; you’re in something of a grey zone as far as the law is concerned. You might feel bad, but morality is somewhat mutable in a situation like this.
Anyway, activate the door by pressing the switch nearby. Make your way past the Fodders in your path until you reach another doorway, which you can crawl through to reach the first portal of the game.
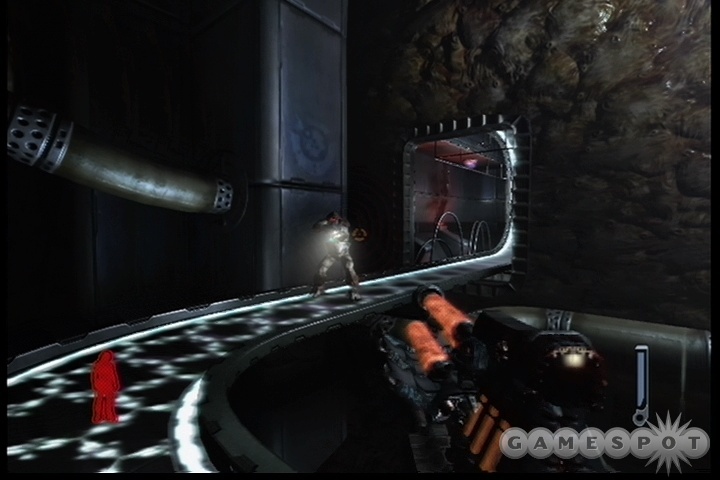
It’s worth taking a moment to explain these portals: basically, they’ll let you jump from one area of a level to another instantaneously, without any loading screens or waits. They can be found in numerous areas and in different sizes and shapes. Sometimes they’ll appear out of thin air and appear as yellow or blue circles, but they’ll often be anchored to some kind of doorway or structure, as is the case with the portal here. Portals can usually only be entered from one side, so if you attempt to walk around to the back of the portal, you probably won’t be able to see it. You can look through portals to see your destination, as well, and if you happen to spot an enemy on the other side, feel free to fire away; bullets travel through portals as they normally would.

So, with all that said, feel free to head through the portal here; you’ll have to crouch and move to the rear of the box to reach it. It leads to another long passageway that branches left and right. Left doesn’t lead anywhere, but taking a right will let you pick up some health from the membranes on the floor. Also take note of the pictures on the wall; it would appear that the aliens know who your relatives are. Perhaps they’re intending to make an example of them?
Anyway, crawl through the portal nearby to reach another area. Use your lighter to see the Fodders in your path, then kill them and move on. You’ll come to a machine that’s apparently used to liquefy humans...a lot of humans. It’ll keep on killing people as long as you stick with it and watch, if you want to gross yourself or your friends out. When you get tired of doing that, move around through the doors, watch Enisi bite it, then move through the portal that opens up to load the next level.
Downward Spiral
Apparently, it’s time to listen to some Nine Inch Nails music. This game really does use the Quake engine, I guess. You can start the mopefest by reactivating the human-juicing machine via the control panel nearby. It’s not nice, but it’s an option!
As you move along the pathway here, your first Hunter will appear. Whack him with your wrench and nab his weapon, an organic rifle. It’s got a powerful primary fire mode that rapidly shoots out bolts, and a handy secondary sniper mode which deals more damage, but uses much more ammo. Another Hunter will appear through a gate further down; you can head through the gate to find a small health boost.
Art? Is This Art?
Deactivate the energy shield nearby with your hand to open the passageway, then drop down and start listening to the Art Bell broadcast that’s mysteriously being pumped into your little chamber. Also mysteriously pumped are the small organic balls of matter being excreted from a tube nearby. You have to push one of these balls down the ramp here until it comes to rest on the webby membrane at the end of the hall. When it’s in position, shoot it with your gun to disintegrate the membrane and move on.

Fall down and start killing the Hunters that appear in the next room. You can move through the doorway to your right to find more ammo for your rifle, as well as another crazy person. You can’t move on from that room, though; you have to go back to the room where the floating devices were located and jump down. You’ll pick up your first creepers down below. These are basically your hand grenades in Prey. Like all the other weapons, they have two firing modes, which you can flip through with your alt-fire button. If you throw a creeper while its legs are facing up, it’ll detonate a couple of seconds after it lands; if you throw it while its legs are down, it’ll lie in wait and act like a proximity grenade, detonating as soon as an enemy walks by.
Use the wallramp here to walk up to the upper area, then use the second ramp to proceed even higher. You’ll come out to an area with a few Fodders lying around; kill them before dropping down to the floor, then move around to reach the oft-featured-in-trailers moment where a crate topples over and reveals another Fodder emerging from a portal hidden within. How exactly the Fodder managed to topple the crate is unclear, but regardless, it’s your passageway...to adventure!
Adventure!
So head on through, then! The next room features a couple of portals, including the one you just came through, as well as a tiny little globe inside a metal box. What insidious purpose could this globe be intended for? Well, if you head through the other portal on the ground here, you’ll discover that it’s just a way for the developers to play around with you. When you pass through, you’ll find yourself miniaturized and on the surface of the globe; apparently the portals can make things bigger or smaller when you go through them. Fight your way straight ahead (or, if you want to avoid combat, turn around from where you land on the globe and head across the black portion of it) and drop down into the portal there to move on.
You’ll find yourself in some kind of blood processing room here, with numerous mouths attached to the walls that periodically disgorge effluvia from their spigots. You’ll take damage if you’re hit, so shoot the mouths to prevent them from moving on. Note that you can see yourself through the portals here if you look around; you can also shoot yourself, but that has obviously deadly consequences.
Keep moving on past where you encounter Jen; beyond that area, you’ll find groups of Hunters tracking down escaped humans. You probably can’t save any lives here, but you can make the Hunters pay for what they’re doing. Take them down, then deal with the Hounds that come hard upon them. Nothing especially difficult here; just shoot them a bunch before they manage to close in on you. If you let them get close enough to bite, they can start to confusingly circle you, making them difficult to hit, especially with the 360 controller.

Where The Hell Am I?
In the next room, you’ll get your first big reveal. Hit the power switch to turn on the walkway nearby, but be sure to stick around and watch the lightshow as the observation panel opens up to space. If there was any doubt about your location, this should end it; you’re definitely on the interior of the Sphere, a gigantic set of cobweb-like structures that rotates around a small, enclosed sun. You know where you are, now; now you have to find out how to leave, hopefully after finding Jen.
Walk up the walkway nearby to find another small room filled with Slaves, zombified humans that apparently work as laborers in the Sphere. You can kill them if you wish, although they’ll turn violent if you attempt to do so. Regardless, roll an orga-ball towards the membrane covering the door, then shoot it to move on. You’ll eventually come to a metal walkway suspended from the ceiling of a crevasse; if you walk across, then attempt to backtrack again, you’ll be shot down and (apparently) killed. But, your journey isn’t over yet...
Rites of Passage
Rites of Passage is a smallish level, intended to guide you in the art of spiritwalking. Although Tommy's death was seemingly certain, Enisi has managed to save you and bring you to a spirit realm, where his spectral form will be able to teach you the old ways of the Cherokee. Tommy's kind of a dork about the whole thing, but you'll have to put up with him for a while until you learn about your new powers and move on.
First, find Enisi and speak with him to the caves of testing. When you reach the fire, wait for Enisi to stop talking, then use your Spiritwalking button to leave your body, pass through the flames, and activate the pillar on the far side. When you pass through the door into the cave, you can pass through the flames again to reach your spirit bow, the only weapon you'll be able to possess while spiritwalking.
Spiritwalking works like this: if you leave your body with spiritwalking, your spirit will be able to fire on enemies with your spirit bow. It's invisible until you actually do start attacking, so you can use it to scout a bit if you're concerned about what lies around a corner or something like that. While in spiritwalking form, your physical body will remain where it lays, and is vulnerable to attack from enemies, but if it gets hit, you'll automatically return to it and be capable of defending yourself. You can't interact with everything while spiritwalking (you can't use wallramps, for instance), but you can flip most switches, and what's more, you'll be able to pass through most forcefields, allowing you access to locations that you can't reach with your physical body. In general, it's not something you're going to want to use for combat, but it'll come in handy when attempting to solve puzzles.

Second Chances
After you return to the Sphere, kill off the Slaves nearby and push one of the orbs to the center of the room to break the membrane, then drop down. The first spiritwalking puzzle is down this tube; you're facing off against a forcefield that you can't bypass. Note the sun symbol on the ground; this indicates a spot where you can use your spiritwalking. (Before you do, though, you may want to chuck a grenade at the three Fodders on the far side of the field; just throw it over and it should destroy all of them.) When spiritwalking, you can run through the field, then switch it off at the panel nearby. You can also walk up the spiritwalking-exclusive ramp near where the Fodders were; some locations will have ramps like these that can only be used if you're spiritwalking, usually leading to extra ammo or the like.
Obtaining A Leech Gun
Follow the path nearby onwards until you reach another forcefield, where you can pass through with your spiritwalking and disable it. You can also peg the Hunter nearby in the head with an arrow, if you like. Regardless, head through and start walking up the walkway, activating it at the nearby switch if you need to. Climb up and over, but don’t walk off the end of the walkway; stop on the small square at the end of the path and, while you’re still upside-down, spiritwalk. Your spirit will drop to the bottom of the walkway, allowing you to move around and pass through the forcefield nearby to enter the control room. Flip the switch to move your body to the far side of the area, then hop back into it and move off the walkway when it’s on the other side.

At this point, you should be able to enter the control room from the side of the room you’re on now; when you do so, you’ll trip an alarm, but you’ll also be able to pick up a Leech Gun, which Tommy appreciatively describes. Grab it, then backtrack and head through the nearby open door to move on.
After you witness the scary little cutscene involving the Dishonored Dead and their predeliction for taking over the souls of small children, you’ll bust through another door and will be able to access the second of the four Leech Gun types. The ammo it comes pre-loaded with is a powerful plasma type, but if you switch to the ice ammo here, you’ll be able to freeze your enemies in place, but only at close range. The hallway here is a dead-end, but if you backtrack and look under the stairs, you’ll be able to find a pair of crates. Head into the right-most one to find the next area.
Switcheroo
When you pass through the crate, you’ll come to a room full of gravity switchers. To flip gravity to another part of the room, simply shoot one of the switches on the "walls". Gravity will be flipped so that the switch you aimed at will now be on the "ground". It’s fairly difficult to get lost here, and your objective is to reach a portal at the top of the room. Do so by manipulating the gravity switches until you find your destination, then maneuver around so that you can enter it.
At this point you’ll be in a large, open area, replete with Hunter snipers looking to take you down a notch. These guys really hurt when they manage to hit you, so be sure to spank them first with your own sniper attachment to your rifle before they get a chance to do so. When you manage to kill a couple of them, feel free to dash out and attempt to circle around the walkway, perhaps using the large rising globes as cover from the snipers. At the far end of the walkway, you’ll drop into a hole, then look upward and shoot a gravity switcher to reach the next teleporter.
Back In The Bar
As you might surmise from the music here, you’ve almost reached the bar area, which the aliens have apparently decided to recreate inside the Sphere in all its run-down glory. Why? Who knows. Anyway, carefully manipulate the gravity switchers to reach it, being sure to think about where you’ll fall when you shoot a switcher before hitting it; you want to leave yourself in position to be able to move on along the path in front of you, which isn’t always going to be possible if you shoot a gravity switch while standing in a bad location.
Anyway, when you reach the bar, drop down to the bottom level and start fragging the Hunters that come after you. When a few portals have opened up, look around until you find a blue one, which should be visible if you stand where the slot machines were located previously and look towards the center of the bar. Head through it to end the level.
All Fall Down

After you spot Jen here, head through the membrane nearby and activate the dormant walkway with the switch in the large room there, then walk along until you reach the far room with the Fodders inside. Another membrane will prevent you from moving on, so destroy it, then spiritwalk through the forcefield beyond to disable it. It’s funny how many of these forcefields have switches on the opposite side; none of the workers in the Sphere must be able to backtrack at all.
Keep an eye on your path, and keep moving past the Art Bell station until you come out into a position which allows you to crouch your way into the metal tube in front of you. Head inside, kill the Hound that was apparently taking a nab, then drop down the tube nearby and keep moving until you come to another room. Kill the Hunters and the Hound here, then use the gravity switches on the ceiling to move across to the far side. Two portals can be activated here. The left leads to a secret area (use spiritwalking to find some ammo for your rifle here), while the right leads onward, ever onward.
In the next small corridor, near the two Leech Gun rechargers, you’ll find another video poker machine. If you hit the Deal/Draw buttons a few times, you’ll find yourself with a few million credits, as the machine is busted and will consistently kick out royal and straight flushes if you just let it be. If you’re playing on the 360 version of the game, you can unlock one of the achievements by accumulating 250 credits here, which should occur after one or two hands. Beyond that, this is a dead-end, so turn around and head back to the portal, which leads to a new area.
Move onto the elevator in front of you after passing through the portal. It moves exceedingly slowly, but will eventually top out, letting you move into what appears to be another dead end. Flip the switch on the ceiling here to rotate the gravity, giving you access to the portal on the ceiling.
Kids - Why’d It Have To Be Kids
You’re going to face off against a number of Dishonored Dead in this room; they’ll take the form of children, who will pelt you with energy when they spot you. (In order to trigger their appearance, you’ll have to take the ramp up to the middle area of the room.) Your best bet for killing them will be to use the red ammo in the Leech Gun, which will disintegrate them after a few seconds of firing them. It’s best to just stand on the central platform and blast them as they approach you; they’ll have to crawl up onto the platform before they can fire their energy bolts at you, and you’ll actually be able to recharge your leech gun from the station that’s just barely visible through one of the holes in the wall, so long as you aim directly at it and get as close as you possibly can without falling off the platform.

After you manage to take out enough of the kids, you’ll hear them sing a version of Ring Around The Rosies, after which a door nearby will begin to open, if only partially. After a few more seconds (and after a few more Dead come from underneath), it will open enough for you to be able to pass underneath it and end the level.
Crash Landing
After spiritwalking through the first energy field here, look for a switch to turn it off to your right. There’s another switch nearby for an alarm that you might want to locate before you turn off spiritwalking; if you can kill the Hunters here while standing near the alarm switch, they’ll be unable to turn it on, allowing you to finish them off more easily, since they won’t be able to call in reinforcements or activate the security turret here. If they do manage to flip the alarm, you’ll want to destroy the turret before it pegs you. It isn’t too difficult; just hide behind a pillar, strafe out and shoot for a few seconds, then duck behind the pillar until the turret closes up again and repeat the process.
After moving outside and seeing the crashed plane, spiritwalk through the force field in the floor and find the switch to deactivate it nearby. Make your way down the platform here until you reach the tubes suspended above the canyon below. Don’t jump down immediately, though; hop down to the lowest tube, then look down to spot a couple of Hounds below you. Take them out with your grenades or Leech Gun.
The Canyon
You might have noticed a new type of ammo for your Leech Gun here; lightning ammo is among the most rapidly-used of the various types, but it’s almost probably the most powerful. It acts as something like a rail gun, shooting out one powerful bolt of lightning in front of you, but since you can’t zoom in with the Leech Gun, you’ll probably need to get a bit closer to your enemies before you can actually use it. Unfortunately, the three snipers at the far end of the canyon here are going to do their best to prevent you from getting anywhere near them.

These snipers, though, like all the rest, require a few seconds to lock onto you before they can fire, so do your best to duck and dive behind the walls on the left side of the canyon to close in on them. With two ammo stations at your disposal, you should be able to cop out a few missed shots on the snipers, and when you get close enough to their positions, they’ll be prevented from firing at you due to the fact that the platforms they’re standing on will be in the way. This sequence is made more complicated due to the fact that there’s no healing in the area, so you may have to travel to the spirit realm to recharge every now and again, but you should be able to cover the distance if you can avoid getting locked onto.
At the end of the canyon, spiritwalk to find the elevator switch, then return to the elevator in your body and head up to the portal to move on.
The Shifting Portal
Shuffle the gravswitches in the next hallway to crawl past the broken gate, then disable the forcefields to reach another portal room. Nothing too tricky here; just walk into the central portal, flip the switch inside to move it laterally, then walk out into the other room and head through the door to move on. (There’s a second portal in the second room here that leads to some rifle ammo you might’ve missed near the airplane crash.)
Keep moving on until you come to a pair of Hounds enclosed behind a forcefield. This appears to be a dead-end, but if you look around, you’ll find a panel with a keypad on it. You don’t have the codes for any of these keypads, but in classic stupid-enemy fashion, if you look around when you get stuck, you’ll invariably find the combination that you need nearby. In this instance, if you backtrack and peek through a small window, you’ll see a small display with some alien text on it. If you wait long enough for it to be translated to Arabic numerals, you’ll see that the code is 1623. Return to the keypad and enter this into it.
In the next room, use your sniper rifle to highlight and kill the two snipers above you, then spiritwalk across the gap here. If you stand atop the gravity portal and look directly up, you’ll see another gravswitch above you; flip it, then return to your body. If you were standing in a certain spot, you will have fallen down a hole that was previously above you; if not, you’ll have to move into the hole and fall down. Move around to the other end of the passageway and fire above you to move on.
The Morgue
More Hunters and a Hound will assail you in the next section of this area, so be ready for a big fight. When you’ve cleared out the bulk of them, spiritwalk through the forcefield to drop the elevator, then move your body on top of it and spiritwalk again to raise the elevator up, allowing you to move on. You’re going to be inside a morgue-like area used to contain processed protein. Er, human beings. Move around until a portal pops up in front of you, then crawl on through.

You’ll come out to a room with a confusing number of walkways in it. One of them heads down to the bottom of the room, but...there’s nothing there? Indeed, it’s a dead end, so you don’t need to explore that area too much. Instead, stay on the first platform you find here and jump onto the set of four little pistons that you can see jutting out from the wall nearby, towards the walkway on the far platform. If you can make it across the pistons, you can walk up the walkway and head straight up to where a Hunter is working at a console. Kill him, then flip the switch nearby to activate the pistons in the room here.
Your goal at this point is to crawl across the activated pistons as they jut in and out of the wall here. If you walk down the walkway you just moved up, then take an immediate left or right, you should be able to move out onto one of the walkway squares when it retracts into the wall close to you. Walk out a couple of squares, wait for it to move, then move again, until you reach the far side of the room, where you can jump down to reach a new portal.
After heading through the portal, you'll find yourself in an odd situation; you're in a room with Hunters, but you're on the ceiling and they're on the floor, with no walkways in sight. How's that possible, anyway? Localized gravity? Magnetic boots? Doesn't matter, really; just get your kill on.
To get on the floor, first head to your left and find the portal in the crate near the two Leech Gun ammo packs. You'll come into a small group of three crates, with more enemies to kill. Take them down, then wheel around to the right of where you entered to find the portal that spits you back out onto solid ground, where all your enemies were previously.
If you move on into the next room, you'll find a healing station and another keypad. The code here is located back in the crazy gravity room; it's 2724. You'll come out into a freezing-cold room; kill any Hounds that you can see from the walkway, then drop the elevator here to reach the floor. If you don't want to deal with the other Hounds in the area, just run across the room, power up the walkway, and book it up as fast as you can; the Hounds are apparently incapable of following. At that point you can listen to Art Bell some more, if you wish, or just activate the portal and book it to the next level.
Sacrifices
You'll note a slave working on a keypad near where you start this level, but you won’t be able find the code until you move down the hall and kill a couple more slaves. When you reach a deadend, the code will be on the panel nearby; it's 0634. Return to the keypad and pop it in to reveal a small portal nearby.

Abattoir
Hmm, a school bus. When have you encountered kids previously in the game? Oh yeah, when they were dispossessed spirits that were trying to kill you. Stand on the spirit marker here and spiritwalk up the ramp to flip the switch that opens the next portal. Before you reach it, you'll of course have to fight against more of the spirit-possessed kids that you fought earlier. Luckily, there'll only be five or six of them to kill, so stay back near the spot where you first entered the room, dodge their attacks, and hit them from long range with your rifle or Leech Gun. After half a dozen kills or so, the exit portal will open back up and you'll be able to move on.
Keep moving until you reach a room with Hunters and a disabled walkway. In order to move on, you'll have to activate the walkway and walk to the portal suspended from the ceiling, but be ready for trouble, as more Hunters will spawn in as you're walking to try and stop you. Kill them, reactivate the walkway, and repeat the process to hit the portal. More Hunters will arrive when you try again, but you can just run to the portal to avoid them.
Give Him A Big Hand
In the next room, kill the Fodders and blow the membrane with the explosive organic ball before dropping down and picking up an iomportant piece of the puzzle: an alien hand. You may have noticed handprint scanners scattered around the Sphere, but you haven't been able to get through any of them yet. When you find the alien hand on the ground, though, you'll be able to carry it around with you and use it on the handprint scanners to bypass them. Simple as cake!
Use the hand on the scanner nearby, then move around the corner and prepare for your first big boss fight, against the Centurian. If it's a fight you want, it's a fight you'll get!
Boss Fight: Centurion
This first Centurion is significantly tougher than the ones you'll be facing off against later in the game. This is mostly due to his huge health reservers; at the beginning of the fight, you won't be able to deal much damage to him at all, leaving you vulnerable to the attacks from his chainguns if you don't stay behind cover. He'll be able to deal damage either with the chainguns themselves or with the grenade launchers attached to them, so keep your distance from him.
Stay behind the pillars while the Centurion fires at you, and kill the Fodders as they appear. The Centurion can bust through the pillars, though, so keep on the move, and look into the small nooks in the corners of the room for healing if you happen to get shot up.
After a bit of ducking and weaving, you'll notice a series of small electrical explosions appear, which open up the two shielded doors on either side of the room. As soon as this occurs, dash across to the now-open door and quickly activate the forcefield inside. At this point, the Centurion will attempt to smash through the field with his gun and fire inside; you should be safe from harm as long as you stay around the corner. The field will eventually drop, but stay where you are and wait for the control panel to recharge. When it does, activate it again to cut the Auto Cannon right off of the Centurion!
With the Auto Cannon on the ground and the Centurion reeling in pain, walk out of your little cubicle and grab the Cannon from the ground. With one hand removed, the Centurion is significantly weakened, and you do have a handy new weapon to blast him with. At this point, you should be able to much more rapidly affect his health by firing on him with the Cannon, so start blasting away! No more Fodders should appear, so feel free to blast the Centurion from whatever cover you can find. The Auto Cannon works well here; just hit him with as much of the primary ammunition as you can, and use up all of the grenades on him as well as you get used to how they fire. If worst comes to worst you can polish him off with your rifle, now that he actually takes appreciable damage.
Moving On
With the Centurion out of the way and a new weapon in hand, head out into the portal that opens up after the beast died and begin moving on. You'll come to a room with more walkways. Kill the Hunters here and head up and over the walkways to find the exit; there are two paths but one of them dead-ends. From there, you'll have to walk a bit before encountering more of the Hidden members of the resistance; you won't be able to interact with them, though.
You'll eventually come to a control room that opens up another portal to a distant part of the Sphere; use the control panel to bring it down to the floor, but watch out for the Harvester that appears through the portal, as he'll launch an explosive at you before disappearing. After stepping through, though, you'll be whisked off to the Spirit Realm again for another chat with Enisi.
There Are Others
Damn, Tommy, listen to Enisi! Save the world or settle for saving only Jen. You can't affect Tommy's choice here, so just slap your head and hope he eventually wises up.
Guiding Fires
After entering this level, head out into the huge open area beyond the first door and welcome a new enemy: the Gasbags. These guys will be a source of acid ammo later on in the game, but for now they're primarily annoyances. They can dodge some of your fire, so try not to waste Lightning Leech Gun ammo on them or anything. Just fire away with your rifle at them from a distance and try not to let them pick you up. If you do get picked up, there doesn't seem to be much you can do except wait to get dropped to the ground, but the falling damage in Prey is fairly light, so this shouldn't often kill you. They'll also periodically spit acid.
When you're ready to head up the spire here, unlock the door by using your alien hand/key on the two panels. You have two travel options here; you can either go to the third floor, which has some ammo, or the second floor, where a pair of Hunters resides and where you'll find the first vehicle of the game, the Shuttle. To use it, walk out onto the exposed platform on one side of the floor and use the small pillar that pops up from the ground.
Skyrockets In Flight
The Shuttle is a bit difficult to control, so feel free to head down to the ground for a few moments to learn about flying. You have two attacks here, with the primary being a standard cannon attack that'll be good for attacking people at distance. The secondary fire is a grappling beam, which works over short range, and can be used to to pick up Hunter snipers and throw them off the platform to their dooms, or simply to grab an enemy shuttle and hold it in place while you rock it with your cannons.

Combat shouldn't be the first thing on your mind here, but take the time to finish off the Hunters on the platform with your cannon. With that done, glide up to the top of the area and look for the jet of flame coming out near a higher platform. If you glide above the blue landing platform here, you'll be prompted to land with your alt-fire button; do so, and the shuttle will disappear again, but you'll be able to retrieve it by walking back to the landing platform and using it again.
After landing, though, head through the door nearby and start offing the Hunters in your path. After you push your way up the paths here, you'll find a walkway switch, so flip it, then walk up the walkway and flip both of the switches on the ramp there. One of them will open a portal back to the lower level of the room, while another will open a port-hole nearby, showing a door on the other side of the window changing from red to blue. This is your cue to return to your shuttle, turn to the left, and fly through the now-open hangar door. You're going to have enemies on your tail, but you can just ignore them; fly through the hangar door, dock your shuttle on the platform in front of you, and immediately run through the door nearby to move on.
More Shuttling

After passing through the hallway and activating the portal at the far end, you'll come to another shuttle bay. Hop aboard, then head outside and move straight up. You'll eventually wind up in a long tube with a view of the Earth. Move into the little guinea-pig tube that's rotating around between the two corridors and let it shunt you off to the left; the corridor you're in has been destroyed by space debris.
Keep following the path until you start heading directly down. You'll come to a large set of walkways on the walls, but keep heading downward until you reach a large room with another shuttle dock. You'll want to spend some time polishing off the Hunters and Drones in the area, if possible, but if your shuttle takes critical damage, quickly park it, dash into one of the rooms nearby, and use the doorway for cover while finishing off the enemies.
There are two doorways here, one to the left and one to the right when viewed from the shuttle dock. The one on the left will lead to a bit more health and ammo, while the one on the right leads to the control room from which a Hunter was sniping you earlier. Pop your head in there, flip the switch to disable the forcefield, then return to your shuttle and head through the window that's now open. You won't have a long trip, as there's another dock on the other side you'll have to park in. Kill the Hunters, open the door, open the portal, exit the level. Cake!
The Old Tribes
Move through the first door here and start sniping away at the distant Hunters, ducking behind one of the walls to use as strafing cover. When you're done, open the nearby door, then use spiritwalking to avoid the security tripwires; walk along the path and activate the security panel to disable the tripwires. Return to your body, then walk to the end of the hall (avoiding the door on your right for the moment) and head through the door there. If you don't annoy the slaves, you can receive a large health boost here, as well as your choice of either lightning or fire ammo for your Leech Gun. If you head through the portal nearby, you can also spiritwalk up the ramp to receive some extra ammo.
With all that done, return to the tripwire room and head out the other door, using the panel nearby to activate the walkway over the gap. Enemies will, of course, start to spawn during your traversal, so be sure to pop them as they appear. You'll have to move in and out of this large room a couple more times, so you can't really afford to let any enemies live. Just fire at them as they pop up and move on.
More Tripwires
After moving across the walkway, bust out your spiritwalking and disable the tripwires in the first corridor, then repeat the process on the next one you enter. Again, there'll be two doors here, so head to the end of the hall and activate the portal there to step through; you'll be in the sniper roost you probably cleared earlier on. Use the switch here to activate a distant walkway, then take out any of the snipers that spawn in, if possible. With that done, return to the tripwired hallway, spiritwalk through the gate to shut it down, then spiritwalk across the gap here to activate the walkway on the far side of the gap.

After crossing the walkway, disable the tripwires in the far hall, then start climbing the walkway at the end of the corridor; it'll lead you to a platform higher up, from which you can pipewalk until you're over the small catwalk that stretches from one side of the room to the other. Drop down and run like the dickens, and you should be able to activate the portal and escape without taking much damage from the enemies that warp in.
Shuttletastic!
After killing the hunter on the far side of the door, use the shuttle and glide a few rooms away until you find another dock, then land. From here, you'll have to avoid the sniper fire while spiritwalking up the ramps available to you. When you do so, you'll be able to kill the snipers, and activate the panel at the top of the ramp, which will open a passageway in the ceiling to you. Hop back in your shuttle and glide up, watching out for more of those floating mines.
When you reach the next large area, note that there are four landing platforms, but that only two of them will actually lead to an uncovered dome. Your first goal will be to kill all of the enemies, since you'll need to move around in this room a bit. Your primary objective, however, is to disable the fan in the ceiling and move on. To do so, you'll need to activate two switches at most of the platforms: one to disable the forcefield (use spiritwalking to reach these switches) and one to expose the radioactive core of the power conduit. Some of the platforms will have one or both of these switches already active.

Basically, when you land at a platform and disable both the forcefield and the shielding, you'll be able to shoot the shielding off of the core, then use your shuttle's tractor beam to drag the power core out of the housing; it'll be a bright blue object. Just lock onto them with your tractor beam and drop them after dragging them out; you don't need to do anything special with them.
When all four cores have been pulled out of their housings, you'll be able to move through the fan in the ceiling and proceed on up to the next guiding fire up there. You'll eventually come to a secret Hidden Citadel. To enter, use your tractor beam to pull away the four pieces of debris in front of the locked door, which will then automatically open.
When you enter the Hidden base, you'll encounter Elouit for the first time. She's the leader of The Hidden, and offers you a deal: find and kill the Keeper, and she'll open a portal back to Earth for you, Jen, and the rest of the refugees on the ship. It's a tall order, but you haven't encountered anything that'll stop you yet, so you might as well take her up on it.
Hidden Agenda
Make your way through the biolabs, using your spiritwalking and alien hand to bypass any hazards. After you spot the Keeper, you'll soon see an Acid Gun suspended in midair. To obtain it, head into the two side rooms here and shoot the white power cells within; be sure to obtain any ammo or health inside the rooms first, then retreat to the doorway before shooting the cells, or you'll set off tripwires.
After obtaining the Acid Gun, use it to kill the Hunters that start spawning in. It's essentially a shotgun, so get up close and personal before firing it at your targets. The alt-fire will pretty much instantly kill anything it hits, but it uses a lot of ammo and has a long reload time, so avoid using it except in emergencies. When enough Hunters have spawned, you'll be able to pass through a portal to get an update on Jen. She's apparently being tortured! Dastardly!
Move through the next room, using your alien hand to unlock the forcefield, until you come to another room with Hunters and a turret that's firing on you. The forcefield here will be spiritwalkable, but there's no where to go at the moment. In order to move on, you'll need to park your body in the small green chamber near the forcefield, then activate the switch here twice; you're essentially activating a horizontal elevator that'll move your character around in an axis. As mentioned, two flips of the switch will get you to an area with a portal that'll let you move on; if you hit it three times you'll be able to use another broken video poker machine, which apparently dispenses some ammo if you use it a few times. Regardless, the portal is your key to exiting this little maze.
A Situation of Some Gravity
After exiting the portal, bypass the Slaves and move on through the crawlspace at the end of the corridor to encounter more robotic flyers. Kill them, then spiritwalk to disable the forcefields before moving up the walkway. After passing down the central walkway and exiting the crawlspace beyond, you'll find yourself in a room with a lot of pipes and a few gravity switchers.
This situation looks complicated, but it's not incredibly so. If you look in front of you, you should see two gravity switches, not including the one you're standing on. One will be on a "wall", and one will be on the "ceiling", a bit further away. You need to get as close as you can to the one on the ceiling, then activate it, as there's a crawlspace nearby leading to the second half of this room. It's best to do so by first shooting the portal on the wall, hopping over the pipes to your left, then walking down to the portal on the ceiling and shooting it, which will let you get through the crawlspace.
After crawling through, walk a bit until you see a forcefield and another gravity switch on the ceiling. Hit the switch when you're standing above the forcefield, and you should fall directly onto it. You won't go through, but if you spiritwalk, you'll drop down next to a switch, allowing you to open a portal. From there, find another switch on the wall, and you should be able to get close enough to the portal to jump through it from the ground, unless you want to stick around and play with more switches to find some semi-hidden ammo.
More Fliers
After seeing the Keeper warp away again (he's going to be tough to get a handle on), find the broken section of the floor and drop down. Get ready for a fight against some flying opponents here, as a few Drones will pop out of the walls and attack. Kill them all, then move through the portal that opens to move on.
Jen
Move ahead here until you find a barrier, then spiritwalk through it. It's easy to miss the code for the keypad here, since it's written on the floor: 2432. It's also difficult to put it into the keypad while you're still in spiritwalking mode, due to the fuzziness of your view. Just keep in mind that the number in the upper left corner of the pad is actually 0, not 1, so the sequence goes from 0-7 instead of 1-8.
After disabling the forcefields, crawl through the red crawlspace nearby for ammo and a heal, then crawl through the crawlspace near Jen. You can get some Leech Gun ammo from the door to your right, but the path onwards is through the door to the left, under the turret.
It'll lead you into the Surgery Control Room, where the Sphere's mad doctors are constructing Mutates. Mutates are former humans that have been converted by the Sphere into horrific defenders, possessing decent speed and a huge claw to impale you with. Needless to say, keep your distance and fire at them with a rapid-fire weapon. If you think you can tag them with an Acid Gun alt-fire shot, then that would be ideal, but they'll usually be moving too quickly for such chicanery, making a red-ammo Leech Gun or Auto Cannon attack preferable. You'll need to take down two Mutates, then two Hounds before you can escape this area. If you find yourself getting killed by the Hounds, check out the holes from which they appear and use your Crawlers in proximity mode to mine the entrances when you reload your game.
Spiritwalking
When you pass through the next door, spiritwalk through the forcefield on your right and crawl into the hole there. You'll eventually pop up into another room and be able to unlock the door that prevents your physical body from moving on. Do so, then walk up to the switch by the window; it controls a shiftable portal. You want to move the portal so that you can walk through it with your body and into the next room, then spiritwalk back through the portal and flip the switch again so that the portal shifts over into the room across from the window. If you do so, you can return to your body and walk back through the portal to move on.
After passing through another couple of portals, you'll come to another surgery room. This one contains four Mutates, and sadly enough, they'll come out at certain times, regardless of whether or not you've killed the previous one. If you waste too much time here, then you'll possibly be facing off against four enemies at once, which is a Bad Thing. It's best to start off by sucking up the lightning ammo for the Leech Gun and using that to quickly dispatch the first couple of Mutates, then spamming the remaining two with the fire ammo from the other leech station to finish them off, ducking and weaving all the while. When everything's dead, a portal will drop from the ceiling, which leads you to Jen. Use the switch near her prison to free her. Her awful voice acting comes along for free!
After you get the voice message from Elouit, check the blue doors for ammo and health, then head through the portal to end the level.
Dark Harvest
Elouit is near death. The Hidden have been routed. The Keeper keeps slipping away. It's time to kick some ass.
Start out by destroying the Hunters that come after you through the wall, then take their own passage and start tracking it backwards. You'll have plenty of enemies to fight, but you'll also have plenty of ammo, so that's a bonus. You'll eventually come to a door with a broken walkway; be prepared for a fight before entering the room.
When you do drop down to the floor here, you'll be met by numerous Hunters that begin spawning in. Try to stay on the platforms on either side of the main floor area; attacking from an elevated position will let you take cover when necessary, due to the pillars on either side of the room. Save your powerful ammo for the moment and take down the Hunters with your rifle, or grenades. After a while, Centurions will begin spawning in. They're tough, obviously, but not invincible, especially if you have plenty of Auto Cannon grenades or Acid Gun ammo. They're so big that they have a hard time dodging these powerful projectiles, so nail them with your biggest shots while staying on the upper platform to duck behind cover when necessary. At no point in this fight should you drop to the floor, unless your ammo situation becomes truly dire.
When you're done speaking with the Keeper in your head, hop through the portal that opens to move on.
Following Her
The Keeper has Jen! Grab the ammo and activate the walkway here to give chase, as best you can. At the end of the walkway, head through the door to pick up Crawlers, then duck through the crawlspace to find a portal. Move through the door to find a large area with a couple of Hunters. If possible, drop down to their level and start blasting them with the Auto Cannon's grenade launcher to prevent them from tripping the alarm, which will cause more trouble than it's worth dealing with at the moment. After that's done, head through the nearby door and spiritwalk to bring the elevator down from Level 2 to Level 1. When it's down to your level, walk on top of it and spiritwalk back to the forcefield to turn the elevator on again, and ride it back up to the top.

After disabling the tripwires in the next room, grab all the ammo you can find and head out through the door. The profusion of ammo supplies will likely clue you in to what's happening Next: a big, big fight. You're going to have to take on four or five Harvesters at this point, which can travel quickly around the room thanks to their little cubby-hole portals (which you can't use). They also wield the powerful Launcher weapon, which acts as both a rocket launcher and as a personal shield; if you attempt to use the grenade launcher on them, for example, they'll usually intercept and render your shells inert in their jellylike shields.
The battle here can be difficult due to the damage that the Harvesters deal with their rocket launchers, but hey - you really can't die due to your Death Walk ability, so no need to worry overmuch. The Acid Gun works well on the Harvesters, as does the Auto Cannon's primary fire and the red-ammo Leech Gun. When the Harvesters are in the lower area of the room, drop down to fight them on the same plane, using the pillar in the middle of the room to block their rocket fire. If they're firing on you from above or below, try to simply avoid their fire as best you can while throwing proximity Crawlers around. If you spot any of the Harvesters split in two and start crawling towards a portal with just their upper bodies, kill them before they reach it, or they'll regenerate while out of sight.
Escape!
When you've killed four or five Harvesters, look at the ceiling of the room. If the small platform has extended below the walkway that runs along the ceiling, then it's time to get up there, walk along the walkway, and drop down and head through the portal to escape this area. Do so, and you'll find yourself standing near a Launcher, if you didn't already have one. Kill off the Hunters nearby, then use the gravity switches to move down the hall here.
When you reach the large energy reactor, wait for it to retract to the far wall, then quickly hop past it when the opportunity arises. A window nearby will break when you do, allowing you to kill a Harvester and activate the switch inside, which in turn starts up another reactor here. Hop past it in the same manner as the first, then walk down the catwalk until you reach another switch, which prevents the reactor from firing. With that done, quickly kill off the flying enemies (using the Launcher's alt-fire to protect you from their rockets), then hop onto the platform on the moving section of the reactor when it comes back your way. If you do so, it'll act like something of a moving platform, allowing you to jump off at the far end of the room.
From there, jump off at the far end of the reactor, then move over to the other reactor. The passageway you have to take here actually takes you through the heart of the reactor, giving you precious little time to make it - you have to wait until the reactor beam shuts off, then quickly run into the beam channel and find the exit before it fires again. You can live through a little bit of the beam firing, but you'll die if you don't manage to get out of there before too long. It's possible to avoid damage altogether, though, so you shouldn't need to worry too much about getting hurt here.
Harvesting
Avoid the Harvester fire here, then move up to the right and find the spiritwalking path. Walking across it will let you retract some pipes nearby, allowing your physical body to move onward. Do so, then quickly move past the Harvesters to drop to the bottom of the floor of the next room. Although it's not immediately apparent, you can jump on top of the small platforms here to reach the end of the level.
The Complex
It's...The Complex, an exciting new drama, premiering this fall. Or, it's the next level of the game. Take your pick.
Fight your way to the end of the long passage that's covered by snipers and use the alarm switch there to disable the turret around the corner. Then, you should be able to crawl underneath the catwalk and proceed along the pipes there. There are two exits here; a door to the right and a walkway leading up. The door is a dead-end, although it'll let you listen to more Art Bell and get another glimpse of the walking tank you may have spotted earlier.
The walkway's the correct path to take - note the appearance of a spiritwalker symbol halfway through the upside-down portion of the path, leading you to some hidden ammo. At the end of the walkway, drop down in spiritwalk to disable the tripwires and move on. From here, the path is very linear - you'll eventually come to a large open area with a machine of undetermined purpose. Fight your way past the Hunters, then drop down to the forcefield below, which you can spiritwalk through. Doing that will trigger the machine to activate, and it will construct the Cube. When it's completed, drop your physical body into the portal below the forcefield (which disengages) to move in.
The Cube

When you’re inside the cube, you’ll notice a small glowing panel beneath you and a bunch of translucent passages. Your goal here is to get the glowing panel to the end of the passage that it can move through. The process is pretty simple: just look at the panel, note the empty passage near it, follow that passage until it hits a wall, then shoot the gravity panel on that wall. When gravity shifts, the panel will drop with it and fill the passage in with blue energy. You’ll need to repeat this process six or seven times until you manage to move the panel through all of the open passages and lock it into place on the far side of the cube, but when you do, the cube will disintegrate and allow you to move on along a walkway above the passage you just arrived through.
Follow the walkway, killing the drones as they appear, and you’ll eventually wind up back at a section of the path you passed by earlier. Duck back underneath the walkway to return to the large portal, which is now activated, and walk into it to be swept up into a new portal, readymade just for you. When you pop out, kill the Harvesters with your lightning Leech Gun, then wait for a second for an airborne Harvester to appear and kill him, too. After everyone’s dead, a portal should open, letting you move on.
When you reach the switch on the railing here, flip it and see what happens. You should see the walkway nearby extract itself from the wall and link up with the walkway on the far side. In order to make it across the walkway before it retracts, you’ll need to stand on it and use spiritwalk to trigger the switch, then quickly return to your body and walk across the walkway while it’s linked together for a second.
Gravity!
You’ll soon come to a room that’s split in two by a forcefield. If you spiritwalk through the gap, you can activate a switch on the other side that flips the gravity around; while you’re on the ceiling, quickly push the small cube nearby to the other side of the forcefield, then wait for the gravity to reset, causing you and the two cubes to all be on the correct side of the field. When you’re back on the ground, push the biggest cube near the hole in the far wall, then push the smaller cube up next to it, then jump atop them to reach the hole. You might need to jump from the small platform to the smallest cube; attempting to jump from the floor level will usually knock the cube up into the air.
Next up you have a spatial anamoly to deal with. The next sequence of corridors consists of some bizarre portal effects, resulting in situations where you’ll be able to see yourself walking, or even get attacked by the same enemy from two different directions. It can be confusing if you get trapped in the maze, but the easiest way to proceed is to simply take every left turn you can find from the starting point. If you do get trapped, keep taking every left turn, and if you seem to get trapped in a continuous loop, start looking behind you at each intersection.
After you find the blue door that exits the maze, get ready for some close-quarters combat with Fodders and Harvesters. Do your best to take down the Harvesters before moving into the central section of this area and finding the switch that flips the gravity; this seems to instantly kill anything in the same area as you. You’ll notice an elevator-like movement on one side of the room; you have to jump up to reach the little prongs that are moving, then ride them down, down, down to another walkway.
Cylinder Of Death

After you pass through the portal to the cylindrical room of the Complex, you’ll be facing off against numerous Harvesters, of the flying sort. Difficult, to be sure, but you’ll want to kill them before you attempt to solve the puzzle here. It’s difficult to avoid their rocket fire since they’re flying around above you, but hey - even if you die you’re going to be resurrected almost immediately.
When everything is dead, push the organic explosive down the ramp near where you exited the portal until you reach the membrane at the axis of the walkway in front of you. Shoot the ball to destroy the membrane, then fall down into the hole beneath it and find the switch to flip the gravity (it’s jutting out from one of the walls). After hitting it, the walkway will flip down, allowing you to gain access to another portal.
Grab a shuttle at the docks and quickly head straight up past the Harvesters on the upper walkways. A little exploration will find another pair of landing pads. Land at them and pass on through to reach the exit from the level.
Ascent
The beginning "puzzle" here is easily enough bypassed; just spiritwalk through the gas leak and shut it down from the far side of the energy beams. Tough stuff.
The next room starts you off with a bang, as you’ll be facing off against numerous mobile Harvesters. It’s going to be safer to take them down in a shuttle, so quickly move off to the left from the door, grab one, and start taking these guys down. After killing four or five of them, land again at the other platform and use your alien hand to open the door there. You’ll find a switch inside that will let you open a portal-ish device back in the Harvester room, so heal up and grab your shuttle again to fly into it. You’ll discover that it’s some kind of assisted motion device, apparently used to move shuttles and Drones around the interior of the Citadel as easily as possible. Return to your shuttle and move directly into the ring of light to get your boost.
When you reach the end of the boost, turn around and attempt to shoot the two turrets nearby with your shuttle before docking. If you can’t knock them out, then land and trip one of the tripwires before shooting them with your Launcher. Then, move around to the switch underneath them and flip it - this will unlock the portal above the platform, letting you return to your shuttle and continue your ascent of the Citadel.
Onwards And Upwards

At this point of your ascent, you’ll be inside a huge cylinder, filled with mines and security devices that’ll attempt to shoot you down. Our advice? Book it. Get close to one side of the cylinder, shoot any mines that approach you, and race as quickly as you can to the top of the cylinder and the blue gate there. When you get through that, you’ll be in a smaller area with some Hunters. Kill them if you like, but your goal should be to clear the tractorable items from the passageway here and move on through the next gate. This will lead to another platform area and one more Hunter; kill him quickly before he can trip the tripwire! When he’s down, land your shuttle, unlock the gate with the switch on the Hunter’s platform, then get back into the shuttle and move on. Clear out the debris from the next room to reach what’s probably the single largest area in all of Prey; a gigantic room with a huge floating asteroid that the Sphere is apparently mining for minerals.
There are two landing zones here: one on the asteroid and one on a platform further down one of the walls. You’re going to have to land on each platform, then walk around a bit to find a switch in both areas. The order doesn’t matter at all. If you land on the asteroid, follow the pipes to find the switch you need to hit, which activates a large box-moving machine. The switch on the platform well below the asteroid is easier to find, so hit that as well; it opens up the path leading into the boxes, allowing you to return to your shuttle and enter one of them. You’ll be safe from fire while you dwell inside the box, so just sit back and enjoy the ride.
Eventually you’ll wind up near another platform; kill the Hunters on it, then land and flip the switch to start another box-building machine. Pop into this one for another horsey ride further up the Citadel.
Energy Discharge
After getting out of the box, fly around and destroy as many of the enemies here as you can, hovering over the landing pad for more health when necessary. When you’ve cleared out most of them, land and use the gravity switches to advance down the platform, using your rifle to snipe out the distant Hunter when you get close to the energy discharge. Spiritwalk through the energy burst to find the control room on the other side, and shut down the flow from there, then walk your body to the control room. Don’t forget to turn the flow back on to discourage any Drones that attempt to follow you!

Head through the door nearby and start stocking up on ammo. Duck underneath the tripwire when you see it; there’s no way to shut it off. Move around to the room with the large, white representation of the Citadel. This is the power station for the section of the structure that you’re in, so you’re going to want to disable it by shooting out the four white power cells in this area. That doesn’t seem to do much in the room that you’re in, but if you backtrack to where the tripwire was located, you’ll notice that the forcefield here has been disabled, allowing you to move on into the room beyond.
Although everything’s pitch black, you’re going to be expected to take on a couple of Harvesters in the long corridor that ensues. After you kill everything, find the gravity switch on the ceiling and hit it, then traverse the corridor (which is still going to be in the dark) and find the portal under your feet. Drop down to move on.
Center of Gravity
Looks like you’re almost at the top of the Citadel. This place is really falling apart! You couldn’t have done this much damage by yourself - guess there are still some Hidden around doing the dirty work.
Fight your way past the Harvesters in your path until you come to a forcefield door, which is easily disabled by spiritwalking. Pass through and kill the Hunters in the control room here. There’s a slot machine in the room, but it’s not rigged like the earlier machines were, making it difficult to make much money on it. The more you make before you hit Game Over, though, the more ammo you’ll get when you do finally cash out.
Hit the switch by the window here once; you should see a platform outside the window go up. With that done, jump through the portal, walk down the steps, and stand on the platform that you just raised; it’s flush up against the wall. With that done, spiritwalk across the gap, turn on the portal here, then jump back to the control room and flip the switch there one more time. That will bring your body down to the lower level, outside the window, where you’ll find a portal that leads onward.
Fire Traps
When you drop down to the next room, dash out and destroy the turret, then focus on the Drones in the area. When you’re ready to move on, stand directly underneath the gravity switcher, then hit it. When gravity is flipped, some fire traps will open on what becomes the ground, so you don’t want to fall into them before you have a chance to move around. From the gravity switcher, drop down to the area near the fire traps, then look up to find another switcher. Again, stand right underneath it, then shoot it to reach its little perch. The door nearby appears to be a dead end, but if you want a moment, the doors will close and you’ll move on to another area of the level.
When you reach this large, open area, head right and follow the path there until you reach a broken section of the platform. Kill the Harvesters, then spiritwalk across the path and use the switch to power on the walkway here. You haven’t seen a walkway, you say? Well, backtrack past the door you emerged from and you’ll locate it. Walk over it and find the shuttle pad to take off. Shoot the large blue emitter further up the shaft to disable its gravity beam, then pass through the gates in the ceiling to move on.
Fly Me To The Moon...
The next chamber is dominated by an asteroid that is puzzlingly covered by an energy shield. That’s no moon.... Well, whatever the reason for the energy shield (none that we can discern), you’ll have to bypass it to move on.

Land at the landing platform and walk up the pipes to reach the moon. When gravity shifts, drop through the shield with your spiritwalking and flip both of the switches. One will disable the gravity shield, letting your body drop down to the surface of the asteroid, and one will open the large hangar doors elsewhere in the room. There’s another landing pad on the surface of the asteroid that will let you take off and fly through the hangar doors. Just be sure to kill off any Drones in the area and heal up before leaving this room, as their damage can add up quickly if you ignore them.
In the next large area, there are two large asteroids tethered by pipes. You have to land your shuttle on the lower asteroid, then walk up one set of the pipes to the upper asteroid, where you’ll find a switch that turns on a set of exhaust vents in the ceiling. (There are two sets of pipes, so if you can’t seem to get up one of them, look around for the other.) With that done, return to the lower asteroid and return to your ship. Fly off to the ceiling and wait for one of the two exhaust vents to exhale gas, then shut down. When that happens, quickly fly up into the gap and find the central porthole that opens up, which leads to another gate.
The Core
A simple little shooting sequence winds down this level. Although it’s pretty easy to find out what to do, it’s also somewhat easy to take lethal damage from the energy core here. It’s protected by eight or so shields that rotate around it, each of which will attempt to fire on you with small shells, while the core itself will launch slow-moving but huge white energy balls that do a bunch of damage to you. Keep in mind that there are four landing pads in the room, so if you ever get too close to death, you can run over and hover over a landing pad to recover your health.
To win here, you have to shut down all of the shields; to do so, circle-strafe around the energy core and aim your guns at the point where the shields are connected to the core by the bolt of lightning between them. There’s a small pod on the shields that collects the lightning and uses it to levitate the shields; shoot the pods and you’ll be able to destroy the shields and drop them to the floor.
After all of the shields have been disengaged, the core will be exposed, revealing four small rings inside of it. It’ll still be firing white shells at you, so dodge those as best you can while shooting at the rings. After all four of the rings have been destroyed, you’ll have destroyed the energy core and can proceed up into the hole that’s revealed as a result. The level-ending portal is soon found after that.
Resolutions
Time to get Jen back from the clutches of the Keeper - if that’s even still possible. When the corridors start getting constructed as you walk along them, be sure to turn left before turning right to pick up some ammo.
Soon enough you’ll come to a huge area with multiple platforms and a large number of different portals. After you explore a bit, the disembodied voice in your head will eliminate most of the portals in your path, leaving you with one portal to ascend to. It’s going to be difficult to reach, but not extraordinarily so.
First Level
From the beginning, spiritwalk across the gap and turn to the right to find the only switch on the lowest level here; flipping it will return the walkway to its original position, allowing you to walk across. When you return to your body and do so, walk across the platform and take a left, this time, and stand on the walkway square at the end of the path there. You should hear yourself lock on and doing the normal walkway sounds, but the walkway obviously doesn’t lead anywhere. To move on, spiritwalk back to the same switch you just flipped, and your body will be shuffled off to the second level.

Second Level
When you reach the second level, move off the walkway square you’re on and proceed forward to the one directly in front of you. While standing on it, spiritwalk to the switch behind you and flip it; you’ll be moved over to the end of a new platform. Return to your body and move forward and to the right to reach another walkway tile, then spiritwalk back to the same switch and hit it again to reach the third level.
Third Level
If you’ve performed the steps as outlined, you should be at the top level of the puzzle. The portal in front of you will disappear when you reach it, but it will reappear in the next room after the voice mocks you a bit. Follow the portals to reach the gauntlet.
The Gauntlet
At this point in the level, you’re basically going to be fighting a nigh-endless stream of enemies. Luckily, you’ll be able to grab a new type of ammo for your Leech Gun here, which basically turns it into a solid beam of energy, a la the lightning gun from Quake. It’s incredibly destructive, looks cool, and actually drains less quickly than most of the other types of ammo does, so be sure to use it against the Harvesters that pop up now and again. At the end of the small set of corridors, find the switch, hit it, then backtrack to find an open door leading to the death pit. Be sure to stock up on ammo and health before jumping down to the floor.
When you do, numerous Harvesters, floating Harvesters, and eventually a pair of Mutates will attack you. There’s nothing much to say about this fight; it’s just a fight! If you have any more energy ammo for your Leech Gun left, feel free to use it to on the enemies here. If not, feel free to just use your Rifle. It’s not like you can really die here, so don’t feel pressured to use up all of your good ammo.
Jen
Well, it’s time to finally get reacquainted with Jen, after you manage to kill your way through The Keeper’s pets. Unfortunately for you, she’s...changed. She’s been grafted onto an alien beast, and although she’s conscious of what’s going on, won’t be able to actually stop herself from attacking. You’re going to be forced to defend yourself if you want to move on.
Jen’s lower body takes on the shape of a particularly nasty hound that possesses two Leech Gun pods on either side of its heads. Its attacks will blast you with fire ammo or energy ammo, just like you would if you fired your own Leech Gun at someone else, but the fire ammo shouldn’t deal much damage, and the energy ammo shots are dodgeable by backtracking beyond the point where they hit the ground. The more devastating attack, however, will come when Jen attempts to charge you and ram you with her houndish body. This is a much more difficult attack to dodge, as she’ll usually turn into you if you attempt to strafe out of the way. Generally it’s best to just turn at a 90 degree angle away from her, run in that direction, then turn around again when she overshoots you and attempts to wheel back around.

When that occurs, pound on her with whatever ammo you find appropriate. It’s probably best to stick to something like the Acid Gun or Leech Gun, or anything that doesn’t stand a chance of exploding in your face, like a Launcher might. Ammo will periodically spawn in the room for your Auto Cannon, Leech Gun, and Launcher, so you don’t have to worry too much about running out.
Killing Her
As with the boss fight against the Centurion, Jen is all but invincible at the outset out of the fight. If you deal enough damage to her, she’ll detach her Leech Gun pods from her body, which will then float on either side of her and juice her up back to full health. After they recharge her, she’ll usually be at full health, forcing you to start over from the beginning of the fight, essentially.
These pods are also going to be her downfall and her greatest weakness, though. When they detach from her body, you can shoot them; if you deal enough damage to them before they reattach, they’ll be destroyed and her healing will be impacted. Once both of the pods are destroyed, she’ll be almost incapable of attacking, besides her charging, and won’t be able to heal anymore, leaving the outcome of the fight in little doubt.
Of course, the pods are pretty tough, themselves, so you’ll want to use your Launcher to take them on. Three good rockets should be enough to destroy the pod. Just keep in mind that you’ll actually have to damage Jen after the pods retract to force her to discharge the pods once again and destroy the other one.
After both pods have been destroyed, use whatever weapons you like to sap away the remainder of Jen’s health. When her hound body has been destroyed, there’s nothing left for you to do save put her out of her misery. If you want to be really harsh about it, use the wrench. No sense in wasting ammo, after all.
Oath of Vengeance
Time to learn more about the ways of the Cherokee. You have seven trials to pass, so head to the cave and get started!
Hah, just joking - somehow you’ve managed to allow the Sphere denizens access to what was apparently a spiritual realm. Good going, Tommy. When you finally manage to pick up the Peace Pipe, which adds to your overall health, you’re going to have to face off against numerous waves of enemies to try and repel them from the spirit world. Again, nothing much to say about this - just do your best not to die, and after you’ve killed off enough enemies, you’ll spot a blue portal opening up on the ground level of the area - pass through it to move back to the world of the Sphere.
Facing The Enemy
Now that you’ve kinda-sorta repelled the enemies from the Land of the Ancients, it’s time to take the fight back to the Sphere. You’re going to be deposited back in the realm of the aliens at this point, so get ready for a fight.
A fight you’ll get, especially in this first area. Hunters, Hounds, and Harvesters will all be gunning for you, but at least you have a lot of health on your side, as well as limitless energy ammo for your Leech Gun; there are a couple of stations on the wall that dispense it, and they’ll recharge over time, so stock up and start blasting. Just don’t cross the beams! After a while a portal will open and stay open, allowing you to move on. After a bit of time you’ll come to a room with two switches. Flip them both, then quickly launch a grenade or rocket at the interior of the device as it spins around. Aim for the white porthole, and you should be able to destroy the machine and shut down the portals leading back to the spirit realm. Yay on you. Spiritwalk across the gap to create a path to follow.
After spotting the Keeper, kill his minions, including the Hunters on the ramp above, then lower the platform. To do so, stand near one of the switches, then spiritwalk to the other. If you flip the spiritwalk switch, then immediately return to your body and flip the other, then you should be able to lower the platform. It will lead you on to an arena, where the Keeper will finally decide to take you on, man versus alien.
The Keeper
Of course, the Keeper isn’t going to play fair - instead, he’ll start summoning in multiple enemies to fight you. You can’t do much about this except play along for the moment. You’re going to have to take on Mutates and Harvesters to begin with, and then the fun really starts, as another Jen-type Tank enemy will spawn in (sans the energy pods to regenerate with), followed by a Centurion. Use the pipes here to dodge enemy attacks and fire away at them, using the free Leech Gun ammo if need be. Again, you can’t die, so don’t worry too much about strategy here.
When the Keeper appears after the Centurion is destroyed, he’ll begin firing trios of white energy balls at you. You can avoid them if you keep your distance and keep strafing in one direction until they’re fired; just strafe in one direction, avoid the balls, then start strafing in the opposite direction, shooting him all the while. He’s fairly weak, physically speaking, and can’t regenerate his health, so you shouldn’t have too many problems finishing him off.
What The...
After the fight is over, you’ll be warped into another area of the Sphere, which is apparently overrun by...Keepers! There are more of them! Not to worry, though, as none of these guys can summon in enemies for you to fight; all they can do is attack you. They’ll use their little portal ability to avoid your fire, and also telekinetically blast you with random scraps that are floating around their domain. They’re tough, sure, but you’ll have infinite energy and lightning ammo for your Leech Gun, so moving on here is simply a matter of taking down a huge number of Keepers, restoring your life when you die, and not giving up. The Keepers aren’t super-difficult, although they can be nasty to deal with. Just keep in mind that they’re invulnerable when they’re levitating objects, so in those occasions it’s best just to hide out and wait for the object to be fired before ducking back and returning the favor...with your fists! Oh, if that were only possible.
Eventually you’ll reach a huge nesting ground of Keepers. You could be slaughtered, but instead, the Sphere Mother will exterminate all of them, and bring you to her lair.
Mother’s Embrace
Now that you’ve reached Mother, all you have to do is take her down to end your journey.
The Little Sphere
Mother lies encased in a protective shell, protected from contact with anything else by a series of lasers that ensure that it never touches one of the walls in her little domain. In order to penetrate the chamber, you’ll have to use the vehicle that you’re given to breach the walls.
Take a moment to get used to the controls of the vehicle. It moves somewhat like a shuttle, but is magnetically locked to the walls of the chamber. You can ignite a small welding laser with the primary fire, while the secondary fire button will launch you towards the sphere in front of you. Your goal is to launch yourself towards the sphere and use your welding laser to ignite the streams of gas that are emanating from the numerous small portals on the sphere. The four green streams are already lit; your target are the smaller blue streams. Since you don’t have much control over your vehicle while it’s in midair, you’ll have to lead your targets a bit. In other words, position yourself so that you’re aiming towards a spot on the sphere that they’ll rotate towards in a couple of seconds, then launch yourself; if done properly, you’ll hit the spot on the sphere at the same time as the portal, allowing you to ignite it.

Keep in mind that you can move your view while in midair, so if you don’t hit the exact correct spot, rotate yourself towards the portal and fire your laser anyway. Also, if you don’t manage to light the gas on fire with your first shot, try hitting the laser again before you fall back to the edge of the sphere.
When all of the portals have been set alight, not including the green placement lasers, the sphere disintegrates, and you’re brought inside, where you’re given a choice by the Mother: take her place. Run the Sphere. Or die. Kind of a Hobson’s Choice if you ask us, and indeed it is, as you’ll have no option but to fight her.
Taking On Mother
Mother initially sits and waits for you to ponder her offer, which is when you should start attacking her. She’ll initially be impregnable inside her little octagon of joy, but you can fix that soon enough. Shift into spiritwalking mode and fire at the green windows on her little ship, then quickly return to your body and fire your weapons through the now-cracked window. Don’t bother firing at Mother, as she’ll quickly shield herself and become invulnerable to your attacks.

The Mother will spawn in more Hunters to deal with you, but they’re not much of a threat; they’re mostly there for your sake, since you’ll need more spirit energy to fire your arrows. Kill them when they appear, but focus on the windows as best you can. You’ll need to take out every window in the sphere before you can actually win the battle, which can take some time; we found it best to fire a few arrows at a time to weaken multiple windows, then return to the real world and shoot them out. These windows may regenerate over time, so be sure to take them down quickly. Again, just ignore Mother at this point, since you can’t hurt her...yet.
After all of the windows have been destroyed (ignore the darker segments of the Mother’s sphere), Talon will arrive and destroy her shielding, and the sphere itself, resulting in your transport to some kind of mental torture realm, where you can finally effect Mother’s death.
The Final Blow
Mother will launch into a little speech here, about how you must take her place, and it’s foolish to resist, etc., etc. Nothing you haven’t heard before. Instead of standing still and listening to her, run around to each of the three large portals on the ground and hit the switches near them. These portals are basically mine-machines; they’ll launch huge explosives into the air, where they’ll float and rotate, waiting for you to exploit their presence.

The sequence of events here is pretty easy to follow: the Mother will speed around the room, throwing grenades and plasma bolts at you. She’s invulnerable when she has her blue shield up, but if you manage to shoot one of the mines while she flies near it, you’ll drop her shield and force her to stop for a moment to regenerate. This, obviously, is the time to pause and take her down.
And...that’s pretty much it, really. Ammo spawns pretty often at the edges of the arena, and you can pop out more mines whenever you like with the control panels at the portals, although each one will likely only support one mine at a time. If you hit Mother with enough ammo, you’ll definitely wind up killing her off.
Conclusion
That, as they say, is that. It’s a somewhat odd resolution, as Tommy now has a dead girlfriend, albeit one that will nag him from the spirit world if he ever tries to get laid again before he dies. That would suck. Don’t forget to wait until the end of the credits for more hints as to the next installment of what the creators are obviously hoping will be a new franchise.
360 Achievements
As with most other Xbox 360 games, Prey comes with a full suite of achievements for your playing pleasure. Here’s a list of those.
| Task | Point Reward |
| Complete Last Call Level | 10 |
| Complete Escape Velocity Level | 10 |
| Complete Downward Spiral Level | 10 |
| Complete Rites of Passage Level | 10 |
| Complete Second Chances | 15 |
| Complete All Fall Down Level | 15 |
| Complete Crash Landing Level | 15 |
| Complete Sacrifices Level | 20 |
| Complete There Are Others Level | 20 |
| Complete Guiding Fires | 20 |
| Complete The Old Tribes Level | 25 |
| Complete Hidden Agenda Level | 25 |
| Complete Jen Level | 25 |
| Complete The Dark Harvest Level | 30 |
| Complete Following Her Level | 30 |
| Complete The Complex Level | 30 |
| Complete Ascent Level | 40 |
| Complete Center of Gravity Level | 40 |
| Complete Resolutions Level | 40 |
| Complete Oath of Vengeance Level | 50 |
| Complete Facing The Enemy Level | 50 |
| Complete Mother’s Embrace Level | 60 |
| Complete game on Normal difficulty | 65 |
| Complete game on Cherokee difficulty | 65 |
| Reach 50 total kills in Deathmatch | 10 |
| Reach 125 total kills in Deathmatch | 15 |
| Reach 500 total kills in Deathmatch | 50 |
| Reach 50 total kills in Team Deathmatch | 10 |
| Reach 125 total kills in Team Deathmatch | 15 |
| Reach 250 total kills in Team Deathmatch | 50 |
| Obtain 25 multiplayer kills with sniper Rifle | 10 |
| Obtain 25 multiplayer kills with Spirit Bow | 10 |
| Obtain 25 multiplayer kills with Wrench | 10 |
| Obtain 25 multiplayer kills with Rifle | 10 |
| Obtain 25 multiplayer kills with Crawlers | 10 |
| Obtain 25 multiplayer kills with Leech Gun | 10 |
| Obtain 25 multiplayer kills with Auto-Cannon | 10 |
| Obtain 25 multiplayer kills with Acid Gun | 10 |
| Obtain 25 multiplayer kills with Launcher | 10 |
| Win a Ranked Match | 20 |
| Play in Ten Ranked Matches | 20 |
| Win $250 in Draw Poker | 10 |
| Win $250 in Blackjack | 10 |
| Get a score of 15,000 or higher in Runeman | 10 |
PC Cheats
Being a game based on an id engine, Prey obviously comes along with some cheats for the PC version of the game. If you enter the following codes after turning on the console, which you can do by holding CTRL + ALT + Tilde button (to the left of your 1 key), you’ll obtain the listed effect. You can usually turn off their effects by entering the codes again.
| Code | Result |
| God | God mode - invulnerability |
| Give all | Get all weapons and ammo |
| Notarget | Enemies won’t react to your presence |
| Givehealth | Gain full health |
| Giveammo | Gain full ammunition |
| Noclip | Walk through walls |
Got a news tip or want to contact us directly? Email news@gamespot.com
Join the conversation