Valheim Bonemass Boss Guide - How To Kill The Swamp Boss
The Swamp boss, Bonemass, is one of the toughest customers in Valheim. Here's how to kill it and what it'll get you.
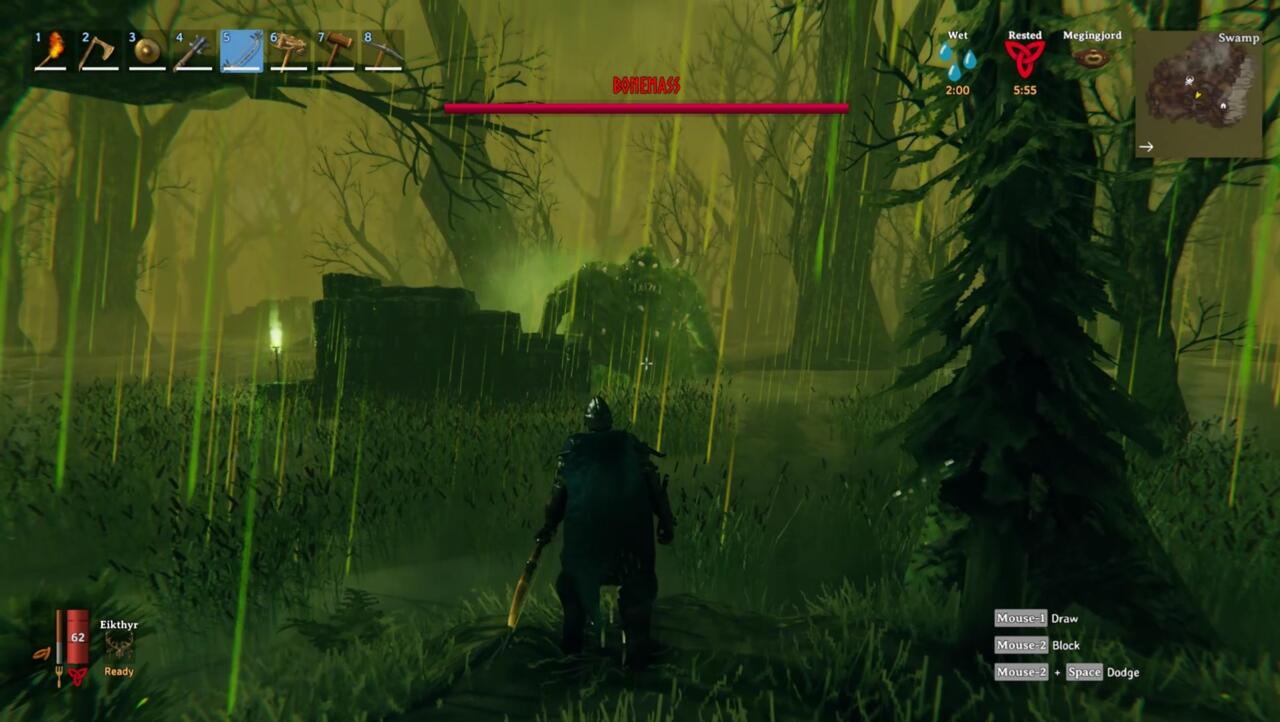
Valheim's third boss is Bonemass, a giant green blob that makes the Swamp biome its home. Defeating it is tough, as the huge boss is relentless and uses massive attacks that are tough to dodge. With the right tools and strategies, though, you can defeat Bonemass and claim its power. Here's everything you need to know to beat the boss.
You'll need to clear out Eikthyr, the Meadows boss, and The Elder, the boss of the Black Forest biome, to get complete access to the Swamps. You'll also want the toughest Bronze armor you have access to before entering the area, as the Swamps are full of deadly enemies that can poison you for massive damage. We've outlined the gear that'll give you the best chances against Bonemass, even if you're fighting the boss without your Viking comrades.
How To Find Bonemass
Like other Valheim bosses, you can only summon Bonemass at specific altars. To find the location of such an altar, you'll need to interact with rune stones located in the Swamps. These are found in the Sunken Crypts dungeons in the Swamp--you'll need the Swamp Key, earned by defeating The Elder, to get into them. Once you find a rune stone and interact with it, Bonemass's location will be marked on your map.

To summon the boss, you'll need to make a sacrifice of 10 Withered Bones at its altar. You can also find Withered Bones in Sunken Crypts, either lying on the ground or mined from Muddy Scrap Piles.
What You'll Need To Fight Bonemass
Armor: Iron Armor (Upgraded If Possible)
Bonemass does a ton of damage with its attacks, but the blob is not the only thing you'll face in the Swamps. It's best to have as much protection as you can get--so it's definitely recommended that you spend the time to mine Iron in the Swamp and craft a full set of Iron armor before trying to go after the boss. Use our Iron guide to get everything you need to upgrade your gear. It's also a good idea to upgrade your armor if you can for even more damage resistance.
Ranged Weapons: Huntsman Bow, Frost Arrows
Arrows aren't the most effective way to fight Bonemass, unfortunately. The boss is resistant to Pierce damage, so normal arrows are pretty worthless in most cases. However, Bonemass can be very tough to fight up close, so ranged weapons are definitely a must. Bonemass is weak to Frost damage (it is a blob, after all), so you can get around the weaknesses of arrows by crafting Frost arrows. You'll need a whole lot of them, but the ability to stay away from Bonemass's big, powerful attacks is worth the extra effort.
Frost arrows aren't easy to come by, though. You'll need to venture into the Mountain biome to get what you need to make them. To survive the mountains, you'll need Frost Resistance Mead, which you can make with a Cauldron and Fermenter. Frost Resistance Mead Base is made from 10 Honey, 5 Thistle, 2 Bloodbags (dropped by Leeches in the Swamp) and 1 Greydwarf Eye.
Apart from Wood and Feathers, Frost arrows require Frost Glands, which you can get by killing flying Drakes that live in the mountains, and Obsidian, which you can get by smashing Obsidian rocks poking out of the ground with an Iron Pickaxe. You'll likely need 200 or more if you're trying to solo the boss, so get plenty of material.
Melee Weapons: Iron Mace, Iron Tower Shield
Bonemass is weak against Blunt damage, so if you can manage to fight it at close range, you can do more damage than you would with arrows. You'll want the strongest weapon you can get, which, in this case, is the Iron Mace--made from 20 Iron, 4 Wood, and 3 Leather Scraps.
The boss also throws out melee attacks of its own, though, so if you want to go toe-to-toe with it, you'll need to block at least some of the damage. The Iron Tower Shield is the toughest shield you can craft, requiring 10 Iron and 15 Fine Wood, and should let you block some of Bonemass's melee strikes. But the shield will significantly cut your movement speed--by 20%, in fact--and won't help with the Bonemass's poison.
Food
You're going to want all the hit points you can get for this fight, so your very best food is essential. Since you've been spending time in the Swamps, you should have Draugr Entrails, which you can use to make Sausages. Queens Jam is also pretty effective, as is Carrot Soup--you'll likely want the stamina boost to help you keep mobile as you fight Bonemass. You should also have the capability to make Medium Healing Mead with a Fermenter and a Cauldron, which uses 10 Honey, 4 Bloodbags, 10 Raspberries, and 1 Dandelion. You'll definitely want the ability to quickly heal while you're in this fight.
There's another essential mead you need to survive: Poison Resistance Mead. Bonemass has a seriously horrific Poison attack that can wreck you pretty fast. Make it from 10 Coal, 5 Thistle, 1 Neck Tail, and 10 Honey, and keep plenty on-hand--the Bonemass fight will last a long time, and you'll need to re-up your protection more than once.'
Ability: Eikthyr
Bonemass is a very mobile boss that will pursue you pretty relentlessly, and it does a big area-of-effect attack that's best dealt with by running to get clear. Stamina management is a big part of this fight, so use the Eikthyr power to help you run around at less cost.
Rested Bonus Is Key: Make A Portal Or Campfire
One of the more frustrating things about the Bonemass fight is the fact the boss summons a constant rainstorm during the battle. That gives you the Wet debuff, which makes healing and stamina regeneration go slower. There's not a lot you can do about the rain, but coming into the fight with the Rested bonus from sleeping and hanging out near a fire can help quite a bit. It's also a good idea to build a portal (or at least a covered campfire) near Bonemass's altar so you can retreat through it at intervals to repair your gear and spend a minute or two beside a fire to restore the bonus. Just don't leave Bonemass alone too long or it'll also regain health.
How To Beat Bonemass - Boss Fight Strategies
Bonemass is resistant to arrows, but makes the close-range fight very tough with its abilities and attacks. If you can bring a few extra Vikings to help you in this battle, it's recommended that you do so. You can work together to kite the boss around and protect each other so that it doesn't simply target you and stalk you until it catches you. It's also helpful to have other players around to deal with another major threat during the fight: other random Swamp monsters who can show up and ruin your day.
At Range
The safest way to deal with Bonemass is at a distance. If you get too close to Bonemass, it'll swing at you with its massive arms. Those attacks can be blocked, but the boss has a big reach and it's tough to dodge those swings. Worse is Bonemass's Poison attack, where it barfs a poisonous cloud that spreads out all around it. The cloud lingers, making it tough to stay close to Bonemass at all. You can avoid most of Bonemass's capabilities by staying away from it, but it'll occasionally pull off a chunk of its own body and throw it at you, spawning a couple of Blobs that you'll have to deal with.
Your Frost arrows will do damage to the boss even though it's highly resistant to Piercing damage, so you can just hit Bonemass with arrows until it dies--it'll just take a lot of them. This strategy requires you to stay very mobile, though, because the boss will pursue you relentlessly. It's also tough to fight this way, because Draugrs, Wraiths, Surtlings, and Blobs are likely to get mixed up in the battle as well. The Swamps are also a bit tough to navigate thanks to being flooded, so make sure you scout the area and have an idea of how you'll want to move around during the fight. If you can make yourself an area that Bonemass can't reach, say by cutting a trench with a pickaxe ahead of the fight, you can mitigate the need to run too much--but you'll still have to avoid Bonemass's AOE attack and the Blobs it'll throw at you.
Valheim News & Guides
- How To Create A Dedicated Server To Play With Friends
- How To Find Scrap Iron And Make Iron Gear
- How To Find Silver And Craft Wolf Armor Mountain Gear
- + Show More Valheim News & Guides Links (7)
- Every Armor Set You Can Craft In Valheim
- Console Command Cheats And Codes
- Workbench Upgrade Guide
- Elder Boss Fight Guide & How To Get The Swamp Key
- Moder Boss Fight Guide
- Valheim Beginners Guide & Tips
- Valheim Impressions: How The Game Succeeds By Not Starving You
Up Close
Melee fighting is more effective against Bonemass in terms of doing damage, especially if you've got a good weapon that deals Blunt damage like the Iron Mace. You can use your shield to power through Bonemass's big melee attacks, but you'll probably want to run clear whenever it throws up Poison. There are good opportunities to hit the boss in the middle of its animations, though, especially when it throws its Blobs out.
If you can get some backup, it's possible to keep the boss's attention on one Viking while the others get behind it and attack from the rear, where Bonemass can't get you. This is tough to maintain, though, so expect to spend a lot of time running clear of the boss and repositioning. Even if you're doing a melee-focused strategy, you're probably going to want a good number of Frost arrows so you can keep dealing damage even when you're unable to get close to Bonemass.
What You Get For Beating Bonemass
Destroying Bonemass gives you some of what you need to move into the Mountain biome. In order to craft the next tier of armor, you'll need to find and mine Silver, but unlike Iron, Copper, and Tin, Silver doesn't pop up out of the ground or drop from nodes you can easily spot. Killing Bonemass gives you the Wishbone, which reveals secret things hidden under the ground--including Silver Veins. (Check out our Wolf Armor guide for help getting yourself set up to mine and use Silver.)
You'll also get Bonemass's power, which is one of the more useful ones in Valheim, especially as you head into the tough Mountain biome. Bonemass gives you resistance against physical damage, including Pierce, Blunt, and Slash damage. The ability makes you much more resilient in combat, which can help significantly when you're fighting Stone Golems, Drakes, and Wolves in the mountains. With both Bonemass's drops available to you, you're ready to move on to Valheim's next set of challenges.
Got a news tip or want to contact us directly? Email news@gamespot.com
Join the conversation