INTRO:
Sega was not exactly in a great spot back in 2014, and some of the years afterwards. It is fast running out of ideas for its home-grown games, and was relying too much on its flagship IP, Sonic the Hedgehog.
However, its side endeavours, namely investments in the computer-centric market, did make some payoff. Creative Assembly, in particular, has provided acceptable revenue for close to ten years by 2014 (and would seem to continue to do so at this time of writing).
Thus, Sega took a gamble on the PC market in late 2014 with one of its IPs, specifically the first Valkyria Chronicles title. It perhaps did better than anyone expected, considering its sales on Steam.
After the less-than-stellar reception of Azure Revolutions – a Valkyria Chronicles spin-off – and its likely mediocre commercial performance, Sega put its chips down on all-platform and international releases for its home-grown games. One of those to benefit from this change of strategy is the fourth entry in the Valkyria Chronicles series.
PREMISE:
To recap, the Valkyria Chronicles series is set in a sci-fi version of World War I, complete with a continent that resembles Europe. In this fictional universe, there is the presence of Ragnite, a miraculous mineral that led to the development of great technology. There are also the Valkyria, otherwise human women who are invested with arcane powers (among other obvious endowments).
In the continent of Europa, there are two major feuding powers: the technologically superior Empire that is much reviled by everyone else, and the Federation, a loose alliance of nations that intend to stay independent of the Empire for their own reasons. They have already fought one war, and outwardly neutral nations like Gallia were damaged along the way.
The game is set just after the onset of the Second Europan War, i.e. close to the timeline of the first (and third) entry of the series. Again, the protagonists are mostly Gallians, albeit Gallians that have enlisted in armies that fly the Federation flag. There is some retconning of the lore to fit this peculiarity, which in turn make the Federation seem even more loosely-knit than it was.
Anyway, the protagonists are a Ranger squad that has been assigned to be part of the vanguard for Operation: Northern Cross, which is an ambitious military plan by the Federation to carve their way to the Empire’s capital. They are Squad E, a bunch of people with a wide and perhaps comical range of personalities.
(Some people may consider the “squad” to be more like a “platoon”, considering its size, but there are translation issues and different terms among the different militaries in the real world.)
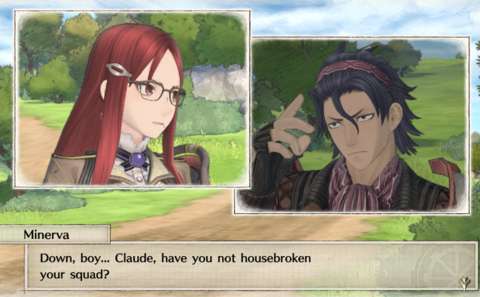
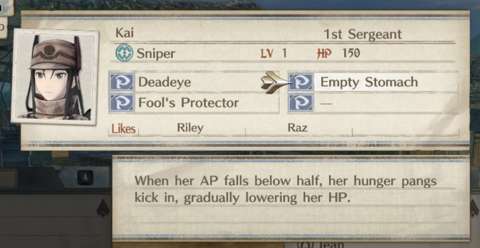
Among the most prominent of these individuals are their officers (commissioned or otherwise). There is Claude Wallen, overall commander of the squad. There are Kai Schulen and Raz, two (non-commissioned) officers who are his childhood friends. Riley Miller, another childhood friend, joins the squad shortly after the prologue. There are also other significant characters, like Minerva, the commander of Squad F.
SAME ERA, DIFFERENT CIRCUMSTANCES:
Squad E and their compatriots would be fighting on a front that is far from Gallia, even as the invasion of Gallia (as shown in the first and third entries of the series) rages on. Their ordeal is a bit different, because they are facing the main bulk of the Imperial war machine rather than whatever Prince Maximilian (the antagonist of the first entry) has requisitioned. Furthermore, Squad E receives logistical and technological support from factions in the Federation.
This is the excuse for the player characters – and enemies – using technology that is different from the ones seen in the first or third entry. The player also certainly will not be seeing soldier classes that were seen in the second or third game, such as the Fencers.
Rather, the player would be using new classes, which are made possible by certain tech innovations that happened in the Northern Cross front.
TURN-BASED GAMEPLAY:
The bulk of the gameplay occurs during the “battles”, “missions” or “operations”; the game uses these words interchangeably. Like its predecessors, the fourth entry uses a combination of real-time and turn-based mechanisms to determine what each side and its units can do.
Battles begin with one side taking its turn. Usually, this is the player’s, but there are some battles where the opposing side gets the first turn. This side uses its “Command Points” – more on this later – to activate its units and have them do things. Usually, only one unit can be active at any time, like it was in the previous games.
Anyway, when a unit is active, it can move about the battlefield. Enemy units have to stay where they are, but they can still shoot at this unit. This is “Interception” fire, which has been around in the previous games too, and will be described further later.
The active unit can only move about so much, and if it can make attacks, it can only make just one. There are some units – usually the player’s – that can make more, but only if they are lucky enough to trigger the Potentials that make this possible. (There will be more on Potentials later.)
After one side runs out of Command Points – also known as “CPs” – that side ends its phase and the other side gets its own. The alternating turn-taking continues until one side achieves its objectives, which in turn are the failure conditions for the other side.
COMMAND POINTS:
Command Points are used again in this entry of Valkyria Chronicles. Command Points determine how much each side can achieve in its turn. This is a hard limit, and that number can only ever go down during that side’s turn (barring some mission-scripting).
In the player’s case, the player must use these as wisely as possible, because the opposing side often outnumbers the player’s. As for the opposing side, it is always CPU-controlled, and it is not very good at using its own CPs; there will be more elaboration on this later.
Every side has a minimum number of CPs; this is usually mission-dependent. This number is then raised with the presence of “leader” units on its side. Each leader unit provides one CP. If the leader unit is taken out – whether incapacitated or killed – the CP is gone. That side will start with less CPs.
ACTION POINTS:
Action Points (APs) also make a return from the previous games. These determine how much distance that a unit can move when it is activated.
In the first game, APs are consumed whenever a unit is making movement animations, regardless of whether they have moved any distance or not. This was a problem that persisted in the series, but was fixed in the later ones, including this. APs are now reduced according to distance that has been moved.
In the case of vehicles, turning also consumes APs; infantry do not have to worry about this because they turn immediately. This is a deliberate limitation that has been there since the beginning of the series, in order to balance vehicles.
A unit’s maximum AP will diminish if it is activated more than once in its side’s turn. This discourages the player from using the same unit more than once, among other disincentives such as limited ammo. Otherwise, there are no other penalties, so if the unit happens to be in a target-rich situation, using that unit repeatedly regardless of its diminishing APs would be wise.
HIT POINTS:
No combat-oriented game could ever get by with some kind of measure of a combatant’s durability. Hit points are thus far the simplest and easiest to implement of such measures, so it is no surprise that this game would use them. As to be expected of such a simple implementation, units are subject to the “critical existence failure” trope, i.e. they function at full performance as long as they have any hit points left.
In this entry of the series, (most) units automatically recover some of their lost hit points every turn. This makes them more resilient, though this also applies to enemy units too. Units that are within bases (more on this later) recover even more.
DAMAGE:
Every weapon has two damage ratings: one for when the target is an infantry unit, and one for when it is a vehicle (called “armor” in-game). The appropriate damage rating is used when an attack affects a target.
Typically, these two ratings are used to differentiate weapons and make specialized weapons possible. For example, virtually all lances have high damage ratings against vehicles, and relatively low damage against infantry.
DEFENSE:
Every unit has a defense rating. Initially, for a new player, it might not be easy to figure out how the rating works; it is always a low number, usually in the single digits. The other numbers that the player sees have more digits. The game does not describe how the defense rating exactly works, but it is likely a divider, i.e. the effective damage ratings of landed hits are divided by the defense ratings.
However, some weapons will never do anything against certain targets. The most notable example of these is that infantry weapons will not do much of anything to tanks.
AMMUNITION:
Gameplay-wise, general-issue weapons like the ubiquitous rifles and submachineguns have unlimited ammunition, i.e. the player does not have to worry about units running out of rounds for these weapons.
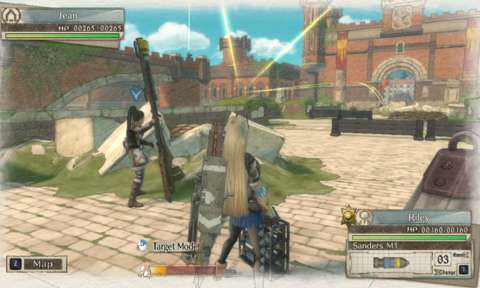
Weapons for specialists and heavy weapons have limited ammunition, however. This is the case for sniper rifles and anti-tank lances. If a unit runs out of ammunition for a weapon during its side’s turn, it can no longer make any attacks with that weapon. This is intended to balance the capabilities of certain units, like the hand grenades that most infantry units have.
AMMUNITION RECOVERY:
Units automatically regain one unit of ammunition for any ammo-dependent weapon over every turn, but only ever just one. However, if they are at bases, they refill their reserves.
Like previous entries in the series, having Engineers approach other units on the same side restores the latter’s ammunition count. This is a potent benefit, but the player does not get a lot of Engineers and they are needed for other purposes, such as clearing mines.
Whichever method that is used to regain ammo, units will never get more than their starting amounts.
SHOOTING AND SCATTERING:
Obviously, units with guns shoot them. For better or worse, this entry of the series retained the shooting mechanism that has been in the series for years. The mechanism involves the use of a targeting reticle, which represents where the unit’s shots can land.
The probabilities of shots landing anywhere in the reticle are unclear. However, most shots appear to occur within the vicinity of the center of the reticle, so there may be a Gaussian distribution to the probabilities. Still, knowing this would not be much of any assurance to players that dislike luck-based gameplay elements.
“ACCURACY” AND “AIM”:
There are two types of factors that affect shooting: “accuracy” and “aim”. The exact effects, e.g. the mathematical calculations, of either factors are not explained in any way. However, close observation reveals their functions.
“Aim” is part of a weapon’s statistic. This determines the default size of the reticle. The developers use this to balance the advantages that a weapon may have, but in practice, lousy Aim makes a weapon very unreliable. Wise players would likely go for weapons with good Aim ratings, if only to land shots on weak spots a lot more reliably.
Accuracy appears to shrink the reticle. Specifically, the reticle shrinks to a proportion equal to 100% minus the Accuracy rating of the unit (taken as a percentage). The Gaussian distribution probabilities remain the same.
Thus, a unit with incredibly high Accuracy can make use of even the most unreliable weapons. This is the case for some Imperial sniper aces, who are armed with Imperial sniper rifles that are better known for their stopping power than their innate accuracy.
RANGE:
The reach of a weapon determines what a unit can shoot at and how much damage that can be inflicted when the target is in range. Obviously, if a target is beyond the range of a weapon, it cannot be harmed.
If a target is within range of a bullet-shooting weapon, the distance between the attacker and the target determines how effective each landed shot is. If the target is near the fringes of a gun’s range, landed shots are likely to do nothing much.
SNIPER ZOOM:
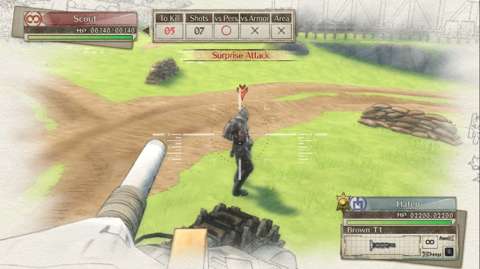
When the player is using a sniper, the player is shown the tunnel vision of the sniper as he/she looks down the scope. The reticle also appears in the telescopic zoom. Interestingly, the reticle remains proportionately the same size regardless of the zoom level. This means that the player will want to zoom in on the target as much as possible, so as to reduce the scattering of the shot. Ideally, the target’s weak spot should be occupying most of the reticle.
CRITICAL HITS:
Just about every unit has at least one spot on its model that is vulnerable. This spot may have much reduced defense rating compared to the rest of the unit’s body, meaning that this is the best spot to land hits on it. It may have negative ratings instead, meaning that any hit that lands there have their damage output multiplied. The latter occurrence is usually accompanied by a unique sound effect.
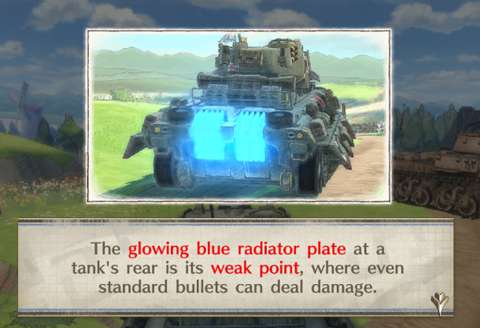
In the case of infantry units, these weak spots are always their heads. This is so, even if the units have helmets. (The helmets do not do anything at all.) As for vehicles, their weak spot is almost always their radiators.
More often than not, if the player intends to complete missions as soon as possible, the player needs to land hits on the weak spots. After all, killing the enemy faster than the enemy could kill oneself leads to certain victory.
EXPLOSIONS FLINGING UNITS ABOUT:
Ordnance weapons, such as most explosive munitions, cause infantry units to be flung about. The general direction of the flinging depends on where the explosion occurred, relative to the locations of the infantry units. As a rule of thumb, they are flung away from the explosion, as one who is educated in physics would expect.
However, the models of the units that are being flung uses ragdoll physics, meaning that the direction of their movement is greatly dependent on the shape of their models too. For example, Lancers get flung the least, mainly due to the size of their models and attached sub-models.
If the infantry units are tossed into places where units cannot reach or should not be in, such as ravines or hills that no units can crest, the game despawns and respawns them. They often reappear close to where they fell the first time, so the flinging will not cause problems.
EVASION:
Of course, the best way to survive is to not be there when the attack lands. However, the gameplay element of evasion is generally out of the player’s control, because it is governed by an RNG roll.
Firstly, there is the “Dodge” rating. This rating is only available to infantry units; vehicles do not get such a rating at all.
This rating comes into play if and only if an attack is directed against the units. This also includes the blast from any area-effect weapons. However, the rating will not be used if the unit is subjected to any other kind of harm. For example, the unit cannot dodge the explosion of a ragnite canister that is next to the unit.
Anyway, the Dodge rating becomes the threshold for the Evasion roll. If the roll is successful, the infantry unit drops to the ground, just before the attacker’s attack animations begin. This causes most attacks to miss. Any hits that still manage to land have their damage substantially reduced. Any hits that land on the unit’s weak spots do not trigger any critical hits at all. Furthermore, explosive attacks do not cause the unit to be flung about.
VISION ARCS:
Every unit has a vision arc, originating from their front facing. For better or worse, this is not always visible to the player, despite there being a tutorial that describes such a thing. That said, this vision arc determines whether a unit has spotted an enemy or not.
This vision arc will be important for two other gameplay elements: surprise attacks and interception fire. These will be described later.
All units will always become aware of any enemy that has come within a few feet of them, regardless of the position of the latter.
In the case of infantry units, they will automatically turn to attack any enemy that they have entered their vision arcs. Scouts, in particular, have the widest vision arcs, and are the most likely to respond to any encroachment.
This behavior can be used to trick enemies into changing their facings.
SURPRISE ATTACKS:
When an attacker makes an attack on the rear facing of an enemy, i.e. outside of their vision arc and directly behind them, the attack is upgraded to a “surprise attack”. This attack will never trigger any Evasion rolls.
This is particularly important to keep in mind when fighting enemies that have very high Evasion rolls, such as two certain petite soldiers that happen to have mean streaks.
SURVIVING INFANTRY FACE THEIR ATTACKERS:
If the targets of attacks are infantry units and they survived the attacks, they will turn to face their attackers. This is important to keep in mind, because diverting the vision of enemies to elsewhere will be a tactic that the player uses to get squishy units around enemies that can otherwise kill them.
For example, enemy Shocktroopers are often located at places where they can shoot at enemy infantry that pass by. Shocktroopers are often tough enough not to be taken out with a single attack, so diverting their attention will be useful in getting infantry past them.
RETALIATION:
Units that survive may not only just face their attackers. If their attackers are within range and they are not vehicles, they will make retaliatory attacks.
Their owning player cannot direct these retaliatory attacks, however. The units will always target the torso of their attackers, meaning that they rarely if not ever inflict critical hits, unless they have a terrible scatter roll that somehow hits their attackers’ heads anyway.
AIMING MODE:
Before an activated unit makes an attack, it goes into aiming mode so that their owning player can direct their attacks. This happens immediately for CPU-controlled players, so this is not perceptible to the human player.
In the case of the human player, the player is given a camera view that is reminiscent of the manual aim feature in third-person shooters. When this happens, all other units have their animations cancelled, and they revert to their default postures and animations. This is useful if the player intends to survey the activated units’ surroundings before committing to a decision.
The player can exit out of the aiming mode at any time, in the case of the player wishing to have the activated unit relocate to another spot before making an attack.
AIMING MODE DISABLES RAGDOLL PHYSICS:
If an activated infantry unit manages to go into Aiming Mode before explosions occur next to it or on it, the explosions do not cause the unit to be flung about. Damage will still be inflicted, however. If the explosions cause enough damage to kill the activated unit, the unit will be forced out of Aiming Mode and flung about accordingly.
INTERCEPTION FIRE – OVERVIEW:
When an active unit is up and moving about, it may be spotted by enemies that have him/her/it within range. This results in the unit receiving interception fire.
Interception fire does not consume any ammunition whatsoever. This means that the active unit is always under fire from enemies as long as the unit is within their range and vision arc.
However, the owning player of the units that are performing interception fire cannot control their fire in any way. Interception fire is inaccurate too; this is most noticeable in the case of elite snipers that can perform interception fire.
INFANTRY INTERCEPTION FIRE:
When an infantry unit is performing interception fire, it will change its facing in order to track any enemy that it is firing on. The only exception is the Grenadier, which will not change his/her facing.
The infantry unit that is performing the interception fire retains its facing after the activated enemy unit has ended its move (one way or another). This is important to keep in mind, especially in the case of long-ranged enemies like a certain Valkyria.
VEHICLE INTERCEPTION FIRE:
Most vehicles have machinegun turrets somewhere on them. These turrets automatically track any enemy within their range and firing arcs, unless the enemy is hidden, gets out of sight, or begins attack animations. The interception fire from vehicles can be brutal, often enough to kill fragile infantry in a single volley. They are inaccurate, but they compensate with considerable volume of fire.
However, the turrets will return to their default orientation after they could no longer fire on the active enemy unit. Cunning players can estimate the amount of time remaining before their turrets complete their rotations.
ALLIES IN THE WAY:
Interception fire can damage units on the same side as the units that are performing interception fire. To avoid friendly fire, the latter will stop their interception fire when their target gets too close to one of their colleagues. This means that the player could try to have his/her units follow a route that brings them close to enemies, in order to avoid interception fire.
Of course, these enemies could turn around and shoot at the player’s units, if they become aware of the player’s units. Still, keeping this in mind can be useful, especially if the player intends to have units run through places that are covered by enemy Grenadiers (more on these later).
STOPPING & CHEESING INTERCEPTION FIRE:
Interception fire from enemies stops when any of the following conditions are met.
Firstly, of course, the activated unit dies. Secondly, there is the prevention of friendly fire, as mentioned earlier. Thirdly, the activated unit goes into aiming mode. Fourth, the player brings up the control input to end a player’s turn.
The fourth option can be brought up without any delay. It can be exploited in order to reset the animations of enemy units that are about to perform interception fire.
COVER:
Cover is always represented with sandbag walls. Most infantry units can crouch next to them, which increases their defense ratings considerably; some characters have Potentials that improve the benefit further.
The unit’s movement slows considerably, however, so moving around the sandbag walls can be arduous. However, there is little reason to do so, because if the player wants a unit to move from a sandbag wall, it is away from it.
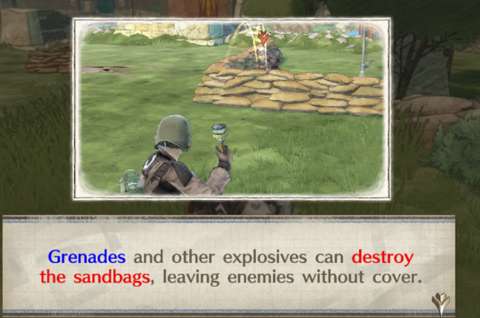
More often than not, the player would have to deal with enemy infantry that are taking cover among sandbags. Sandbag walls can only be brought low with explosives, or having a vehicle run into them. The latter will likely be the cunning player’s favored method; it is also more gratifying, especially if the player intends to kill the enemy that had been using the sandbags.
Engineers can restore destroyed sandbag walls. There is usually no reason to do this for sandbags that occur away from bases, but the cover at captured bases should be restored for the sake of any would-be defenders.
LADDERS:
The battlefield is a 3D environment. It is possible for units to be at different elevations, even underneath each other if there are overhang bridges or platforms. Infantry units can utilize this by making use of ladders that connect places of different elevation together. (That said, elevation does count for the purpose of range considerations.)
There are no ladder-using animations, for better or worse; ladder usage occurs immediately. Therefore, ladders are a good way to cancel intercept-fire animations.
In some maps, there are ladders that are initially unusable. Engineers can restore the ladders; indeed, this is usually in the player’s interest to do so. Ladders cannot be destroyed, however, and the CPU-controlled opposition would make use of any repaired ladders.
WATCHTOWERS:
There are watchtowers in some maps. Despite their wooden construction, these are indestructible objects.
These watchtowers are generally for units with relatively long-ranged weapons: Snipers and Grenadiers come to mind. Infantry units on top of watchtowers get a small range bonus, but the main benefit is that their field of view becomes unobstructed by most obstacles.
Only one unit can occupy the nest of any watchtower at any time. The unit can be forced out, however – typically by killing them. However, explosive attacks that hit the watchtower (or them) will knock them out of the watchtower; they do not get Evasion rolls to prevent this.
RAGNA-CRATES:
The Imperials have a lot of resources to draw from – so much so that they sometimes leave them carelessly lying around. Chief of these are canisters of processed Ragnite fuel. The player will be shooting these to make them blow up, usually to eliminate enemies or cut off avenues of approach.
On the other hand, the presence of the containers can be cause for head-shaking disbelief. They are often located at unbelievably convenient locations, like just behind tanks. In some of these cases, there can be some excuse to justify this, such as the tanks were using them to refuel. However, most cases do not have such excuses.
FENCES:
Fences prevent movement of infantry units. There are two categories of fences: short and tall ones. Each in turn is differentiated into two types, depending on their destructibility.
Short fences do not obstruct line of sight and incoming fire. Tall ones do block incoming interception fire (except those from anti-tank cannons), but they do not block line of sight, i.e. enemies can still perceive units that are behind tall fences.
Wooden fences can be destroyed with explosives or vehicles crashing into them. Indeed, the player will likely have to destroy these in order to clear paths to where player characters need to go to.
POTENTIALS:
Potentials are the main means of differentiating the player’s units from those of the enemy’s. Potentials are generally buffs or de-buffs that alter the performance of the player’s units; they also happen to be the tangible expressions of the characters’ personalities.
Potentials do not trigger on the player’s command. However, the player can attempt to get the units into circumstances that trigger the positive Potentials, while avoiding the conditions that trigger the negative ones.
The trigger conditions are mentioned, either through an explicit statement or implied. For example, there are characters who do not do well around members of the opposite gender, so getting them in close proximity with units of the other gender is the trigger.
Even so, an RNG roll must be passed whenever a condition is achieved in order for the Potential to trigger. The threshold for the RNG roll is unclear, as are other vital statistics that are not told to the player.
GAMUT OF EFFECTS FROM POTENTIALS:
Any Potential can only be triggered just once in an activated unit’s turn. However, multiple (possibly even all) Potentials could be triggered if the conditions are met.
This can result in a mash of benefits or setbacks, for better or worse. Furthermore, the timing of the triggers can be either frustrating or advantageous.
Keeping the conditions in mind can help the player mitigate some of the fickleness of the Potential triggers. However, that requires the player to already have considerable familiarity with the mission maps and also remember the Potentials of the individuals that the player would deploy. This can be daunting, especially if the scenario requires the player to use units that the player is not familiar with.
Furthermore, the effects of any Potentials that are triggered will end when the activated unit ends his/her turn. The unit can trigger his/her Potentials again if he/she is reactivated, however.
MORALE:
Another major factor for the triggering of Potentials is morale. Morale is a gameplay element that was introduced in the second entry to give the player some semblance of control over the triggering of Potentials. In the second game though, it is also used as a mission failure condition. In the fourth entry, it is an element that is entirely for the benefit of the player.
Each unit has his/her own morale meter. This is not shown to the player, however. That said, there are only ever two states of morale: normal, and high.
Reaching high morale is quite easy. If the unit has done something that raises his/her morale, such as defeating an enemy unit, the player is shown an animation of the unit being smug, exhilarated or such other expressions. Getting enough of these would increase the unit’s morale to high, which is indicated with the unit’s icon being highlighted with sparkles during Command mode.
High morale gives a bit of stat-buffing, while also increasing the chances of triggering positive Potentials and reducing the chances of negative ones being triggered. High morale is expended upon the end of that unit’s next activation. However, it is retained as long as the unit has not been activated again.
SECOND CHANCE:
An infantry unit at high morale has a chance of doing something more if they are taken down. If this triggers, the player is shown a brief cutscene of the character getting back up. The player is given a few seconds to make one of two mutually exclusive decisions: have the character inspire nearby friends, or do a “last stand”. Failing to make a decision wastes the opportunity.
Anyway, inspiring allies increases their individual morale trackers, typically after the character spouts some one-liners that are supposed to be inspirational. “Last stand” has them getting up, with some APs left and being able to make another attack. They are rendered invulnerable, but will only stay so until they end their move. Ending their move knocks them out.
This gameplay element is only ever available to the named player characters that have their own faces. This will never be available to generic characters (like the soldiers whose eyes are always obscured).
GRENADIERS – OVERVIEW:
In the previous games in the series, the player’s only means of having units that can make attacks over and around obstacles are the throwing of hand grenades, or the use of mortar lances that only Lancers can use. Both are short-ranged and do not have high vertical reach, which limit their tactical value.
This has been addressed in the fourth entry through the introduction of the Grenadiers. These new units use long-range portable mortars that can be deployed and packed up incredibly quickly.
Grenadiers fire mortar rounds that follow very steep trajectories, meaning that they can go around and over most obstacles, including most buildings. Closer targets lead to steeper trajectories, further improving the rounds’ ability to circumvent obstacles.
According to the narrative, this technology is relatively nascent in the Federation’s militaries, and one of the main characters is responsible for its invention. The Empire does quickly make their own copies, however, so the player should expect Grenadiers on both sides of any battle. This can seem unbelievable, but there is a narrative reason for this that will be revealed in the storytelling.
MORTAR TYPES:
Like the Lancers, Grenadiers can eventually have up to three weapon variants to choose from. One variant is the default standard, whereas one is anti-armor and the third is anti-personnel.
The anti-armor variant is the most accurate, which is appreciated because it is best used against the weak spots of vehicles. Some enemy vehicles also happen to have their radiators on the top of their chasses, which makes the anti-armor mortar an essential.
The anti-personnel variant is the least accurate, but it inflicts the most damage on enemy infantry. It will be especially useful in getting rid of enemy shocktroopers that happen to be entrenched at places that have to be broken through.
GRENADIER AWARENESS:
The Grenadier has the advantage of receiving information on the whereabouts of enemies that have been spotted by their compatriots. If these enemies are spotted by their compatriots and they are within the front arc of the Grenadier, the Grenadier can perform interception fire against the enemy even if they cannot see them. This is described to the player in a tutorial, and it can be observed throughout the game.
However, the Grenadier will never become aware of any enemy that comes up to him/her from behind, even if the enemy is right next to them. In fact, the Grenadier has a minimum range in which he/she can do nothing.
GRENADIER INTERCEPTION FIRE:
As with other units’ interception fire, the Grenadier’s interception fire does not consume any ammunition. This interception fire does have considerable scatter, however, so it is possible that the target would not be hit at all.
Perhaps the most important thing to keep in mind is that the Grenadier does not change his/her facing so readily, due to his/her attack animations. Therefore, it is possible for the target to run out of his/her vision arc and get clear of the interception fire.
MORTAR TRAJECTORIES:
The control inputs for the use of Grenadier mortars have their own visual designs. They appear to be based on the visual designs of the control inputs for the use of hand grenades and mortar lances. However, they have much better contrast – which is just well because the player will need it.
That said, the trajectories end with a circle that represents where the mortar round might land; this is not unlike the targeting reticle for the primary weapons of other infantry units. This does not represent the area of effect, which – like the visual designs for the use of other explosive weapons – is not shown to the player.
Most of the time, the trajectories that are shown to the player are reliable. However, there are some that can seem misleading. There will be more on this later.
PLAYER’S VEHICLES - OVERVIEW:
In the first Valkyria Chronicles, the vehicles under the player’s controls were not particularly useful. The Edelweiss takes two CPs to use each time, and the light tank does not do much. The second game introduces APCs, which are just too flimsy and does not move far enough to be useful. In that game, the light tank is the only worthwhile vehicle, due to its cheap CP use and its ability to mount oversized turrets anyway. (I have no experience with the third game, so I could not say whether they were useful or not.)
The fourth game would rectify a lot of issues with the vehicles, and make most of them worthwhile to use.
THE HAFEN:
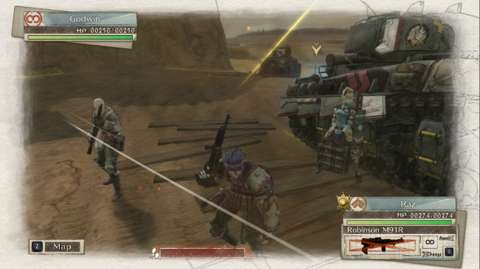
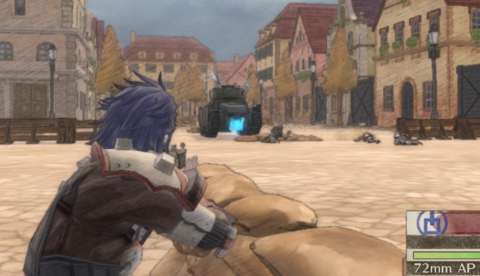
The Hafen is the main battle tank of the player characters’ squad. It starts with standard-issue, perhaps even outdated equipment. However, the tank can be upgraded into something else entirely; even its chassis is switched to something else (which would effectively make it a different vehicle entirely). Suffice to say that the looks and capabilities of the Hafen would be a marker for how far the player has progressed.
That said, the Hafen, like any other unit, only costs 1 CP to be activated. It does not have a lot of APs, but it will be the player’s most powerful unit throughout the game. Smashing through armored screens is its job, and it does so quite well as long as the player has been prioritizing its upgrades.
However, it should be pointed out that the Hafen, like any other vehicle, has a radiator. This is a weak spot, and even the CPU-controlled opposition knows this. Getting the otherwise nigh-indomitable Hafen knocked out because the player left the weak spot exposed is an embarrassment that is much deserved.
The Hafen has three weapons: the main mode of its cannon, the mortar mode of the same weapon, and the coaxial machine gun. These mix of weapons make it effective against any target, as long as they are within range and as long as the shots land. The Hafen’s significant disadvantage – other than its glowing weak spot – is that its weapons have rather lousy Aim.
THE CACTUS:
The Cactus is the APC of the platoon. APCs were introduced in the second entry of the series, and they were much maligned for being mediocre at their intended function. In this entry, thanks to the APC’s considerable reserves of APs (especially after it has been upgraded), the APC can help a lot in strategies that involve getting other units to critical locations – which is indeed its intended function. The player can also use the APC’s AP reserves to smash through fences and sandbag walls (more on these later), thus forcing entrenched enemy infantry out of cover.
Thanks to the APC’s relatively fast movement speed, getting its radiator hit is not much of an issue. Its only significant setback is that it cannot do much at all during the enemy’s turn, so the player must be mindful of where to put it before ending his/her turn.
GLORY:
After halfway through the playthrough, the light tank Glory joins the platoon. The light tank reprises the role of the one in the first game; it is intended to be an auxiliary tank. It can pack almost as much punch as the Hafen and it is much more mobile. It can also be upgraded to have considerable durability for a light tank.
Its disadvantage also happens to be its gimmick. The light tank can only ever mount just one type of weapon on its turret. It is a specialized weapon, however, and whichever it is, it is very effective at its intended purpose. However, this also means that the player needs to have fore-knowledge of what to expect in an upcoming mission in order to make the most of it.
VEHICLES NOT ALWAYS DEPLOYED:
Not every mission can support the presence of all vehicles, and very few ever allow the deployment of all three. The Hafen is almost always deployed whenever a mission allows the presence of vehicles, meaning that the Glory and the Cactus only ever gets deployed sometimes.
In some missions where vehicles are not allowed, the main player character, Claude, might be deployed, specifically as a Scout. This is not unlike what was done with Welkin in the first game. The presence of Claude means that Orders are available as long as he is functional, and Claude himself is one of the better-performing Scouts.
VEHICLES NOT ALWAYS USEFUL:
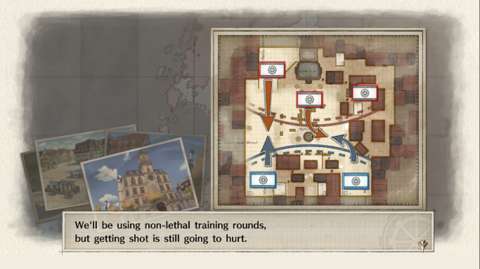
Even in missions where vehicles are available, they may not always be useful. This is mainly due to the layout of the map; many maps have areas where vehicles cannot pass through, thus limiting the player’s options with them.
BASES AND CAMPS:
Most maps have bases and camps, which are under the control of one or the other side. Bases and camps still work a lot like they did in the previous entries.
The base is the main camp of either side. Losing the base is usually the owning side’s failure condition while getting that base is the other side’s victory condition. Practically all skirmish missions will be about seizing the other side’s base while retaining one’s own. Control of camps is optional, but they give the same advantages as bases, so it is generally a good idea to capture them if getting the enemy’s base camp very early on is not possible.
As for their benefits, bases and camps significantly heal any damaged units that stay in them over a turn. This may be useful, if the player’s unit has been damaged in the attempt to seize a camp; having that unit stay at the camp over a turn is a good way to heal it and restore its ammo while also defending the camp from counter-attacks. Camps and bases are always ringed with sandbag walls too, so they provide cover for any defenders. Vehicles can also be parked there so that they can receive the benefits (and they count as defenders), though they likely will destroy some of the sandbag walls.
The player is more likely to use bases and camps for their other function: deploying and retreating units. Indeed, deploying units can help the player deal with any threats or objectives ahead of a seized camp.
ORDERS:
The first game introduces “Orders” as buffs; this has been so throughout the series, including the fourth.
Orders require CPs to be activated. The lesser ones need only one CP, but often affect only one unit. The more powerful ones understandably require more CPs.
If Claude is functional as a unit, Orders are available for use. The player will be shown a short (but not skippable) cutscene of Claude delivering the Orders, before their benefits activate.
The opposing side may have commanders that can deliver orders too. In such cases, they have their own set of orders, some of which may be unique to themselves.
Orders may be directed at a single unit, which grants the unit benefits such as increased defense and attack factors. There are also orders that are directed at all units, which of course do not require any targeting. The latter orders are a bit more expensive, but may be more practical if the player intends to use multiple units.
There are other Orders that do something else. For example, there is an Order that immediately causes requested reinforcements to appear immediately, rather than in the next turn.
The CPU-controlled opponent does not really know how to use Orders efficiently or effectively. Rather, it is programmed to use specific orders at specific turns, making them quite predictable.
The Orders that are available to the player are unlocked by visiting the Mess Hall at Headquarters (more on this later), or training the soldiery to specific levels (more on this later too).
DIRECT COMMAND:
In the third entry, the main player character has the ability to have other units follow him around. This gameplay element has been retained in the fourth entry, and has been extended to any officer and NCO. The main difference though is that this uses a separate resource: the “Special Point”, or SP. The player usually only gets one per turn.
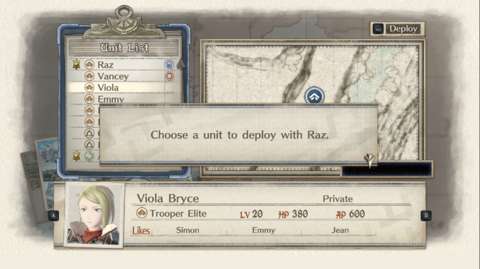
Before activating an officer or NCO, the player can choose to expend the SP on the unit; a CP will always be expended, by the way. After that, this unit can have up to two other infantry units following him/her around; they do not expend their own AP, and will be automatically placed next to the officer or NCO if their pathfinding fails for whatever reason.
In practice, this is not as useful as having the APC ferry units around. However, there are missions where the APC is not around and there are paths that the APC cannot go into, so the player would have to be creative in the use of Direct Command. As a tip, having Scout leaders like Minerva escort Grenadiers, Snipers and Lancers around is a good way to have these otherwise low-AP units get to where they need to be.
COOPERATIVE ATTACK:
When a unit makes an attack against an enemy and another unit on the same side happens to be close to him/her, the other unit might join in the attack too. This adds to the weight of fire, which can be useful if the intended target is tough.
This has been around since the first game. That said, Lancers still cannot join in, and Grenadiers cannot either. Vehicles that have machineguns can join in, but the player would have to wait for them to rotate their turrets so they may not contribute their volume of fire in time.
There are more than a few conditions that the player needs to consider before attempting to make a joint attack. The first is whether the other unit would join in the attack in the first place. The probability is increased if the other unit happens to like the attacking unit, and it is increased too if the other unit happens to have high morale.
That said, any unit that is being directed around by an officer or NCO will join in. The Hafen is also very likely to join in too.
The second condition is whether the target is within the range of the other units. Obviously, a Sniper will not be getting any assistance from anyone else other than another Sniper if the target is far away.
The third condition is unique to Snipers alone – specifically Elite Snipers. Elite Snipers can join in attacks, but will expend their ammunition doing so. Therefore, the player will want to be mindful of the proximity of player-owned Snipers, lest they run out of ammo when the player wants to use them.
SHIP ORDERS:
Ship Orders are the last gameplay element to be described, because they are also the least.
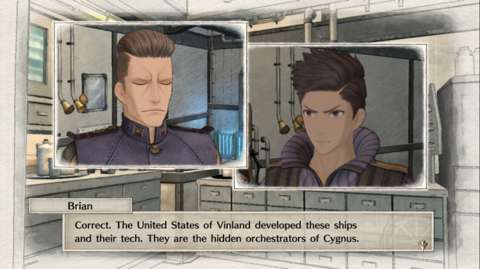
Halfway through the game, the headquarters of the player characters are replaced with an ice-crunching ship. The ship also packs advanced tech, developed by the United States of Vinland. These techs are the narrative excuse for the implementation of “Ship Orders”.
Ship Orders are off-map assets that the player can call in, generally for supporting vehicles. They can only be called a limited number of times before the ship runs out of readily available ordnance. Any Ship Order appears to draw from the same reserves.
There are four types of Ship Orders. One reveals the locations of undetected enemies, which would seem very useful especially if the player likes to use Grenadiers. The second is bombardment of an area. The third rescues any downed units, and heal the ones that are still up. The fourth returns a vehicle that has been knocked-out.
DISSATISFYING LIMITATIONS TO MOST SHIP ORDERS:
Most of these Ship Orders would seem useful, and would have been useful if not for their setbacks.
Each type of Ship Order also has limitations that reduce their usefulness. For example, the Emergency Fix order can only be used if vehicles have been knocked out. It cannot be used on still-functional vehicles to restore their hit-points.
For a Ship Order that is supposed to be devastating, Bombardment does not destroy anything other than units. It will not even detonate exposed Ragnite canisters.
The most disappointing setback is the limited range at which Bombardment and Radar can be used. Their range is centered on the commander of the mission (typically Claude and/or the Hafen); Bombardment, in particular, has very limited range.
The only useful Ship Order is Rescue Squad, which can be used to heal infantry units that are in trouble without having to activate them so that they can use their Ragnaid.
There are also many missions, especially in the main storyline, that do not allow the use of Ship Orders. This reduces their utility even further.
REDUCED DAMAGE TO UNDETECTED ENEMIES:
It is possible for the player’s units to hit enemies whose presence have not been detected during the player’s turn. The player may have unwittingly harmed them, or the player knows that they are there (probably after having reloaded a game-save).
In either case, there is a gameplay-balancing measure: the damage that is inflicted on them is substantially reduced.
IN-BETWEEN MISSIONS:
While the player is in between missions, the player would be either using the “Book Mode” or visiting the “Headquarters” to kit out and improve his/her forces.
The “Book Mode” lets the player pick missions to play; this is also how the player accesses the additional missions and challenges that occur outside of the main storyline. It should be mentioned here though that some missions are not unlocked if certain secondary characters have died.
“Headquarters” lets the player improve his/her forces. The Headquarters is typically a place where soldier training and hardware development is possible. Presumably, these activities happen in between missions; the series always has such a feature in its entries, and the chronological occurrence of these activities has always been hand-waved away. The player could even attempt earlier main-storyline missions with equipment and training that was not chronologically available at the time.
EXPERIENCE AND DUCATS:
The player’s reward for completing every mission is experience points (EXP) and ducats. Neither are acknowledged in the storyline.
The player’s performance determines the amount of EXP and ducats that are gained. Generally, finishing a mission in as few turns as possible and killing high-value targets grant the player more. That said, the game does not consider how many units that the player has been putting in harm’s way when calculating such rewards, so the player could resort to having units risk their lives to knock out key enemies.
SPECIAL WEAPONS & ACCESSORIES:
If the player’s performance is particularly commendable, e.g. not losing any units whatsoever and/or not getting them downed in the first place, the player is rewarded with special weapons and accessories.
Some special weapons are variants of the weapons that the player unlocks by developing them through the R&D feature in “Headquarters” mode, whereas some others are Imperial weapons. These weapons are side-grades, meaning that they have greater ratings in certain statistics while having worse ratings in others. Some special weapons also have secondary capabilities. For example, certain special semi-auto rifles can inflict a de-buff that reduces defense.
Special weapons will eventually be rendered obsolete as the player progresses down the R&D tree charts. The game attempts to address this by introducing more special weapons, which are practically more powerful versions of the special weapons that had been found earlier in the playthrough. The player can do nothing about the earlier and obsolete special weapons, however.
Accessories are either trinkets or additional gear that can be worn by any character that happens to be an infantry unit, or has a form as an infantry unit, e.g. the main player character. These impart benefits to the unit. For example, footwear increases the AP of unit, which is useful for units such as Shocktroopers.
SLEW OF MINOR PROBLEMS:
The gameplay experience of Valkyria Chronicles 4 is damaged by a myriad of minor problems that can be frustrating, especially to players who insist on what-you-see-is-what-you-get designs. These problems can be worked around, but are significant enough to be mentioned in their own sections.
SLIGHTLY MISLEADING TRAJECTORY FOR ANTI-ARMOR MORTARS:
After a certain point in the first playthrough, the player gains access to anti-tank mortars. The problem with this weapon is that the mortar round actually lands slightly ahead of the projected trajectory. Learning this the hard way can be unpleasant.
NO AREA OF EFFECT FOR EXPLOSIVE WEAPONS:
The first game in the series had problems with the use of mortar lances and hand grenades, which is that their area of effect is unclear. This problem has been retained, and made worse with the introduction of the Grenadiers.
UNCLEAR HITBOXES:
The game tries to show the player what could be hit or otherwise come into contact to through the visual designs of the models and terrain. Unfortunately, what the player sees is not what the player would have.
There are many maps in which terrain features appear to have larger hitboxes than they have, especially the edges and corners of walls and ledges. These pose problems when having a unit move around them and when shooting at enemies that are barely obscured by these terrain features.
The hitboxes of particularly large tanks also happen to be quite ambiguous; these can be frustrating if the player is trying to have a Lancer hit a tank’s radiator but the Lancer is not directly behind the tank.
The game does try to inform the player about terrain hitboxes through the map system, but only the full overhead map, as seen in Command mode, actually show these. The actual visuals during gameplay do not.
POORLY-DOCUMENTED POTENTIAL TRIGGERS:
Although the game does describe the concepts behind the Potentials of the player’s units, the equations or the exact mechanisms that trigger the Potentials are not told to the player. Rather, the player has to find them through observation and trial and error. In particular, none of the descriptions of the Potentials ever mention the probabilities of their occurrence.
NO REASON NOT TO DEPLOY MAIN CHARACTERS:
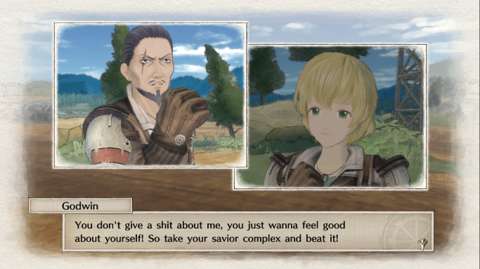
Like all of the previous entries in the series, there is no reason not to deploy the main player characters into combat. They have leadership badges, which make them very much a must-have in just about every mission, regardless of whether they are actually useful or not.
There is the aforementioned feature of assigning NCO’s with a leadership badge, which mitigate this minor issue a bit. However, being able to shift any leadership badge elsewhere would have addressed this issue entirely.
AIMING MODE DELAY AFTER STOPPING OF MOVEMENT:
If the player has been moving an activated unit around, the unit can only go into aiming mode after the unit has ended his/her movement animation. This can take a couple of seconds after the player has stopped making any control inputs for movement. This delay means that enemies can attack the unit during this time.
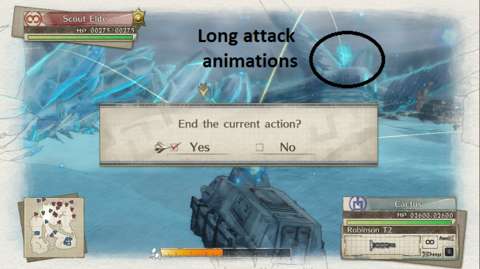
OTHER DELAYS DUE TO ATTACK ANIMATIONS:
In addition to aiming mode, certain visual occurrences could not happen until after attack animations have been completed. To elaborate, the game will wait for an activated unit that is making an attack to complete its animations before proceeding with other occurrences.
CAMERA STILL NOT GOOD ENOUGH FOR USING GRENADIERS:
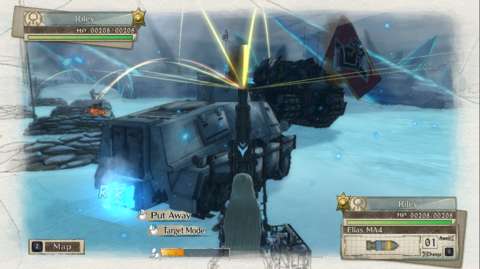
When the player is controlling Grenadiers, the camera’s vertical position can be raised in order to give the player a better view of what is ahead of the Grenadiers. Unfortunately, this is still not sufficient enough in aiding the player at getting a good firing solution. This is especially so in places where there are buildings or trees, which will obstruct the player’s view anyway.
VAULTING OVER COVER DEPEND ON UNRELIABLE PROMPT:
The player can have an infantry unit vault over a sandbag wall when a prompt to do so appears. Generally, this prompt appears when the unit is exactly in front of the wall. However, it will not appear if the unit is at the trailing tips of the walls. This would not have been a problem if these tips do not have collision hitboxes, but they do.
This also means that if there are units already in front of a stretch of sandbags, no other unit can vault over that wall.
GOING DOWN LADDERS IS NOT AS EASY AS GOING UP THEM:
As long as there is space for an infantry unit to get near a ladder at its bottom, using the ladder is not a problem; the prompt to do so will appear.
However, in the case of having a unit use a ladder to get down, the game will check whether there is any unit near the bottom of the ladder. If there is any, the ladder is rendered unusable to anyone that is at the top of the ladder. This is a difference that is not pleasant to learn the hard way.
Fortunately, this problem does not occur for watchtowers.
DUMB ENEMIES:
The aforementioned minor problems are insignificant compared to the most notable problem in the game: incredibly stupid enemies.
The opposition is mostly composed of unit types that the player has as well. However, the CPU-enemy is not entirely aware of their strengths and weaknesses. Consequently, its decision-making scripts frequently lead to bad decisions.
For example, weak units like scouts and engineers would run in front of the Hafen, which will kill them rather quickly (if its weaponry has been frequently upgraded). Another pervasive example is that enemy units never go for head-shots. Perhaps the worst gap in their intelligence is that they do not press their advantage, such as using the same shocktrooper twice to clear a base that the player is controlling.
Therefore, despite the advantages that the opposition has, such as their numerical superiority and strategic starting locations, cunning players would have little trouble defeating them. Players who already know what hurdles are ahead of them (typically by reloading game-saves) would trounce them even more soundly.
The most displeasing fact about this issue is that this has been a problem since the first game. Generic enemies are very stupid, and only the ones that have custom-made scripts are worthy challenges.
CHALLENGING ENEMIES HAVE COMPLETELY DIFFERENT RULES:
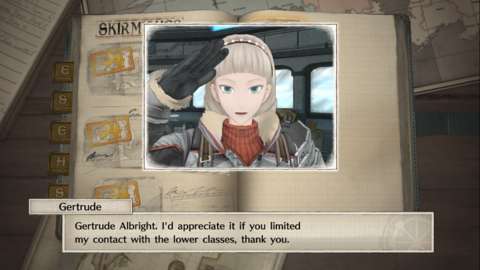
The enemies that are actually challenging play by completely different rules. The most notable of these are the Vulcan – the Hafen’s rival tank – and the antagonist Valkyria of this entry in the series.
The Vulcan can fire its machineguns on the move, and its interception fire includes its main cannon if the player makes the mistake of having his/her vehicle move in front of it.
The Valkyria is practically invulnerable. Unless the player’s units are underneath cover pieces that had been specifically coded to nullify her attacks, they are doomed. Defeating her requires the achievement of very specific objectives too.
PILLBOXES:
Since the player characters are driving through Imperial territory, some of the places that they will go through already have fortifications. These include pillboxes, which are among enemies that do not play by the player’s rules.
Pillboxes are very difficult to destroy; some are even rendered invulnerable. Their main threat is that they have considerably long-ranged heavy machineguns, which can tear apart any infantry that they can reach. However, pillboxes have narrow arcs of fire, and often have Ragnite canisters somewhere behind them. Indeed, eliminating pillboxes is as easy as blowing these up, which is possible if the player has Grenadiers.
ANTI-TANK CANNONS:
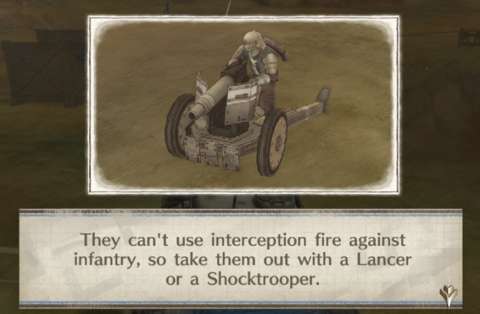
The previous games had gatling gun emplacements. These have powerful interception fire that are otherwise useless against armored vehicles. In this game, there are anti-tank cannons too. These work like the gatling guns, but are meant to be used against the player’s vehicles instead. The player’s infantry units will not draw interception fire from them.
In practice, these anti-tank cannons are as accurate as Lancers – meaning that they can only reliably hit broad targets like the Hafen. They can be easily dealt with if their anti-infantry support has been removed.
However, the player will want to keep in mind that the CPU-player can activate anti-tank cannons during its turn too, and they can fire on infantry. It is unlikely that any infantry unit can survive a direct hit.
SKIRMISHES:
Skirmishes are relatively simple missions that the player can attempt at any time to earn more XP and Ducats. They utilize the maps that appeared in the storyline missions, albeit with many sections that are blocked off with indestructible fences. Most of them are very easy.
POST-GAME:
After finishing the main storyline, the player’s playthrough is upgraded to “post-game” status. This unlocks additional content, such as certain DLC packages. More skirmish missions are also unlocked; playing these unlock additional non-canon characters for use.
The player also unlocks the Cenotaph, which lets the player return deceased characters to the roster, including those that die during the progression of the main storyline. This is very much non-canon. However, the player might want to regain these characters anyway, especially if they happen to be high-performance characters.
The most notable gameplay feature to be unlocked is the “Infirmary” and the “Renown” resource. The player now gains Renown in addition to Ducats and XP for completing missions. Renown can be used to unlock more features, such as further branches in the R&D feature and the ability to train soldiers to level 30.
DLC:
Sega is no stranger to producing DLC. Valkyria Chronicles 4 has more than a few DLC packages. One of them provides missions with greater challenges, but otherwise does not fix the aforementioned problems. One of the packages is practically fan-service; the player unlocks beachwear outfits for the main player characters. Another DLC package has the player using specific units from the roster of secondary characters, some of which are the least reliable units in the game.
These will be described in other articles, though it should suffice to say for now that they are supplementary material at best.
VISUAL DESIGNS:
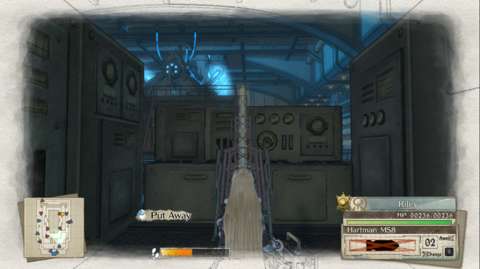
Valkyria Chronicles 4 is going for a water-colour painting and anime artstyle, much like the remaster of the first game. Therefore, it is still using a game engine that originated in the early 2000s, albeit spruced up to support things like present-day lighting. Tweaking the graphical settings lets the game be played on a wide variety of machines, which is much appreciated. Incidentally, lowering the graphical settings makes the water-colour effects more noticeable.
The age of the engine does show though, especially in the animations of lady characters who have long hair. Chocks of hair that clip through the rest of their models are a jarring sight. Objects in the environment, such as trees and (especially) the sandbag walls are notably stiff, much like they were in games that originated in the early 2000s.
The best visual designs are of course the conceptual designs for the characters and the vehicles. As to be expected of characters that have been designed by Raita Honjou, characters pretty much have the same facial shapes, with their rest of their features being the main differentiators.
The most amusing of these designs are of course those for the lady characters; Raita Honjou did not have the reputation of being a pervert for nothing. The animators of the game certainly capitalized on this, giving gratuitous secondary animations to some of the lady characters.
The player should not expect the kind of entertainingly frantic animations that one would expect from Japanese-developed action games though. In fact, many of the animations, while mostly believable, are slow and deliberate. The player cannot skip most of them, but they are thankfully brief enough not to be an annoyance. (There is the aforementioned problem about delays though.)
SOUND DESIGNS:
The best sound designs in the game are the sound effects for the weapons. Many of them would be familiar to gun enthusiasts, albeit they are not entirely authentic. Notable examples are the plink of infantry rifles being reloaded, a sound effect that is adapted from the iconic plink of M1 Garand rifles being fed with clips.
There are also a lot of explosions. Explosions fueled by Ragnite implosion, such as those of grenades, sound notably different from those that are caused by Ragnoline (liquid fuel derived from Ragnite), such as the explosions of doomed vehicles.
There are more than a handful of music tracks, but they are used so often for situations of similar themes that it would not be difficult for an observant player to predict which track is going to play next. The tracks do at least sound spirited, especially the orchestral ones.
Unfortunately, the voice-overs are the most problematic sound designs. To cite an example of a technical issue with them, voice-overs that happen during battle are easily cut-off, preventing the player from hearing the full clips.
WONKY TRANSLATION AND DUBBING:
The worst of the voice-overs are those in the dubbings. In particular, Sega has not contracted their voice-over partners well.
Personally, I could only endure the English voice-overs for several hours into the game. There is a lot of ad-lib in the translations, much of which does not give the player a good impression of the characters.
For example, there is a scene where Raz makes a remark about having to deal with enemies and raging fires. In the English dubbing, he mentions that he knows how to kill one of those. In the Japanese dubbing, he does not say that but sarcastically mentions that having both would be interesting.
Other examples include the many goofy remarks made about the curvaceous profiles of the lady characters. The problem is that the Japanese voice-overs did not include such remarks, or at least remarks that are not as avert as “T&A”, to cite an example of the slangs that are being hurled. Such remarks give the English versions of the characters personalities that are very different from their Japanese versions.
This problem has occurred in the localization of the first Valkyria Chronicles, and it is unfortunate that it is happening again.
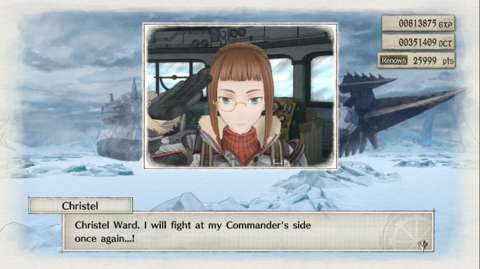
The Japanese voice-overs are more bearable than the English ones, but they are still the typical kind of voice-overs that the player would hear from TV anime. There are a lot of grunts, to cite a pervasive trope about Japanese anime voice-overs; this game has them too.
It would not take long for jaded players with little patience for anime clichés to simply skip past conversations and cutscenes as soon as they know the gist of them.
SUMMARY:
Much of the storytelling can be corny and cringe-inducing, especially to those who are already all too familiar with tropes in anime. However, the last quarter of the main storyline is the best part of the storytelling, because new revelations are made about how present-day Valkyria are exploited. There is more exposition on the United States of Vinland, a powerful but somewhat indolent member of the Federation that had been supplying the Federation with tech that is advanced enough to rival even the Imperial Alliance’s.
There are many, many minor gameplay problems, the most common being unreliable hitboxes. The most disappointing gameplay designs are the dumb CPU-controlled enemies, all the more so if they are supposed to be commanded by “brilliant” individuals.
The game still has enough saving graces to make it worthwhile playing, especially to people who had been following the series. In particular, the fourth entry would likely be satisfying to those who had been displeased at how Sega has been neglecting this otherwise original IP.

