Star Wars Rogue Squadron III: Rebel Strike Walkthrough
Need help against Darth Vader and his Imperial forces? The GameSpot Walkthrough to Star Wars Rogue Squadron III: Rebel Strike includes walkthroughs of every mission, including tips on how to get a gold medal, and locations of all upgrades. We've even included instructions on how to unlock all the spacecraft and secret features hidden within the game!
Design by Katie Bush
The Death Star has been destroyed but the Rebellion's work isn't finished. In LucasArts and Factor 5's Rogue Squadron III: Rebel Strike, you assume the role of Luke Skywalker, Wedge Antilles, and several other characters straight from the Star Wars trilogy. Rebel Strike blends classic Rogue Squadron gameplay with new ground missions, which place you in the heart of the trilogy's memorable moments, including rescuing the Princess from the Death Star, escaping the Hoth base overrun by snowtroopers, and chasing Boba Fett through the halls of Cloud City.
This comprehensive GameSpot game guide to Rogue Squadron III: Rebel Strike features:
General Strategies: This section covers general strategies for completing Rebel Strike's missions with medal status.
Tech Upgrades: Check here for details on all 11 tech upgrades and their precise location in the game.
Secrets: This section reveals an assortment of secrets, including how to unlock specific ships, such as the Slave 1, Millennium Falcon, and TIE bomber, and several passcodes.
Table of Contents
General StrategiesLuke's Campaign
Defiance on Dantooine
Defenders of Ralltiir
Extraction from Ralltiir
Battlefield Hoth
Trials of a Jedi
The Sarlacc Pit
Speeder Bike Pursuit
Triumph of the Rebellion
Relics of Geonosis
Deception at Destrillion
Guns of Dubrillion
Fondor Shipyard Assault
Tech Upgrades
Secrets
Chapter 1: General Strategies
This section covers general strategies for completing Rebel Strike and acquiring medals.
- When you're trying to complete missions for gold medals, remember that once you complete the mission in any fashion, you may unlock other usable craft. In many occasions, different craft--other than the default selection--could help you complete the mission more quickly.
- If you're falling short on the kill requirements of certain missions, order your wingmen to flee. If they're sticking with you, those wingmen may kill some enemies, which will make it more difficult for you to meet the requirement.
- If you have trouble beating a mission the first time, consider using the targeting computer, especially on missions when you must protect a specific craft. The targeting computer makes it easier to target TIE fighters or other threats to the craft you're attempting to protect. Using the targeting computer will cost you medals but it will help you complete the mission. Once defeated, you can go back and attempt the mission again, either with a better (or different ship) and the knowledge of what's to come so you can better prepare and anticipate the enemy movements.
- Accuracy is another requirement that can be tough to meet. Using accurate homing missiles is certainly wise but if it's a larger, more durable target, it's better to use lasers because you can fire many more lasers and each successful hit improves your hit to miss ratio. This keeps your percentage high. Practice shooting only when you need to. Against smaller craft, like TIE fighters, lead them with your crosshairs or wait until they turn and approach your position head-on. Center the incoming TIE in your crosshairs and fire a couple shots to destroy the Imperial craft.
- On ground missions, you can run at specific enemies to target them or stand in place while firing. Your character will target specific enemies and adjust targets after each kill.
- Another key to acquiring better medals is to get the tech upgrades. These are scattered throughout many missions (their locations are revealed in the walk-throughs and in the specific Tech Upgrade section later in this guide) and can boost your lasers, shields, and secondary weapons. Acquire the upgrades then return to previous missions and enter battle with stronger abilities.
Chapter 2: Luke's Campaign
This section provides walk-throughs for the missions that comprise Luke's campaign (non-bonus missions in which you control Luke Skywalker). These walk-throughs cover all objectives and provide extra tips on completing the mission with a gold medal. We've included the walk-through for the Triumph of the Rebellion level in Luke's campaign.
Revenge of the Empire
Briefing: The Imperials have landed on Yavin IV and are heading toward the Rebel base. Stall the Empire's advance and buy the Rebels time to escape.
| STATISTIC | GOLD MEDAL REQUIREMENT |
| Completion Time | 4:00 |
| Enemies Destroyed | 60 |
| Shot Accuracy | 65% |
| Friendlies Lost | 0 |
| Lives Lost | 0 |
| Targeting Computer Efficiency | 100% |
Objective: Destroy the Imperial transports.
Your first objective is to destroy six Imperial transports landing on the surface of Yavin IV. These transports are essentially lined up. You can destroy all six in a single pass if you position your craft correctly. Move your craft slightly to the right and aim toward the first Imperial transport. As you approach, use your primary laser fire to destroy the transport. Alternatively you could use torpedoes but it's just as easy to destroy the transport with laser fire. If you begin to approach the transport at close-range and still haven't destroyed the vehicle, use the "L" button to slow down temporarily.
Destroy the six transports in order. Luke will countdown the number of transports remaining to keep you abreast of the remaining targets. You can ignore the other targets unless you're seeking kills. It's highly unlikely you'd ever suffer enough damage to lose a life during this section if you stick to the transports.
GOLD MEDAL TIPS: You must balance speed and accuracy to achieve a gold medal in the Revenge of the Empire level. This first section can make or break both statistics if you aren't careful. First of all, it's wise to recover the advanced lasers tech upgrade from the Defiance on Dantooine level; the increased firepower makes it easier to eliminate the transports quickly. When this first section begins, order your wingmen to flee so they don't steal any kills. Approach the transports at close-range before opening fire so you ensure all lasers strike the target. You should have enough kills through the level to avoid the TIE fighters. A few misses could crush your accuracy rating so be very conservative with your trigger finger.
TECH UPGRADE: The advanced shields upgrade is found on this first section of the Revenge of the Empire level. Instead of destroying the fourth Imperial transport (if flying to them in the order they appear, not including the transport that doesn't land), fly through the transport and you'll automatically recover the advanced shields tech upgrade.
Objective: Destroy the Imperial loader shuttles.
There are six Imperial loader shuttles total and the first three are in front of your starting position. Approach the shuttles (note their design as the shuttles carry large storage crates which contain the Empire's AT-ST landing assault craft). You need to move forward and a bit to the left to locate the shuttles.
When you're within range, destroy the shuttles with your laser fire. Slow down your craft with the "L" button as necessary to destroy all three in a single pass. The third shuttle will require a slight turn to the right to destroy without making a second attack run against the group.
GOLD MEDAL TIP: Use the "R" button to increase your speed as you approach the first group of loader shuttles. Don't fire until you're very close so you ensure each of your ship's lasers strikes the shuttle target. Accuracy is very important here. Even though the shuttles provide a large target, it's easy to begin firing from too far away.
Revenge of the Empire - cont.
Objective: Defend the Rebel transport.
The last three Imperial loader shuttles are dropping their AT-ST cargo near a rebel transport. Turn 90 degrees to the left after destroying the third loader shuttle to find the transport. If you get lost, check your radar in the upper right corner and follow the indicator.
The Rebel transport is on the ground; the remaining three loader shuttles are depositing their cargo on small islands surrounding the transport. You must destroy either the shuttle before it drops the cargo, the storage crate before it opens, or the AT-ST once it emerges. Adjust your speed as necessary to eliminate these targets in a single pass.
GOLD MEDAL TIP: Use "R" to speed toward the targets. You should arrive at the nearest shuttle before the AT-ST emerges. Destroy the remaining two AT-STs in order. You should also destroy the boxes to maximize kills. Slow down your vessel so you don't have to make a second pass, which will waste valuable time. Line up your shot carefully to ensure greater accuracy.
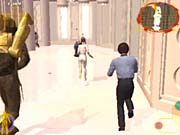
Objective: Find the General.
You now continue the mission on foot. Luke Skywalker and Wedge Antilles exit their craft and search for the Alliance General inside this fortress. Proceed through the hallway ahead and combat Imperial Stormtroopers with your blaster. The path through the halls is linear; simply follow the indicator in the upper right corner of the screen if you get lost.
GOLD MEDAL TIP: Tell Wedge to stay behind immediately (down on the directional pad). Wedge may steal some of your kills and you'll need to horde all of them if you are to receive a gold medal. Accuracy is also very important. Fire each shot individually (don't hold down the fire button) and shift to other targets as soon as your current target perishes. Grab Stormtrooper blast rifles as they'll be more potent against the Imperial targets.
The Stormtroopers aren't required targets until you reach the room containing the General (which somewhat resembles the throne room at the end of Star Wars: A New Hope). This room is immediately after you must use the "C-stick" to open the door. Shoot all of the Stormtroopers in the room to rescue the general. A cut scene interrupts the action and prompts you to begin your escape.
GOLD MEDAL TIP: The room containing the General can be tricky. It's important to balance speed with kills here. You must work quickly to complete the mission under the gold medal time limit but you also don't want the General and his Rebel escorts to steal too many of the kills. Move through the room to the far end and eliminate the Stormtroopers close to the General. If you leave these alone, the General and Rebels may eliminate them. Use accuracy shots. Watch the overhead radar to spot the red dots (indicating an enemy) and line up Luke appropriately. The problem with eliminating the farthest troopers first is that you must return near the entrance to finish off the rest. Once all troopers are dead, the exit opens and it's back near the General. You'll have to waste a few seconds returning there but it's more important to get the kills.
Objective: Escape with the General.
Exit near the upper right corner of the room. You don't need to wait for the General. Just move quickly. Follow the directional indicator to find the final area of the level: the hanger. Once again you must eliminate all of the Stormtroopers in this room to complete the objective. Unlike the room containing the General, begin with the Stormtroopers closest to the entrance and work your way toward the far end of the hangar. This should ensure you get most or all of the kills. Watch the overhead radar to spot the incoming enemies. Accuracy is likely the hardest requirement to achieve so try and make sure you are lined up properly before firing.
Defiance on Dantooine
Briefing: Rendezvous with the Imperial defector Tycho on Dantooine and deliver him safely to the Rebels.
| STATISTIC | GOLD MEDAL REQUIREMENT |
| Completion Time | 4:10 |
| Enemies Destroyed | 38 |
| Shot Accuracy | 42% |
| Friendlies Lost | 0 |
| Lives Lost | 0 |
| Targeting Computer Efficiency | 100% |
Objective: Reach the Imperial landing zone before the transports lift off.
The first segment takes place in the canyons of Dantooine; Luke pilots a speeder bike toward the Imperial landing zone in an effort to reach the site before transports lift off. The canyon is a series of twists and turns. The spires are the toughest navigational element; the spires jut out from the water and can obstruct your path. If you hit these spires dead on, the speeder bike will likely be destroyed.

A second challenge is the Imperial probe droids populating the canyon. You can avoid them completely by keeping the speeder bike away from them or shoot at them as you approach. They're tough to see; look for their light indicators and line up your crosshairs appropriately. Avoid the spires, the canyon edges, and the probe droids to reach the Imperial landing zone safely.
GOLD MEDAL TIP: Once again, it's a balance of speed and kills that can make or break your gold medal run. Use the "R" button to increase the bike's speed through the early part of the canyon. Note that you can cut corners around the canyon edges; most edges aren't tall and your speeder bike can move safely over them. You'll also need to target the probe droids, though. So don't speed through the sections with the droids. You may even consider using the "L" button to slow slightly to target the probe droid successfully. When Luke notes the landing zone is just ahead, you can gain a few seconds by hitting your boost and cutting the corner to the right and then remaining in the canyon center. This does bypass a couple of kills, however.
Objective: Stop the ground transport that's carrying Tycho.
The next section is on foot. You must guide Luke to the E-Web cannons and fire on the Imperial transport. There are Stormtroopers and probe droids in the area to impede your progress. Don't fire on the transport with your other weaponry; commandeer the E-Web cannons and use them against the transports.
Run forward and shoot the Stormtrooper using the first cannon. Move adjacent to the cannon and use the "C-stick" to utilize the cannon then move the sight with the directional stick. The transport deposits a trio of enemies. Shoot the enemies (you can't let these enemies just fire on you or you could perish eventually) then keep the crosshairs on the transport and hold down the fire button. You can also aim for the transport's front cannon. This is a great section to increase your accuracy. The transport will begin to move away; keep your crosshairs pinpointed on the transport's rear. Once it moves behind the rock, it's out of the cannon's line of fire. Press "B" to disengage then move forward.
Shoot the Stormtrooper at the next cannon then use the "C-stick" to commandeer the weapon. Shoot the enemies that exit from the transport then begin firing repeatedly against the transport's hull. The transport will begin to move off to the right. Keep your crosshairs on the vehicle and keep firing until it moves off the right side of the screen and out of your line of fire. Hit "B" to disengage.
The next E-Web cannon is on the left side of the path. Shoot the Stormtrooper and the two probe droids overhead while continuing to move to the cannon. Utilize the cannon and eliminate the enemies that exit the transport. Start firing on the transport once again (destroy its other front cannon if possible). It will move off to the left. Time to disengage and proceed to the next cannon. It's on the right side of the area. Kill the Stormtrooper and any probe droids, then use the cannon to finish off the transport.
GOLD MEDAL TIP: You can boost your accuracy score very easily here. Place the cannon crosshairs on the transport and fire as many shots as possible before the transport moves out of your line of fire. Look for bacta near the cannons to replenish your health if you've sustained a lot of laser fire during this section. Also, be sure to hit the enemies the exit the transport. If left alone, they could kill you. Shoot carefully to maintain accuracy! Finally, shoot the probe droids as you move between cannons for additional kills.
Objective: Follow Tycho back to the Rebel landing zone.
Now Luke and Tycho race back to the Rebel landing zone on speeder bikes. It's very difficult to get hit by enemy fire here; it's nearly as hard to hit enemies with your own fire. A wise strategy may be to concentrate solely on driving and don't worry about getting any more kills. Avoid getting hit as necessary but worry most about remaining on track and successfully completing the required jumps.
Listen for your cue to jump. To complete the jump, hit the "R" button to boost just as you breach the edge of the canyon. Pull the directional stick back while holding the "R" button down and guide your speeder bike down to the next path. Dodge spires as necessary and listen for the second jump. Complete the jump in a similar fashion: hold down the "R" button, pull back on the directional stick, and guide your bike down to the landing zone.
TECH UPGRADE: After the second jump, move your speeder bike to the path on the left. You may need to use the "L" button to slow as you traverse this path. Run over the power-up to secure the advanced lasers tech upgrade. This is an ideal tech upgrade to possess; it makes nearly every mission much, much easier (particularly for achieving higher medals).
You can fire on the transports on these paths to increase your accuracy, though you likely won't need it. Shoot a few probe droids if possible if you need the kills. You'll eventually dive down into a canyon (once again using the boost button to jump). Dodge the TIE bomber bombs as you move through the canyon. Use boost to increase your speed toward the Rebel landing zone. Reach the destination to complete the level successfully.
Defenders of Ralltiir
Briefing: Locate and defend scientists trapped on the besieged planet of Ralltiir.
| STATISTIC | GOLD MEDAL REQUIREMENT |
| Completion Time | 3:30 |
| Enemies Destroyed | 25 |
| Shot Accuracy | 48% |
| Friendlies Lost | 0 |
| Lives Lost | 0 |
| Targeting Computer Efficiency | 100% |
Objective: Destroy the Imperials threatening the shield generator.
You begin the mission in a snowspeeder just to the left of a bridge. Slow down using the "L" button and shoot the AT-PTs crossing the bridge. Increase speed to the far end of the bridge and destroy the three APCs at the end. Shift course to the map's center. You'll spot the shield generator; scattered around the shield are flashing lights on the ground. These are bombs! Fly over one of the flashing lights and start pressing the "B" button to activate your tow cable. The bomb will become attached to the tow cable and fly behind your craft.

These bombs can destroy the bridges (where the Imperials are arriving from) and AT-AT walkers. After grabbing the bomb, fly through the map center and aim a bit to the left until you spot the bridge in the distance. Fly toward the pylons at the front of the bridge (the short ones that hold the bridge at the land). Aim your snowspeeder just above the pylon so your bomb drags underneath and behind and makes impact with the top of the pylon. A cut scene revealing the bridge's destruction will play.
TECH UPGRADE: If you follow this walk-through, find the Imperial transport on the other side of the first destroyed bridge (it's positioned perpendicular to the bridge). Destroy the transport to reveal the power-up icon. Fly over the power-up to recover the advanced targeting computer tech upgrade. If you get lost, just shoot all three Imperial transports across the bridges to find whichever one contains the upgrade icon.
Return to the shield generator and pick up another bomb. You can aim at some targets of opportunity but it's generally safer to just get back to the generator, grab another bomb, and head toward the next bridge. Don't bother with the AT-AT walkers yet. The faster you can destroy the bridges, the better off you'll be. With the bridges destroyed, the Imperials will have fewer troops near the shield generator.
Pick up a second bomb and find the next bridge on the outskirts of the town. Just fly toward the edge and move left or right until you spot the high pylons. Once again, ram the bomb into the top of the front pylon and the bridge will be destroyed. Repeat the process for a third time to destroy all three bridges and eliminate most of the threat.
Now it's simply mop up time. Find any stray APCs and AT-PTs and destroy them. Search near the shield generator and grab another bomb while you're at it. It's time to finish off the AT-AT walkers. To do so, you can either use the snowspeeder's tow cables in Star Wars: The Empire Strikes Back fashion (activate the tow cable under the AT-AT walker and wrap the cable around the walker's legs) or you can fly over the AT-AT walker's head and ram the bomb into the vehicle's cockpit. The mission ends successfully once all enemies are eliminated.
GOLD MEDAL TIP: Destroying the bridges quickly is still the way to go, though you will cost yourself some kills. The APCs are worth multiple kills (as they hold extra troops) when destroyed in standard fashion; if you destroy the APCs by eliminating a bridge, you only receive one kill. You won't have time to wrap the walker legs with tow cables if you want a gold medal, so use the bomb method. Watch the overhead radar for the location of remaining forces.
Extraction from Ralltiir
Briefing: Rescue scientists hiding in the ruins of Ralltiir.
| STATISTIC | GOLD MEDAL REQUIREMENT |
| Completion Time | 4:00 |
| Enemies Destroyed | 100 |
| Shot Accuracy | 45% |
| Friendlies Lost | 0 |
| Lives Lost | 0 |
| Targeting Computer Efficiency | 100% |
Objective: Clear the way to the Blockade Runner.
Luke pilots an AT-ST walker to escort the rescued scientists to the Blockade Runner. The Imperials attempt to impede your path with an assortment of APCs, Stormtroopers, E-Web cannons, AT-STs, and probe droids. Round the first corner to the left and eliminate the large group of troopers. Note that the AT-ST has secondary missiles that work well against tightly packed enemy groups and can also weaken APC hulls. Target the APC further down the path and eliminate it on the run.
You will need to kill everything in your path. If you neglect a Stormtrooper or two, the scientists will be wiped out. You don't need to wait for them. Just make sure you've killed everything then hurry to the next group of enemies. Round the next corner to the right and eliminate the AT-ST and surrounding foes.

TECH UPGRADE: After the first right turn, look in the alcove to the right to find the power-up icon. Move your AT-ST over the icon to secure the homing photon torpedo tech upgrade.
There's only one path through these streets. Some things to watch for: the Stormtroopers manning the E-Web cannons can be difficult to hit, so aim precisely before firing to maintain accuracy. Watch for additional troops exiting the APCs, and don't neglect the probe droids hovering over the areas. The final area of the level contains a group of AT-STs in a semi-circle formation. Eliminate them from left to right to complete the section.
GOLD MEDAL TIP: Accuracy, kills, and time must be balanced to score the gold medal. You don't need to wait for APCs to deposit their troops; just start firing on sight and keep firing until the vehicle explodes completely. Aim carefully as the Stormtroopers aren't very large targets. Utilize your secondary weapon when faced with a larger trooper group.
Objective: Regain control of the Blockade Runner.
Now you control Luke on foot through the Blockade Runner. You must kill Stormtroopers and follow the directional indicator on the overhead radar to complete the section. It's difficult to get lost. Just follow the indicator through the ship. You'll eventually reach an E-Web cannon. Troopers appear to the left and the right. Defeat this last section of enemies to complete the level.
GOLD MEDAL TIP: You should be able to boost your accuracy scores here as most of the troopers aren't hard to hit. Line up correctly and shoot just enough to kill the trooper before aiming toward the next. Watch for troopers trying to hide behind crates. Don't shoot at the enemies ducked behind cover; move to the side of the enemy to get a better shot. For additional kills, go right when the path first splits to the left and right. The right is a dead end but there are two more troopers to kill here. When you reach a hallway with an open doorway on the right side of the screen, kill the two enemies down the hall before moving through the open door.
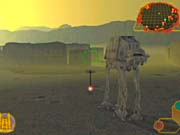
Battlefield Hoth
Briefing: After crash landing in your snowspeeder, you must find your way back to Echo base.
| STATISTIC | GOLD MEDAL REQUIREMENT |
| Completion Time | 5:30 |
| Enemies Destroyed | 60 |
| Shot Accuracy | 20% |
| Friendlies Lost | 0 |
| Lives Lost | 0 |
| Targeting Computer Efficiency | 90% |
Objective: Take out the two lead AT-ATs.
Luke Skywalker has just crash landed in his snowspeeder. Your first task is to eliminate the two lead AT-AT walkers. You begin just behind the first AT-AT walker. Run underneath the walker, taking care not to get stomped by the AT-AT's huge appendages. Get directly underneath the walker and use the "C-stick" to launch the grappling device onto the walker's belly.
Once attached, press the directional stick up to ascend the grappling device. When you're adjacent to the walker's belly, press the "A" button a few times to use Luke's lightsaber to open a hatch in the walker's underside. Press "B" to toggle a new first-person view. Adjust the crosshairs with the directional stick. When the crosshairs is over the opening in the hatch, press the "B" button again to toss the explosive inside the walker. One down, one to go!
You drop down automatically. Avoid the walker's feet and head just to the right and spot the second walker. Snowtroopers block the path so be ready with your blaster. Scurry quickly to the walker and eliminate the snowtroopers in your path. Once underneath the second walker, perform the same moves you did before: C-stick to launch grappling device, up on the directional stick, "A" button to blast open the hatch with the lightsaber, and "B" to enter first-person mode and "B" again to toss in the explosive after you've lined up the crosshairs.
GOLD MEDAL TIP: Work quickly, and don't get killed by the walker's feet. When moving between walkers, be accurate with your shots against the snowtroopers. Weave to the left and right slightly to target as many as possible.
Objective: Get to the Tauntaun.
You automatically drop down from the walker. Move to the right and find the blue insignia over the Tauntaun. Proceed to the Tauntaun as quickly as possible. There are a few Snowtroopers along the way. Eliminate them with your blaster and reach the Tauntaun to complete the objective.
GOLD MEDAL TIP: Don't fire on these snowtroopers too soon. They're pretty far away so you'll just lower your accuracy rating if you fire immediately. Wait until you're within range then fire. Adjust your heading slightly to target other Snowtroopers but don't hesitate much as you near the Tauntaun.
Battlefield Hoth - cont.
Objective: Follow Derlin back to Echo base.

Now you're on a Tauntaun! Start forward from your initial location and shoot the Snowtroopers in your path; you can use the "A" button to fire forward or the "C-stick" to fire in other directions while moving forward. Rack up some kills by weaving left and right through the Imperial forces. Return to the Rebel forces and reach the red insignia to complete the objective.
GOLD MEDAL TIP: If you're continually missing a gold medal by kills, this portion of the level is the best place to rack some up. There are plenty of snowtroopers to kill. Find and kill as many as necessary without taking too much time in the process. And remember, you should also remain as accurate as possible. Line up with the snowtrooper before firing your blaster.
Objective: Destroy the three AT-STs.

You disembark the Tauntaun. Run forward toward the E-Web cannon and eliminate all the snowtroopers in your path. Utilize the cannon by using the "C-stick" when you're standing next to the weapon. The Imperial forces arrive via shuttles just to the right of your initial cannon viewpoint. The AT-STs are your primary target, though you should also eliminate the ground troops for additional kills.
TECH UPGRADE: Blast the right-most AT-ST and storage crate to uncover a tech upgrade. After destroying the AT-ST and crate, disengage from the E-Web cannon and run over there. Move over the power-up icon to recover the advanced cluster missile tech upgrade.
Objectives: Protect the three Rebel transports. Destroy the TIE bombers.
This is the most difficult part of the level. There are so many enemy fighters in the area that it can be challenging to spot the TIE bombers and protect the transports adequately. If all three transports perish, the mission ends in failure. Enable your speed boost to move toward the first transport. You will be able to spot a group of TIE bombers moving off to the right side of the screen. The TIE bombers move in groups of four. Target the upper three in each group of four to prevent them from scrambling (the bottom is the leader; if he's destroyed, the others scramble).
Each transport is under attack so you must move quickly. A good strategy is to destroy two or three from a bomber group then move on to another transport. A group of four can pummel a transport quickly but a single bomber can't inflict a whole lot of damage in a short period of time.

Listen for the audio cues that reveal when transports are under attack ("We can't take much more of this!") and proceed to that transport quickly. You can see from a distance which transports are under attack. First, the ships moving directly around a transport are likely the bombers. Also, as the transport sustains damage, it begins to spark and smoke. When the Rebel transports reach the rendezvous, the mission ends successfully.
GOLD MEDAL TIP: You must save all three transports to receive the gold medal. Homing photon torpedoes will certainly be helpful; this tech upgrade can be found on the Extraction from Ralltiir level. Try to destroy the first TIE bomber group with torpedoes or at least knock them down to a single bomber. Move on to the middle or far left transport and clear those bombers. Pay close attention to the audio cues. Accuracy is important but the gold level requirement is only 20%, so if you've been solid up to this point, you can afford some misses. Hit a few targets of opportunity (TIE fighters) if possible to ensure you meet the kill requirement. Also, the targeting computer efficiency is only 90% for a gold medal. You can use it very briefly during this final section to help find bomber targets.
Trials of a Jedi
Briefing: Train in the Force with Master Yoda on the swamp planet of Dagobah.
| STATISTIC | GOLD MEDAL REQUIREMENT |
| Completion Time | 4:30 |
| Enemies Destroyed | 22 |
| Shot Accuracy | 100% |
| Friendlies Lost | 0 |
| Lives Lost | 0 |
| Targeting Computer Efficiency | 100% |
Objective: Find your way to the strange creature's home.
As Master Yoda warns, stay out of the water! Head to the right and jump over the water to each of the floating logs. Line up your first jump correctly by standing on the rock platform at its edge then move to the right and jump. When you reach the next piece of land, swing the lightsaber ("A" button) and kill the creatures and their small hut. Continue across the next set of jumps. This set includes a moving creature as one of the landing pads. Jump when the creature is nearing the center so you land on its widest part. Kill more creatures on the other side and scurry up to the hut to greet Yoda.
Objective: Complete Yoda's lightsaber blocking tutorial. Complete Yoda's double-jump tutorial.
In Yoda's first tutorial, you must use the Force and the lightsaber to deflect the laser bolt. Hold down the "B" button when the laser bolt approaches Luke's front side. Just block the laser bolt a single time to complete the task.
The second part of the tutorial is the double-jump. Press the jump button to leap into the air and at the peak of your jump hit the jump button again to perform a double-jump.
Objective: Follow Yoda back to the X-Wing.
Now you must make your way back to the sunken X-Wing. Head toward R2-D2 (grab the bacta next to him if you need it) then go to the left. Perform double-jumps to reach the logs. Follow the indicator on the radar to find the correct route. Leap over the floating rocks and defeat the creatures on the far side. Move around the trees to the left to find the path.

The next jump is over a log moving vertically. Leap over then proceed into the gulley. Dodge the moving rocks by shifting your directional stick to the left and right. Leap up the next set of rocks (they fall if you stand on them too long so work quickly) and find R2 at the top with another bacta tank.
Traverse another set of jumps over floating rocks. Just follow the indicator if you get lost. You'll eventually reach another jumping puzzle to the left. Now you must cross a couple of moving creatures. Jump when the creatures are lined in the middle so you land on their largest spot. Kill some creatures on the far side (two sets) and make the final large double-jump toward the X-Wing.
Objective: Raise your X-Wing from the swamp.
Yoda instructs you on how to raise the X-Wing: hit the "B" button rapidly! Press the "B" button quickly but steadily. You will see the X-Wing rising from the water. Don't stop hitting the "B" button until the cutscene interrupts the action (the X-Wing will drop and the "B" button icon will disappear). The mission concludes once the cutscene begins.
GOLD MEDAL TIP: It may take a couple times through the level to master the jumping puzzles. To beat the time requirement, you must avoid the water as much as possible. You won't lose a life for falling into the water a couple times but you will lose precious time. When you reach the creatures, kill a couple and make sure you eliminate the hut.
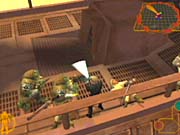
The Sarlacc Pit
Briefing: Use your Jedi powers to fight your way to freedom from the forces of Jabba the Hutt and the dreaded Sarlacc Pit.
| STATISTIC | GOLD MEDAL REQUIREMENT |
| Completion Time | 1:12 |
| Enemies Destroyed | 16 |
| Shot Accuracy | 100% |
| Friendlies Lost | 0 |
| Lives Lost | 0 |
| Targeting Computer Efficiency | 100% |
Objective: Get to Jabba's Sail Barge.
Luke Skywalker has just received his lightsaber from R2-D2 in this action scene from Star Wars: Return of the Jedi. You begin on one of Jabba's skiffs and are standing next to one of Jabba's guards. Strike him down with the lightsaber ("A" button). Now you must wait until another skiff moves to your left. Meanwhile, guards on Jabba's Sail Barge are pelting you with laser fire. Face the Sail Barge and hold down the "B" button to deflect the laser fire and prevent Luke from sustaining damage.
When the next skiff moves to your left, perform a double-jump onto the adjacent skiff and strike down the two guards with your lightsaber. A movie scene plays depicting Han Solo eliminating the infamous bounty hunter Boba Fett.
Face the Sail Barge again and hold down the "B" button to deflect the laser bolts. Watch to Luke's left for one skiff to move off to the right and a second skiff to approach from the left. When the second skiff passes by to Luke's left, perform a double-jump onto the skiff and kill the two guards with your lightsaber. You should now be on a skiff moving to the left. Deflect the laser bolts as necessary by facing toward the screen and the Sail Barge.
You can make a decision here. You can stay on this skiff as it moves around to the left and circles in front of the Sail Barge or you can leap onto another skiff that moves adjacent to Luke and heads back to the right. The second skiff moves closer to the Sail Barge but takes a lot more time. Stay on the same skiff going left. When you're just parallel to the Sail Barge, perform a double-jump to land onto the side. Keep jumping over the railing to reach the deck.
Objective: Protect Leia until she gets to the deck gun.
Jabba's guards exit from the hatch in the deck's center and move to attack Leia; she's trying to reach the gun to point it at the deck. Kill the guards exiting the hatch to prevent Leia from being hurt. Listen for Luke to call out "Point it at the deck!" and the task is almost complete. Ensure Leia's safety by finishing off the remaining guards. Finish this objective to complete the level.
GOLD MEDAL TIP: To get the gold medal, just make two skiff jumps. Stay on the skiff that moves around to the left and in front of Jabba's Sail Barge. This will cut down some time. Now, just make sure you protect Leia. Kill the guards along the railing for plenty of kills.
Speeder Bike Pursuit
Briefing: Use your speeder bike to chase down Imperial scouts before they alert the Imperials guarding the shield generator.
| STATISTIC | GOLD MEDAL REQUIREMENT |
| Completion Time | 4:00 |
| Enemies Destroyed | 9 |
| Shot Accuracy | 9% |
| Friendlies Lost | 0 |
| Lives Lost | 0 |
| Targeting Computer Efficiency | 100% |
Objective: Destroy all biker scouts.
This is a segment of the classic scene from Star Wars: Return of the Jedi. As Luke, you must pursue a group of biker scouts on speeder bike and prevent the Imperials from reaching the shield generator. The primary challenge is avoiding the giant redwood trees. You do have a path but as you get deeper into the forest, more and more trees clog that path. You must dodge the vertical trees left and right; if you smack a tree head on, you will perish. Don't worry about going up and down to avoid horizontal trees.
Biker scouts will move both ahead of you and beside you. The scouts that move ahead of you can easily be shot with your speeder bike's primary laser cannon. The scouts that move beside you will attempt to ram your speeder bike into the trees. You can use the "B" button to punch at the opposing speeder bikes but it's easier just to push the enemy bike into a tree without the "B" button. Just move the directional stick against the enemy bike and attempt to guide him into a tree.
You can use the speeder bike's boost (R button) and brakes (L button) to help guide you through the forest. Strategic use of the brakes can save you from smacking a tree head-on. You can survive brushing against a tree but a dead-on strike will nearly always destroy your speeder bike.

The forest gets more narrow as you continue onward so be prepared to be much more careful dodging the plentiful trees. The final biker scout will latch onto your speeder bike. You won't be able to push him into trees; he's affixed on your speeder bike and won't budge. Don't move around wildly. Simply avoid the trees and stay alive until the cutscene starts.
GOLD MEDAL TIP: The most important statistics when trying to get a gold medal here are time, shot accuracy, and lives lost--you can't lose a single life if you wish to achieve a gold medal! Time is easy to handle: just use the boost occasionally and you should have little trouble beating the time. Even though the shot accuracy requirement is very low, it's still a challenge to meet 9% since your speeder bike fires multiple lasers at once when fully charged and the speeder bikes aren't the easiest targets. Speed up slightly to get closer to the bike targets and fire when you're perfectly lined up.
TECH UPGRADE: After the forest path narrows considerably, you'll spot what appears to be a dense section of trees along the left edge. Nearly immediately after this dense section, the path splits to the left and right. Your natural instinct will be to stay to the right since the left path isn't visible until the last possible second. However, apply your speeder bike's brakes and enter the left path. Maneuver down this left route slowly with brakes applied and run over the power-up icon to acquire the homing concussion missile tech upgrade.
Objective: Defeat the last biker scout.
A cutscene shows Luke Skywalker being knocked off of his speeder bike. The last biker scout turns around and makes a run at the Jedi Knight. When you regain control of Luke, you can block the laser bolts by pressing and holding down the "B" button but it's not necessary. Your sole task is to swing the lightsaber ("A" button) the moment the biker scout passes adjacent to Luke. Wait for the two objects to connect (Luke and the enemy speeder bike) then hit "A" to complete the objective. If you miss, wait for the scout to make another pass and eliminate him.
Triumph of the Rebellion
Briefing: Rebel forces are pinned down outside the shield generator bunker. Using a captured Imperial walker, blast your way through the battle to save the team.
| STATISTIC | GOLD MEDAL REQUIREMENT |
| Completion Time | 5:20 |
| Enemies Destroyed | 80 |
| Shot Accuracy | 28% |
| Friendlies Lost | 0 |
| Lives Lost | 0 |
| Targeting Computer Efficiency | 100% |
Objective: Fight your way to the bunker before Han and Leia are overwhelmed.
You're piloting a stolen AT-ST and the Imperials are about to find out! This first section is pure shooter bliss--just shoot everything in sight and follow the directional indicator on your radar to the shield bunker to aid Han Solo and Princess Leia. There are tons of targets; you'll find Stormtroopers and biker scouts scurrying across the forest floor and Imperial AT-STs firing their weaponry at the indigenous Ewoks assisting the Rebel forces.
Note that you can shoot or run over many of the thinner trees to clear them from your path. Just keep moving toward the directional indicator and target any enemy AT-ST on your viewscreen. And when there's no enemy AT-ST around, fire on the Imperial troopers scampering madly around Endor's forest floor. Don't forget your AT-ST's secondary weapon; aim your crosshairs at the enemy AT-ST's cockpit and fire to reduce the enemy vehicle to rubble very quickly.

Another element to this first segment is the ability to control Ewok weaponry and traps, specifically catapults, log swings, and log rolls. It's not mandatory to utilize these extra gimmicks to complete the mission. In fact, some can hurt you as well, so it pays to be careful. For instance, if you try and crash an enemy AT-ST with the log roll, then you better dodge those logs on the ground also or your AT-ST will stumble and crash costing you a precious life.
TECH UPGRADE: You'll find the tech upgrade on Triumph of the Rebellion early on. Follow the path (just move where the directional indicator shows you) and when you find the first set of Ewok catapults (watch for the "Catapults" message to appear in the upper left corner meaning you can call on their assistance with the directional pad), turn right and head into the forest. If you look at the overhead map, you'll spot an alcove here to the right of the catapults. Spot the power-up icon in the corner. Get close to it and recover the homing Cluster missile tech upgrade.
GOLD MEDAL TIP: You need 80 enemies killed to receive a gold medal so don't rush through the forest without blasting some Imperial troops. Balance speed, kills, and accuracy through this initial section. While you should keep moving the entire time, don't neglect the fact you need some extra kills to reach your goal.
Objective: Fight your way to the bunker's control room. Plant the explosive charges.
Once you reach the shield bunker, you switch to Han Solo. You now control his movements inside the bunker. Orders are to plant three explosive charges inside the bunker. An insignia marks the spot for each of the three charges. Battle the Stormtroopers with your blaster rifle and proceed into the bunker's control room. There's the first insignia here; walk up to the insignia and when prompted (if you aren't, move around slightly to find the correct spot) use the "C-stick" to plant the charge.

Enter the generator room of the bunker. The catwalk splits to the left and right. There are insignias down each path marking the correct location for the final two explosive charges. Beware of the Imperial troops along the catwalk. Eliminate them and plant each charge to complete the objective.
Objective: Fight your way out of the bunker before it explodes.
The Rebel traitor Sarkli attempts to block your escape from the shield bunker. Fire your blaster at him as you proceed toward the bunker's exit. Just keep running and blasting and you'll finish him off and exit the bunker. Enjoy the Rebellion's victory over the vicious Empire!
Chapter 3: Wedge's Campaign
This section provides walk-throughs for the missions that comprise Wedge's campaign (non-bonus missions in which you control Wedge Antilles). These walk-throughs cover all objectives and provide extra tips on completing the mission with a gold medal.
Raid at Bakura
Briefing: Attack the Imperial holding facility orbiting Bakura. Disable the Imperial transports and give the Rebel evacuation teams time to offload the prisoners from Hoth.
| STATISTIC | GOLD MEDAL REQUIREMENT |
| Completion Time | 8:30 |
| Enemies Destroyed | 97 |
| Shot Accuracy | 28% |
| Friendlies Lost | 0 |
| Lives Lost | 0 |
| Targeting Computer Efficiency | 100% |
Objective: Disable any fleeing Imperial transports. Provide cover for the Rebel recovery crews.
You enter the mission with one transport already disabled; the other Imperial transports are still docked so there's no need to worry about them until you're notified of their presence. Your first order of business should be to concentrate on battling TIE fighters. You can order your wingmen anyway you wish. Seek out groups of TIE fighters and either lead their path as you approach or wait from them to turn and attack and blast the TIE fighter as it closes on your craft's nose.
A Rebel transport will enter shortly and dock with the disabled Imperial transport. While docked, the Rebel transport is vulnerable to enemy TIE fighter attack. The Rebel transport can survive for an extended period of time, but if left unprotected, the Rebel transport could perish during the extraction or when it attempts to escape the area. The easiest way to protect the Rebel transport is to move toward it by following the indicator on your radar. When you approach, watch for the TIE fighter green laser bolts. Follow the bolts to their source and target those TIE fighters attacking the transport. It shouldn't take much to save the Rebel transport from the attack. Just get a group or two off its tail and it should leave the mission space successfully.
After it leaves, resume killing TIEs until you're told an Imperial transport has left the station. Find it using the directional indicator and disable the transport using your ion cannons. Hold down "B" to charge the ION (your crosshair will turn blue) and let go to fire the cannon at the transport. Hit it three times with the B-Wing's ION to disable the transport.
Perform a similar task with the third Imperial transport appears. It's on the far side of the station and can be tracked down using the directional indicator. Take out any targets of opportunity as you approach the transport. Two Rebel transports will enter the area and dock with the Imperial ships. TIE fighters will attack these vessels but it's unlikely they'll inflict mortal damage. Protect the second transport more vigorously and keep TIEs from firing on the Rebel ship.

When the second Rebel ship disembarks the area, the mission either ends or continues. The mission will continue on if you have achieved at least silver medal status. Primarily this will depend on how many enemies you've killed (TIEs and the station's guns). You must kill at least 45 enemies to achieve silver medal status. If you don't reach silver medal status, the mission concludes and you won't play the next objective.
GOLD MEDAL TIP: To receive a gold medal, you must be able to complete the mission's second section. That means you must get at least silver medal requirements on the first part, which is at least 45 kills. This is easiest accomplished in the B-Wing because you'll have use of its secondary missiles (the Y-Wing's bombs aren't helpful). It will be particularly easy if you have acquired the homing missile tech upgrades. Use all of your missiles to eliminate TIE fighters (since you won't need them in the next objective).
Objective: Locate and rescue Hobbie.
Wedge steals a TIE bomber to locate and rescue Hobbie. Fly low through the canyon (to avoid the upper defenses) and use the TIE bomber's missile weaponry to eliminate structures. You don't have any lasers, only missiles and bombs.
The easiest way to complete this part of the mission is to stay very low, almost near the ground. Use your missiles (hold down the "A" button) to target the ground defensive structures and destroy them. For the larger ground structures, you can either fly under them or fly above them and drop some bombs. The mission concludes once you locate Hobbie. Just follow the canyon until you spot the insignia on the ground; fly into the insignia to complete the mission.
TECH UPGRADE: This mission's tech upgrade is found in the last structure before you locate Hobbie. It's the third of three structures in a row (the first two have satellite dishes on the top). Bomb the third structure and fly into the power-up icon to secure the Advanced Proton Bomb tech upgrade.
The second part of this mission is almost a bonus task since it's very easy to complete and also includes a special task. You can unlock the TIE bomber by destroying all of the ground defensive targets. But that's not all--you must destroy these ground targets in single volleys. For instance, if you encounter a group of three ground targets, you must target each one with your missiles then launch the missile so all three targets are destroyed nearly simultaneously. This must be accomplished for all ground target groups. You'll know if you are successful if General Madine compliments you after each missile attack.
Slow down your TIE bomber as you approach a new group and target each ground target in a group. Target the furthest structure first then move to the closest. The missiles need to destroy the targets with as little time separating each explosion as possible.
Relics of Geonosis
Briefing: Investigate the area around Geonosis for the fleeing Imperial escort carrier.
| STATISTIC | GOLD MEDAL REQUIREMENT |
| Completion Time | 6:40 |
| Enemies Destroyed | 135 |
| Shot Accuracy | 60% |
| Friendlies Lost | 0 |
| Lives Lost | 0 |
| Targeting Computer Efficiency | 100% |
Objective: Find the Escort Carrier.
Finding the Escort Carrier is the least of your problems. Just fly straight into the asteroid field and wait for the radio chatter to broadcast an alert: it's an ambush. The Escort Carrier will appear ahead of you.
Objective: Destroy the Escort Carrier.

As you approach the Escort Carrier, unload all of your weapons into its hull. The next part of the mission takes place on Geonosis so you won't need any of your vessel's secondary weapons. Target the Escort Carrier with your missiles as you approach and obliterate the vehicle to complete the objective.
GOLD MEDAL TIP: You could stick around for an extra few seconds and knock out some TIE fighters for additional kills but it's possible to get a gold medal without doing so. If you do plan to take out some TIEs, it's best accomplished in Slave 1, which is unlocked by completing all missions with at least a bronze medal. The Slave 1's 20 sonic mines can obliterate groups of TIE fighters and is the key to achieving the "Best Ever" rating. Also note that your accuracy requirement is high so shoot the Escort Carrier with lasers in addition to your secondary weapons to increase your successful hits.
Objective: Protect R5.
You land on Geonosis. Your droid, R5, starts moving across the planet. You must follow and protect him. There's a group of Stormtroopers in front of you. Toss a grenade ("B" button) to kill them; finish off survivors with your blaster. Continue toward the E-Web cannons. Kill the Stormtrooper controlling the right cannon then move the "C-stick" to use the cannon.
There are battle droids here straight out of Star Wars: Attack of the Clones. Mow down the battle droids with the cannon. There are also more Stormtroopers way in the distance. You can shoot most of these with the E-Web cannon as well. Continue forward and kill the remaining Stormtroopers. Search the right side of the canyon to find some bacta tanks to replenish Wedge's health. And don't forget to pick up blasters to improve your primary fire.

Turn the corner to the right and shoot more battle droids. Mow down all the battle droids you encounter to protect R5. You can stand still and automatically target any battle droids in range. Check your radar to see if you missed any. You'll reach another bend to the right (on the left is an escape pod).
GOLD MEDAL TIP: Remain highly accurate during this ground section! The gold medal requirement is 60%. And kill everything!
TECH UPGRADE: After battling through groups of battle droids, check the escape pod on the left. Approach the escape pod's entrance to recover the advanced photon torpedo tech upgrade.
Continue toward more battle droids in the distance. An Old Republic gunship attacks from overhead!
Objective: Destroy the Old Republic gunship.
Ignore the gunship for now. Just keep running forward and eliminate the battle droids as you move. There's an E-Web cannon in the distance. Shoot the Stormtrooper there and snag the bacta tanks to the right of the cannon. Use the cannon ("C-stick") and blast the gunship. The left cannon can target the path you arrived from; the right cannon can target the path on the right. Shoot the Gunship relentlessly to destroy it. Kill off the remaining battle droids and locate an abandoned Jedi Starfighter on the right path.
Objective: Destroy both Escort Carriers. Protect the Rebel Frigate.
Move forward toward the first Escort Carrier. Your newly acquired Jedi Starfighter comes equipped with sonic mines. Approach the Escort Carrier within close-range and fire off your sonic mines. The first Escort Carrier should crumble quickly under the assault. Locate the second enemy ship by using the directional indicator. Obliterate it with your remaining mines (which regenerate) and lasers.
GOLD MEDAL TIP: Stick around and kill some TIE fighters if you complete the earlier parts of the mission quickly. You should have plenty of time to finish this section so grab some TIE fighter kills (fire sonic mines at groups) before heading to the booster ring.
Objective: Find the Jedi Starfighter's hyperdrive booster ring.
Follow the directional indicator on the radar to find the hyperdrive booster ring. Fly close to end the mission.
Deception at Destrillion
Briefing: Infiltrate the Empire's secret research facility. Locate vital targets and transmit their coordinates to the Y-Wing groups.
| STATISTIC | GOLD MEDAL REQUIREMENT |
| Completion Time | 4:00 |
| Enemies Destroyed | 27 |
| Shot Accuracy | 36% |
| Friendlies Lost | 0 |
| Lives Lost | 0 |
| Targeting Computer Efficiency | 100% |
Objective: Fly through the energy tunnels. Locate the Imperial Research Facility.
The first part of this mission is self-explanatory. Just fly through the energy tunnel and avoid hitting the tunnel's edges and the bridge energy barriers that stretch across the tunnel's center. Reach the other side to complete the objective. If you have trouble dodging the barriers, try out the cockpit view.

GOLD MEDAL TIP: Memorize the location of the energy barriers so you can increase your ship's speed and get through this tunnel as quickly as possible. This holds true for the second tunnel as well (described later in this mission walk-through).
Objective: Destroy the TIE hunters inside the energy field.
There are many groups of TIE hunters inside the energy field. You're in an A-Wing which lacks decent shielding and armor so it might not take long for the TIE hunters to penetrate your ship's hull. Try to avoid getting shot as much as possible. The TIE hunters are very small and elusive; it's difficult to pursue the TIE hunters and destroy them.
Instead, watch for individual TIE hunters to turn and attack your A-Wing head-on. Line up your crosshairs with the approaching TIE hunter and fire. You should also utilize your A-Wing's secondary missiles to attack the TIE hunters from longer range.
GOLD MEDAL TIP: You must complete this section as quickly as possible, which isn't the easiest task given the elusive nature of the TIE hunters. You must utilize your secondary homing weaponry. As soon as you exit the tunnel, start targeting multiple TIE hunters with your secondary weapon. Start looking for TIE hunter trio groups and target as many as you can. The A-Wing's secondary weapon regenerates, so don't hesitate to use your entire supply. Check the readout and when another missile is in your storage, prepare to use it! Try to stick as close to the area's exit (the opposite tunnel) as possible so you can get out of the energy field as fast as possible once the last TIE hunter explodes.
Now you must traverse a tougher energy tunnel. Avoid the energy barriers as you did in the previous tunnel. Stay low and to the left through the tunnel's final crowded section and emerge unscathed.
Objective: Disable the shields surrounding the targeting relays. Destroy the targeting relays.
You now fly a Y-Wing on a bombing mission against the super laser ahead. There are three targeting relays and you must destroy all three to complete the objective. The problem is that shields protect the targeting relays. The shields must be disabled with two ion cannon blasts. To fire your ion cannon, hold down the "B" button until your crosshairs turn blue then let go to launch the ION blast.
TECH UPGRADE: Maneuver your Y-Wing into the circular structure in the center of the three targeting relays. You can fly down into this structure. Move near the bottom and run over the power-up icon to recover the spread proton bombs tech upgrade.
GOLD MEDAL TIP: A good way to destroy the shields is to approach from above the targeting relay. Move your Y-Wing to its highest point (the ceiling will eventually stop you). Fire two ION blasts to destroy the shield then destroy the relay with either your lasers or the Y-Wing's bombs. Start with the right-most targeting relay and work your way around clock-wise. Go fast between relays then slow down when using the ION. Make sure the relay is destroyed before moving on. To achieve gold medal time, you more than likely will have to destroy each relay in turn without a second attack run. Finally, to get a gold medal (and maybe even a silver), you need to shoot a few TIEs. As you approach the right relay, two TIEs approach head-on. Try and get them both then look for targets of opportunity when flying between the relays.
Guns of Dubrillion
Briefing: Retaliate against a surprise attack from a secret Imperial weapon. Identify targets of opportunity and destroy them.
| STATISTIC | GOLD MEDAL REQUIREMENT |
| Completion Time | 7:00 |
| Enemies Destroyed | 80 |
| Shot Accuracy | 35% |
| Friendlies Lost | 0 |
| Lives Lost | 0 |
| Targeting Computer Efficiency | 100% |
Objective: Reach the Super Laser.
Wedge lands and takes control of an abandoned AT-ST. As the mission opens, start blasting the Stormtroopers ahead of you. Continue walking up the ramp and blast the AT-STs on either side of the path.

TECH UPGRADE: The hidden tech upgrade on Guns of Dubrillion is found very early in the mission. As you walk up the ramp, move down the first path on the left. Walk over the power-up icon to recover the advanced concussion missiles upgrade.
Just follow the path and target the AT-STs. A couple shuttles drop off some storage crates. Try and shoot them before they drop to the surface. When you reach the split path, take the right route. Shoot the troops controlling the cannons on the ground ahead. Turn the corner to the left and shoot more storage crates before they can release their walkers. Follow this route until the left and right sides connect. Terminate the troops moving from right to left.
The long hall contains several AT-STs. Utilize your secondary weaponry to defeat them. Walk onto the elevator platform at the end to start your descent. Armed drones appear in the air around the platform. Target and shoot the drones with your primary lasers. Sweep around the platform with your crosshairs to find the drones. One shot kills each.
You now enter a warehouse with a rail system. The objects on the rails are explosives. You will die if you hit one so avoid them at all cost. Try to shoot the objects when they're near enemy walkers; the explosion radius will destroy any nearby walkers. Do not shoot any of the containers if there's another container near you. The radius may trigger the other container and you'll perish! Move along the rail system to the left. Be on the lookout for armed drones hovering above.
At the end of the path, Wedge automatically hops into an AT-AT walker for some true firepower. The AT-AT moves automatically; you only control its aim and laser fire. Blast the approaching TIE fighters and the armed drones that hover above. You automatically reach the elevator platform and begin another descent.
When you reach the bottom, open fire on the small AT-STs in the distance and take out any armed drones that approach. You'll automatically approach the spinning turbines in the distance. The three turbines are your primary target. Continue to shoot the armed drones that appear but knock out the turbines as fast as possible. Once all three turbines are destroyed, the mission ends successfully.
Fondor Shipyard Assault
Briefing: Using captured Imperial TIE fighters, launch a sneak attack on the Imperial shipyards of Fondor.
| STATISTIC | GOLD MEDAL REQUIREMENT |
| Completion Time | 4:00 |
| Enemies Destroyed | 50 |
| Shot Accuracy | 56% |
| Friendlies Lost | 0 |
| Lives Lost | 0 |
| Targeting Computer Efficiency | 100% |
Objective: Defend the Rebel transport.

You're piloting a TIE hunter, which isn't the most durable craft ever devised. In fact, it's quite fragile so you'll need to avoid sustaining too much damage. Your first foe is the escort carrier turning your way directly ahead. Use some of your secondary weapons to damage the escort carrier and speed around to its rear side. Pummel the back of the escort carrier with your primary fire to take the vessel down.
Now you must help protect the Rebel transport. Find it using the directional indicator on your radar. Utilize your secondary weapons to lock onto nearby TIE fighters. Watch for the green lasers to stream toward the transport and find the offending TIE fighters on the other end. Defend the transport until it reaches the station's doors.
GOLD MEDAL TIP: Watch your accuracy carefully when firing on TIE fighters. You can deplete your percentage quickly if you aren't careful. Wait until you're very close or wait until the TIE fighters move toward you. And don't forget to use your secondary weapons. Finally, since the TIE hunter is a fragile craft, beat the mission then play it again using another ship (such as an X-Wing) and you may find it easier to achieve a higher medal.
Objective: Use the ion cannons to disable the damaged station's doors. Destroy the damaged station's shield generator.

This is the easiest part of the mission. You're headed directly toward the station's shield generator. You must simply shoot it enough times to destroy it. The station's doors open and close but just fire a steady stream and the generator will explode.
Objective: Destroy all 3 cloaking devices.
The final part of the mission takes place across the star destroyer's surface. If you have played the Attack on the Executor bonus mission then you know what to expect. Stay as low as possible to avoid much of the turret laser fire. You can also shoot the turrets from the low vantage point. Be careful when flying through the tiered structures. The gaps are very narrow.
You can follow any path; just follow the directional indicator on your radar. You'll reach the first of three cloaking devices. Plentiful turrets surround each cloaking device so approach with caution. Slow down and blast as many of the turrets as possible then pound the cloaking device with your laser fire.
Fly to the second and third cloaking devices by following the indicator on your radar. Flying low can be challenging as some of the routes have low obstructions that will force you to adjust your height quickly. Slow down and pull up to avoid the obstructions.
GOLD MEDAL TIP: This final section is quite challenging in the TIE hunter. It's so fragile and it won't take long for the turret lasers to destroy your craft. Beat the mission successfully with any statistics then replay with a different, more durable craft to go for a gold medal. Try the X-Wing. Destroy as many turrets as possible and be accurate in doing so.
Chapter 4: Bonus Missions
This section provides walk-throughs for the bonus missions that require points to unlock. These walk-throughs cover all objectives and provide extra tips on completing the mission with a gold medal.
Death Star Rescue (10 points)
Briefing: Disguised as Imperial Stormtroopers, locate and rescue Princess Leia. Find the Millennium Falcon and escape the Death Star.
| STATISTIC | GOLD MEDAL REQUIREMENT |
| Completion Time | 3:20 |
| Enemies Destroyed | 55 |
| Shot Accuracy | 45% |
| Friendlies Lost | 0 |
| Lives Lost | 0 |
| Targeting Computer Efficiency | 100% |
Objective: Access the security elevator.
Luke and Han, disguised in Stormtrooper gear, escort a pseudo-captured Chewbacca toward the Death Star detention center hoping to gain access to Princess Leia's cell. Follow the directional indicator to the elevators (using the "C-stick" to open required doors). Since you're in disguise, the Imperial Stormtroopers won't bother you. Just get to the three elevators and enter the center elevator to reach the detention center.
GOLD MEDAL ALERT: To reach the number of kills necessary to achieve a gold medal, you must kill the Stormtroopers in the initial hallways. Killing these Stormtroopers releases a horde of others along the path to the elevators. Furthermore, the security elevator doors open, releasing even more troopers. Eliminate them all before ascending the elevator to the detention cell. You can grab some bacta tanks from the open elevators (check the left most elevator). Grab all the Stormtrooper rifles too.
Objective: Defeat the enemies in the detention center. Locate Princess Leia.
Han has things under control ("I'm fine. How are you?") at this control deck so turn around and scamper down the detention hall. Defeat the enemies within the detention cell. Run to the third door you can open (watch for the "C-stick" icon to appear) and open to find Princess Leia inside. If you have trouble finding her, just open every door on the right side as you move down the hallway.
GOLD MEDAL TIP: Once again you need every kill you can muster and there are several more here you can score. Stay with Han and defeat all of the troopers that appear from the right side of the screen. They appear at the top, middle, and bottom of the screen. Defeat all of them; you'll know you are successful when the directional indicator appears on the radar. But don't go down the hall just yet. You can also shoot the security cameras above the cell entrance and the doorway just right of the entrance for additional kills.
Objective: Escape the detention area.
Escort Princess Leia toward the control room. One of those torture droids appears behind you; turn around and shoot it and keep moving quickly. Keep moving; when more troopers appear behind the Princess, turn around and shoot them. Look for the insignia on the right side of the screen. It's the entrance to the trash compactor. Shoot the wall to open the entrance to complete the objective.
Objective: Find the Millennium Falcon and escape.
Follow the directional indicators until you encounter the group of Stormtroopers. This sends Han and Chewbacca in another direction leaving the Princess in your capable hands. Continue to follow the only path until you reach the chasm--the classic scene from Star Wars: A New Hope. Shoot nine Stormtroopers that appear on the far platforms. After you have defeated nine, use the "C-stick" to enter first-person mode. Move the crosshairs toward the top of the screen and press the "A" button to fire the grappling hook.

Upon reaching the far side of the chasm, follow the path around to the right. Take the next right (opening the door) and follow the directional indicator toward the Millennium Falcon. When the hanger doors open, stand still and defeat the troopers across the bay (to the right of Vader and Kenobi battling). Enter the hangar and finish off the remaining troopers. It's easier to stand still and fire on them instead of running around.
GOLD MEDAL TIP: After traversing the chasm, go to the right. Instead of taking the next right, go forward for another Stormtrooper kill. This small room also contains a large supply of rifles, which helps clear the troopers from around the Millennium Falcon. After taking that next right, there are two doors on either side of the hall that lead to more small rooms; these small rooms contain more rifles.
Flight from Bespin (20 points)
Briefing: Han Solo has been encased in carbonite and is being taken to Boba Fett's ship. Prevent Boba Fett from leaving Cloud City and retrieve Solo.
| STATISTIC | GOLD MEDAL REQUIREMENT |
| Completion Time | 5:45 |
| Enemies Destroyed | 48 |
| Shot Accuracy | 8% |
| Friendlies Lost | 0 |
| Lives Lost | 0 |
| Targeting Computer Efficiency | 100% |
Objective: Intercept Boba Fett before he can leave the city.
Approach the door to the right. Stand next to the control mechanism (marked by an insignia if you can't find it, but it's to the right of the door) and press the directional pad up to call on R2-D2 to open the door. Kill the Stormtroopers and follow Boba Fett. When you battle the next two troopers, turn around and head toward the right side of the screen to find the correct path. Continue down the hall using the indicator to determine the correct route. You'll battle a few more groups of Stormtroopers before reaching the door accessing the landing pad. Once again, stand next to the control mechanism and order R2-D2 (up on the directional pad) to open the doors. Run out onto the landing pad.
Note that if you want to do some exploring, head into the dining hall where Han fired his blaster at Darth Vader in Star Wars: The Empire Strikes Back. In the room you'll find some rifles and bacta.
GOLD MEDAL TIP: Keep running! Don't fire at Boba Fett; it's just wasted laser bolts and will deplete your accuracy (though the requirement is very low). Speed is key here. Just keep running toward the landing pad and shoot the troopers as you move.
Objective: Locate the Millennium Falcon and escape.

Turn around immediately and start toward the Falcon. You'll encounter more Stormtroopers. Follow the sole path as indicated by your radar. Order R2-D2 to open the locked door. Run out toward the Falcon and don't stop until the cutscene interrupts the action.
Objective: Eliminate the TIE fighter patrols.
Luke Skywalker has called on Princess Leia for help. Before you can rescue the wounded Jedi, you must eliminate all of the TIE fighters in the area. The Millennium Falcon isn't very maneuverable but the TIE fighters aren't tough. You can easily see them against the backdrop of Cloud City.
Should a TIE fighter get behind the Millennium Falcon, you must use the "C-stick" to fire behind your ship and at the TIE fighter. Push the "C-stick" back to fire at the pursuing TIE fighter.
GOLD MEDAL TIP: Acquire the homing missile tech upgrade then utilize all of your secondary missiles to aid in the destruction of the TIE fighters. Watch your accuracy carefully! The requirement is only 8% but it's easy to blow that completely if you start shooting at air through this section.
Objective: Locate and rescue Luke Skywalker.

After defeating all the fighters, check the radar for the directional indicator that reveals the position of Luke Skywalker. Increase the Falcon's speed and move underneath the Cloud City structure to find the insignia marking Luke's location. Fly into the insignia to complete the objective.
Objective: Fly to the escape point.
Ignore the fighters and go as fast as possible in the direction revealed on the radar. The escape point isn't far and it's pointless to stay and fight. You should have enough kills already to achieve a gold medal. If you're looking to achieve a "Best Ever" then stay and kill four to six more TIE fighters as quickly as possible.
Escape From Hoth (20 points)
Briefing: Darth Vader's forces have breached the Rebel base on Hoth. Escape with Princess Leia.
| STATISTIC | GOLD MEDAL REQUIREMENT |
| Completion Time | 5:19 |
| Enemies Destroyed | 69 |
| Shot Accuracy | 30% |
| Friendlies Lost | 0 |
| Lives Lost | 0 |
| Targeting Computer Efficiency | 100% |
Objective: Escort Princess Leia to her command ship.
The secret Rebel base on the icy world of Hoth isn't so secret anymore. Imperial forces have entered the base and Han Solo must escort Princess Leia to her evacuation command ship. You control Han Solo in this mission; it's a ground mission like the others. You'll use your blaster to eliminate the invading Snowtroopers as you attempt to escape them base.
Follow the base corridors and blast the Snowtroopers along the way. You'll reach a Snowtrooper manning an E-Web cannon. Eliminate him and take control of the cannon to destroy the Snowtroopers in the next hallway. Keep going down the long hall until the ceiling caves in.
GOLD MEDAL TIP: Time is of the essence here. For the best chance at a gold medal, don't stop and use the E-Web cannon. Instead, just kill the Snowtroopers in the next hall with Han's blaster. You may sustain some serious damage but as long as you survive, you can grab the bacta tanks from the medical area. And always through this level, just keep moving. There's no reason to wait for Leia--she'll catch up!
Objective: Reach the Millennium Falcon.

You begin facing the other way; take the first path on the left side of the screen to enter the medical area. Grab the bacta tanks near the exit. Continue through the hall and shoot the Snowtroopers. When you reach the first intersection, take the left. At the second intersection, keep going forward. And at the third intersection, which includes an E-Web cannon, go to the left. There's no reason to stop and use the cannon.
Bridges are destroyed in the next room. Walk onto the first bridge and at its end jump to the right onto the adjacent bridge. Go to the end of this bridge and leap to the perpendicular bridge that heads off to the right. Continue to the right and back into the tunnel. When you reach the first right turn, take it. There's no reason to go straight; Darth Vader appears here but is blocked by debris. Follow this path past Goldenrod and to the Millennium Falcon.
Objective: Defend the Millennium Falcon.

Now you control the Millennium Falcon's underside laser gun to hold off Snowtroopers. The Imperials arrive from three locations; all primarily on the left side of the screen. If too many Snowtroopers get past your laser cannon to the right, they'll board the Falcon and the mission ends in immediate failure. Not the loss of a life--the entire mission is failed. Shoot any Snowtrooper that begins to advance toward the Falcon from the left. Clear out the other troopers taking cover behind the boxes. A cutscene interrupts the action if you have protected the Falcon successfully.
Objective: Disable the damaged star destroyer and escape.
You've escaped Hoth in the Falcon but the danger isn't over yet. You must disable the damaged star destroyer to make a full escape. The star destroyer has already lost one shield generator (the circular structure on its peak; the one on the left has been destroyed). Increase your speed toward the second shield generator. Ignore the TIE fighters. If one gets behind the Falcon, use the "C-stick" to blast the pursuer.
As you approach within range of the upper right shield generator, open fire with your lasers and secondary missiles. Destroy the shield generator and Han states you must knock out the one underside as well. Fly underneath the star destroyer and take out the half-circular object on the star destroyer's belly. It's approximately in the center. Adjust your speed as necessary on the approach and obliterate the structure with lasers and missiles.
The command deck is your final target after both the shield generator and reactor have been eliminated. It's located on the star destroyer's bridge. It's a small object on the panel below the two destroyed shield generators. Take it out with laser fire and remaining missiles to complete the mission successfully.
GOLD MEDAL TIP: You should have little trouble keeping your accuracy up here as long as you ignore the TIE fighters (unless they're behind you). Work quickly to finish off the star destroyer to meet the time requirement for a gold medal.
Attack on the Executor (30 points)
Briefing: Pilot an A-Wing fighter against the flagship of the Imperial fleet, the super star destroyer, Executor.
| STATISTIC | GOLD MEDAL REQUIREMENT |
| Completion Time | 4:50 |
| Enemies Destroyed | 55 |
| Shot Accuracy | 35% |
| Friendlies Lost | 0 |
| Lives Lost | 0 |
| Targeting Computer Efficiency | 100% |
Objective: Destroy the ion cannons threatening the Calamari cruiser.
Three star destroyers threaten the Calamari cruiser. You must quickly reach each star destroyer and destroy its ion cannons to prevent the Calamari cruiser from sustaining damage. If the cruiser perishes, the mission ends in failure. Immediately increase speed to the nearest star destroyer. Target the four ion cannons on the side closest to the Calamari cruiser. You can utilize your A-Wing's secondary weapons as you approach or slow down as you near the cannons and obliterate them with your primary lasers.
Once all four ion cannons explode, proceed to the second star destroyer and eliminate its four cannons. Utilize your missiles or lasers and avoid smashing into the star destroyer's hull.
The final star destroyer approaches perpendicular to the Calamari cruiser and actually passes twice. So you must destroy all eight of its Ion cannons: four on each side of the capital ship. Pass by its right side first, which moves first to the Calamari cruiser then go to its left. Destroy all eight ion cannons to complete the objective.

GOLD MEDAL TIP: You must wait for the Calamari cruiser to safely get beyond all three star destroyers. Meeting the time requirement for the mission can be a challenge. Allow the opening cut scene to play out completely--don't skip it! The Calamari cruiser actually moves during the cut scene. So it gets further along, which decreases the amount of time you must wait for it to reach the objective point. Keep your accuracy up with accurate shots and take out TIE fighters as targets of opportunity. If possible, take out more of the star destroyer ion cannons (from the first two star destroyers).
Objective: Destroy the Executor's command deck.
The surface of the Executor looks similar to the latter part of the Fondor Shipyard Assault mission. Dodge or shoot the laser towers and follow the indicator to the Executor's command deck.
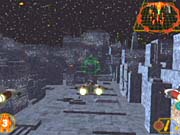
Look for the command deck high above the Executor's surface. It's the "T-shaped" object that looks similar to the top of a star destroyer. The command deck itself is a small nub on the "T-shaped" object. Shoot this part of the Executor or crash into it to complete the bonus mission.
Rebel Endurance (30 points)
Briefing: Fight your way through waves of enemies.
| STATISTIC | GOLD MEDAL REQUIREMENT |
| Completion Time | 30:00 |
| Enemies Destroyed | 390 |
| Shot Accuracy | 30% |
| Waves Completed | 45 |
| Lives Lost | 7 |
| Targeting Computer Efficiency | 100% |
Objective: Destroy all Imperials.
The Rebel Endurance bonus level is a 52-wave gauntlet through Imperial troops and probe droids. You kill a wave of enemies then another appears in the same arena. You're armed with a blaster and must survive as far as possible in order to secure a medal in this tough challenge.
And it can be challenging, especially for those with weak trigger fingers, but there are some tricks and tips. Here are a collection of tips that should help you secure a gold medal:
- The fire button isn't the only important button to use during Rebel Endurance: get ready to use your jump button! You can avoid a lot of enemy fire by jumping. Starting with the first wave, jump and fire at the same time. Get used to it. Aim as you do during other ground missions. Move toward an enemy and hit jump and fire at the same time. It's a handy trick that should keep you alive for a very long time.
- Some enemies drop blaster rifles and some even drop bacta tanks. You must grab the bacta if you are to survive for very long. They're very small and hard to see but just keep moving and walk over anything on the ground and you'll pick up the health boost. And don't forget to grab the blasters too!
- The middle of the arena is the biggest danger zone. After completing a wave, avoid staying in the very middle. Instead, clear a wave and get to the edges quickly. That way you likely won't trigger all of the wave's enemies and can deal with a small group instead of the entire wave.
Chapter 5: Tech Upgrades
This section reveals details on all 11 tech upgrades and their precise location in the game. You must recover the tech upgrade then complete the corresponding mission successfully to receive the upgrade for all future mission plays.
Advanced Lasers
Description: Improves the power of laser cannons on every craft.
Location: Found on the Defiance on Dantooine level on the third part when you're on the speeder bike escorting Tycho back to the Rebel landing zone. After the second jump, move your speeder bike to the path on the left. You may need to use the "L" button to slow as you traverse this path. Run over the power-up to secure the advanced lasers tech upgrade. This is an ideal tech upgrade to possess; it makes nearly every mission much, much easier (particularly for achieving higher medals).
Advanced Photon Torpedo
Description: Improves the penetrating power of photon torpedoes.
Location: Found on the Relics of Geonosis level on the ground portion of the level. After battling through groups of battle droids (after you take control of the cannon then continue on and round the corner to the right), check the escape pod on the left. Approach the escape pod's entrance to recover the advanced photon torpedo tech upgrade.
Homing Photon Torpedo
Description: All proton torpedoes will now track the target they were fired at.
Location: Found on the Extraction from Ralltiir level on the AT-ST segment of the level. After the first right turn, look in the alcove to the right to find the power-up icon. Move your AT-ST over the icon to secure the homing photon torpedo tech upgrade.
Advanced Proton Bomb
Description: More powerful proton bombs.
Location: Found on the Raid at Bakura level on the TIE bomber segment (to activate this segment, you must achieve at least silver medal statistics on the first segment). The tech upgrade is found in the last structure before you locate Hobbie. It's the third of three structures in a row (the first two have satellite dishes on the top). Bomb the third structure and fly into the power-up icon to secure the advanced proton bomb tech upgrade.
Spread Proton Bomb
Description: A wider range of effect for each proton bomb.Location: Found on the Deception at Destrillion level on the third segment with the Y-Wing. Maneuver your Y-Wing into the circular structure in the center of the three targeting relays. You can fly down into this structure. Move near the bottom and run over the power-up icon to recover the spread proton bombs tech upgrade.
Tech Upgrades - cont.
Advanced Concussion Missile
Description: Concussion missiles will be upgraded to cause more damage to hostile targets.
Location: The hidden tech upgrade on Guns of Dubrillion is found very early in the mission in the first AT-ST segment. As you walk up the ramp, move down the first path on the left. Walk over the power-up icon to recover the advanced concussion missiles upgrade.
Homing Concussion Missile
Description: All concussion missiles will track their targets.
Location: Found on the Speeder Bike Pursuit level. After the forest path narrows considerably, you'll spot what appears to be a dense section of trees along the left edge. Nearly immediately after this dense section, the path splits to the left and right. Your natural instinct will be to stay to the right since the left path isn't visible until the last possible second. However, apply your speeder bike's brakes and enter the left path. Maneuver down this left route slowly with brakes applied and run over the power-up icon to acquire the homing concussion missile tech upgrade.
Advanced Cluster Missile
Description: A more powerful version of the standard issue cluster missile.
Location: Found on the Battlefield Hoth level during the E-Web cannon section. Blast the right-most AT-ST and storage crate to uncover a tech upgrade. After destroying the AT-ST and crate, disengage from the E-Web cannon and run over there. Move over the power-up icon to recover the advanced cluster missile tech upgrade.
Homing Cluster Missile
Description: A version of the cluster missile that tracks its target.
Location: You'll find the tech upgrade on Triumph of the Rebellion early on. Follow the path (just move where the directional indicator shows you) and when you find the first set of Ewok catapults (watch for the "Catapults" message to appear in the upper left corner meaning you can call on their assistance with the directional pad), turn right and head into the forest. If you look at the overhead map, you'll spot an alcove here to the right of the catapults. Spot the power-up icon in the corner. Get close to it and recover the homing cluster missile tech upgrade.
Advanced Shield
Description: The defense ranting of the shields on all craft will be raised to maximum. This is the only defensive upgrade available.
Location: The advanced Shields upgrade is found on this first section of the Revenge of the Empire level. Instead of destroying the fourth Imperial transport (if flying to them in the order they appear, not including the transport that doesn't land), fly through the transport and you'll automatically recover the advanced shields tech upgrade.
Advanced Targeting Computer
Description: This allows players to turn and leave on their targeting computer without having to hold down the Y button. With this upgrade installed, players also have more control over their wingmen. Highlight specific targets with the C Stick, and then issue an attack command by pressing the control pad in the appropriate direction.
Location: Found on the Defenders of Ralltiir level. If you follow the mission walk-through in the earlier section, find the Imperial transport on the other side of the first destroyed bridge (it's positioned perpendicular to the bridge). Destroy the transport to reveal the power-up icon. Fly over the power-up to recover the advanced targeting computer tech upgrade. If you get lost, just shoot all three Imperial transports across the bridges to find whichever one contains the upgrade icon.
Chapter 6: Secrets
This section reveals Rebel Strike's secrets, including passcodes and unlockable ships.
Unlockable Ships
Slave 1: Unlock Boba Fett's ship by achieving at least a bronze medal in all regular missions.
Millennium Falcon: Unlock Han Solo's ship by achieving at least a bronze medal in all regular and bonus missions.
Jedi Starfighter: Unlock the Jedi Starfighter seen in Star Wars: Attack of the Clones (and in the Relics of Geonosis mission) by achieving at least a silver medal in all regular and bonus missions.
TIE hunter: Unlock the TIE hunter seen in several Rebel Strike missions by achieving at least a gold medal in all regular and bonus missions.
TIE bomber: Unlock the TIE bomber by destroying all of the ground defensive structures in Raid at Bakura. You must destroy them with homing missiles and eliminate each group of structures with the same missile volley by targeting all structures before firing.
Naboo Starfighter: Complete the Tatooine Training in all four times of the day (dawn, day, dusk, night) and grab all bonus items each time. You can adjust your Gamecube's time to each time of day to complete this task. An example of a dawn time would be 6:00 AM; an example of a day time would be 12:00 PM; an example of a dusk time would be 6:00 PM; and an example of a night time would be 12:00 AM. The bonus items are: Bantha Herd (turn left after Begger's Canyon and fly over), Mos Eisley (beyond the herd), Bantha Herd #2 (left from Mos Eisley and fly over), Sandcrawler (right from the second herd and shoot at it), R2-D2 (blow up the sandcrawler), Jabba's Palace (go where the sandcrawler was headed), Toshi Station (left from Jabba's Palace), and C-3PO (near a skeleton at the bombing lesson).
Unlockable Special Features
These items are found in the "Special Features" menu.
Star Wars Arcade Game: Complete the Death Star Rescue bonus mission to unlock the classic vector Star Wars arcade game.
The Empire Strikes Back Arcade Game: Complete all regular missions to unlock the classic vector The Empire Strikes Back arcade game.
Documentary: Complete the Triumph of the Rebellion mission to unlock the Rebel Strike documentary.
Audio Commentary: Complete the regular missions with at least a bronze medal to unlock the audio commentary option.
Credits: Complete the Triumph of the Rebellion mission to unlock the credits.
Ace Mode: Complete all regular missions with at least a gold medal to unlock a harder difficulty level called Ace Mode.
Passcodes
Enter these passcodes in the options menu.
LOOKMOM! - This passcode unlocks the Rebel Strike documentary.
THEDUDES - This passcode unlocks the credits.
Star Wars Arcade Game
When you are playing the Death Star trench run portion of the game, don't fire your X-Wing's laser weapons! Just dodge the fireballs, and on later levels, the obstructions. It won't be easy, especially on higher levels where there are many more fireballs and obstructions to avoid. However, if you make it to the exhaust port without firing and fire only to launch the torpedoes into the Death Star's port, you will have "used the Force" as Obi-Wan suggested and will be awarded special bonus points. This can be up to 100,000 points!
When you approach the Death Star, look closely. You can see the words "May the Force Be With You" written on its surface.
Got a news tip or want to contact us directly? Email news@gamespot.com
Join the conversation