James Bond 007: Everything or Nothing Walkthrough
Bond. James Bond. Not since GoldenEye have we played a 007 game as polished and exciting as Everything or Nothing. Check out our walkthrough for a walkthrough of the game's massive 29 mission campaign, and tips on how to get all the Bond moments.
Design by Collin Oguro
Not only is James Bond: Everything or Nothing exceptionally long for a console game, but some of its missions are quite stunningly difficult. That is, there are a full twenty-nine single-player missions, each of which must be played through twice in order to get the top score, and many of which can take quite a bit of time. On top of that is the multiplayer portion of the game, which is also story-based and which must be unlocked in much the same manner as the single-player game.
In other words, it is understandable for someone to need help getting through this massive game, and we are here to help. Not only will you find some important information regarding the equipment that Bond has at his disposal in this guide, but there are also some quick trips and tricks as well as the grand-daddy of them all, one massive walk-through to help you along your way.
Equipment
Weapons
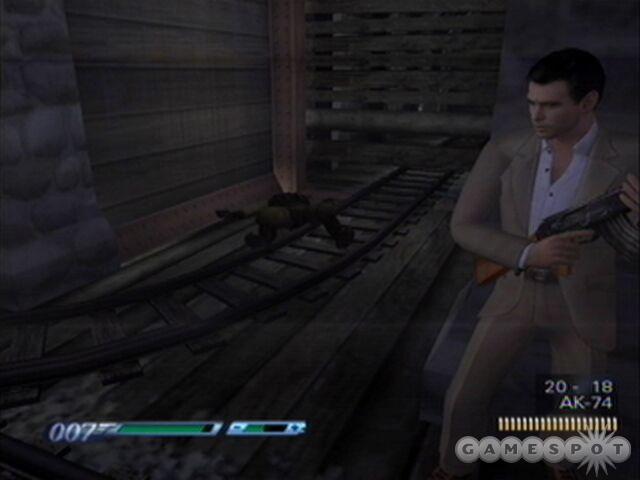
AK-74
| A good midrange assault rifle, the AK-74 is readied faster from Bond sense than the SIG 552, but does less damage. All in all a good weapon to choose when in a bind. |
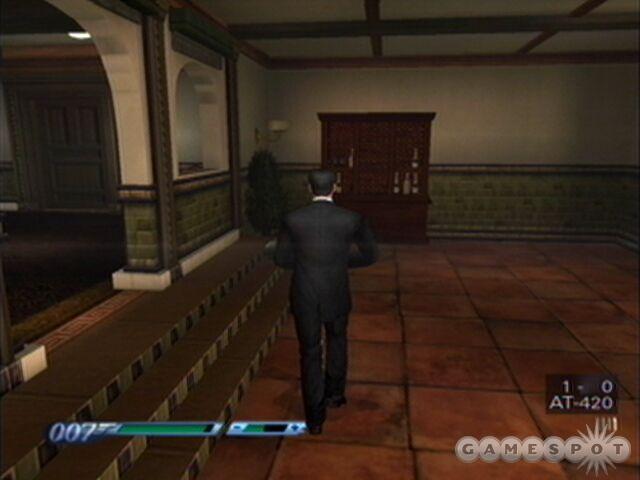
AT-420 (Rocket Launcher)
| Reserved for when Bond needs to either take out multiple enemies, can’t get a direct shot and needs to utilize a blast radius, or simply needs to take out something big, the AT-420 is able to do some serious damage. Just be careful: Bond can’t hold more than 8 total rounds at a time. |
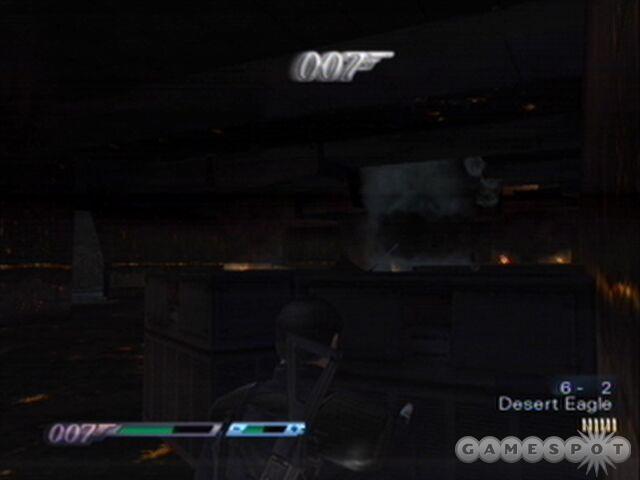
Desert Eagle
| While the Desert Eagle fires much more slowly than the P99, it also does much more damage and can often take enemies down in one or two shots to the center of mass, instead of the usual four or five that the P99 requires. |
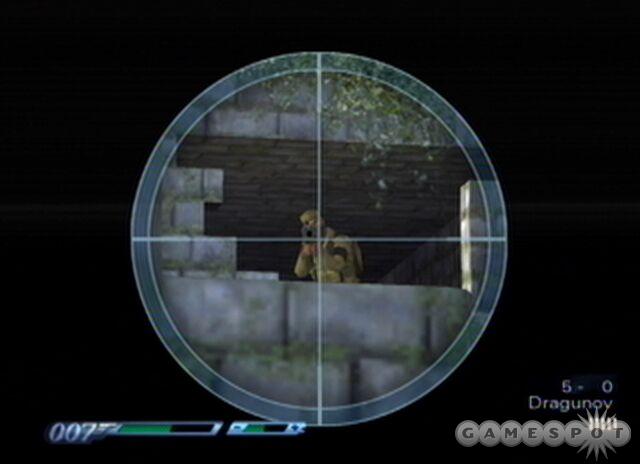
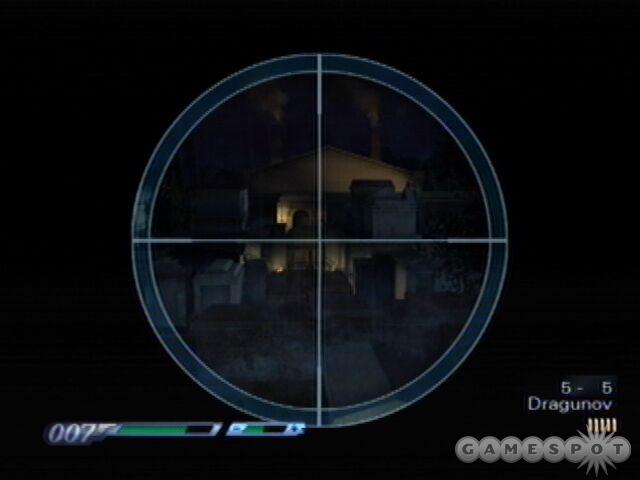
Dragunov (Sniper Rifle)
| Bond won’t come across the Dragunov very often, but when he does there is usually a good reason for it. Just be careful when making use of it, however, as most enemy snipers are able to shoot Bond while he aims. |
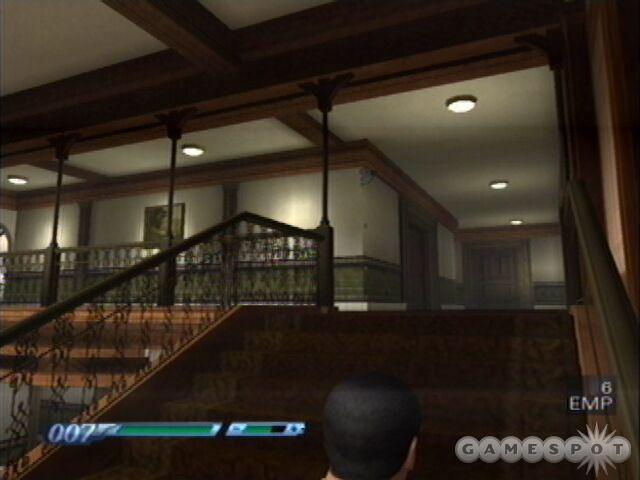
EMP
| The EMP grenade isn’t available until the later parts of the game, at which point Bond will be able to make exceptional use of it. Simply throw it at a computer system of some manner and detonate in order to disable the computer. |
Grenade
| When Bond can’t get his hands on a rocket launcher, the grenade can demonstrate a good way to utilize a blast radius to take out multiple troops. Just be careful, it makes a lot of noise. |
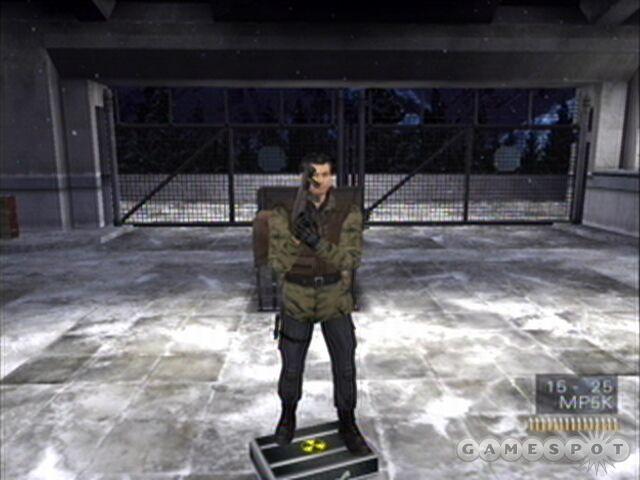
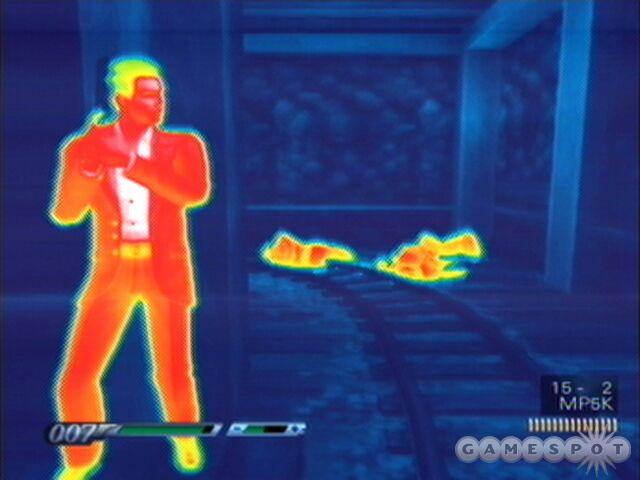
MP5K
| Faster to ready than either the AK-74 or the SIG 552, the MP5K is able to shoot quite fast. Just be careful, as it will take significantly more MP5K rounds to take down an enemy than it will either AK-74 or SIG 552 rounds. |
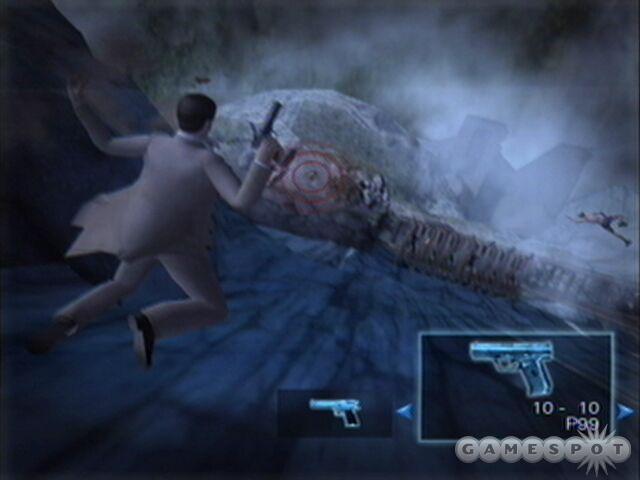
P99
| Bond’s basic weapon, there is really very little reason to ever use the P99 in its basic format. Instead, whenever Bond is forced to fall back on the P99, using it in a silenced configuration is much more effective. |
Physical
| While not a weapon, exactly, Bond’s physical attacks can be quite useful. That said, Bond doesn’t get any range with them, and most enemies will be armed, so avoid using them whenever possible. |
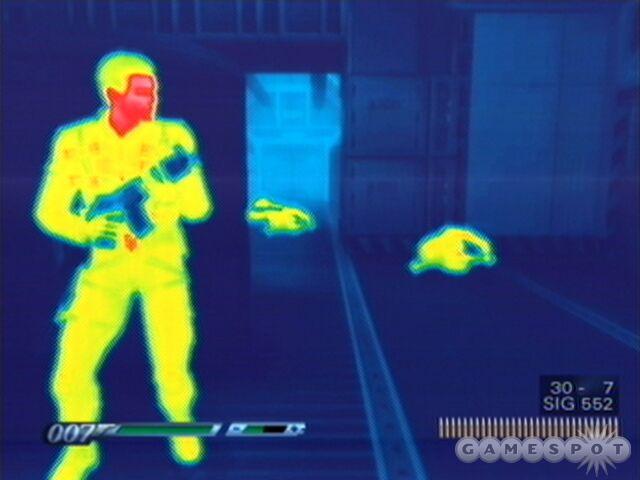
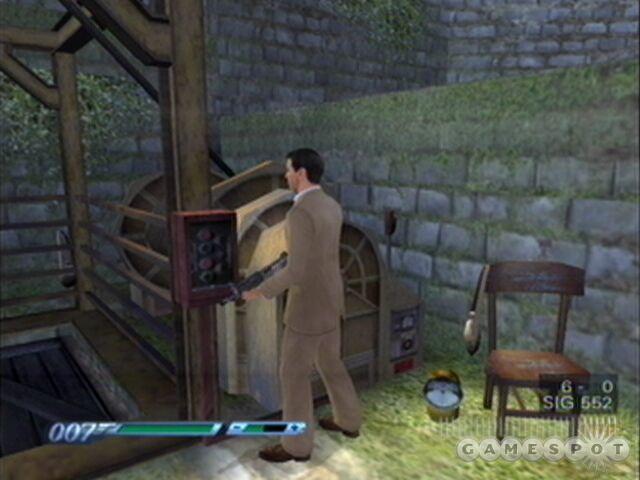
SIG 552
| Able to do significant damage to an enemy, often able to kill with just one or two hits on the primarily unarmored enemies, the SIG 552 is capable of some very long-range shots, as well. The only serious disadvantage to it, however, is that it is slow to equip, which can be a problem if Bond is in a hurry, using Bond sense to take out multiple enemies with different weaponry. Hey, it happens. |
Silenced P99
| Even though it does very little damage, the Silenced P99 is actually quite useful. Sure, if an enemy sees another fall for no reason they will get suspicious, but if Bond ever catches an enemy alone, a few slugs with this baby will render them dead, and quiet. |
Sleeper Dart
| The Sleeper Dart is a shockingly useful weapon, even when Bond isn’t trying to be quiet. By occasionally switching to the Sleeper Dart in the middle of a battle, shooting an enemy, then switching back to another weapon Bond can easily take down several enemies with just one shot. It works out quite well. |
SPAS 12 (Shotgun)
| A heavy close-range weapon, the SPAS 12 is capable of killing most enemies with just one shot, or wounding enemies even when Bond misses with part of the blast. Use when Bond is in a CQB (Close Quarters Battle) situation, but avoid when at range. |
Strobe
| Even more useful when Bond wants to be silent than the grenade, the strobe grenade is capable of stunning enemies for a few moments, allowing Bond to shoot them and be done with them without much hassle. |
Gear
Armor
| As Bond plays through the game he will take damage from various sources. When this happens simply have Bond grab another armored vest in order to heal himself. |
Battery
| In addition to Bond’s health, he also uses energy in order to utilize some of his spiffy gadgets. Pick up spare batteries when Bond runs into them in order to keep his energy level high. |
Gadgets
Nano Suit
| By utilizing the Nano Suit, Bond is able to make himself partially invisible when moving, or completely invisible when still. Be careful, however, as battery power will drain very quickly. |
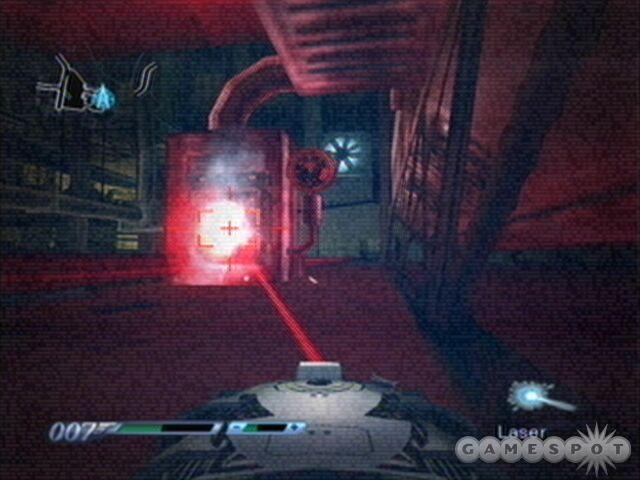
Network Tap
| The Network Tap is able to take over machinery by simply shooting the device. This works not only on turrets, but on tanks, as well. As a result Bond can sometimes make a nasty situation a piece of cake, providing it is used correctly. |
Q-Spider
| The Q-Spider is a multi-purpose tool that grows in its usefulness as time goes on. At first the Q-Spider is able to simply investigate situations, but later is able to cause itself to explode, turn invisible, or even shoot a sleeper dart at an enemy. |
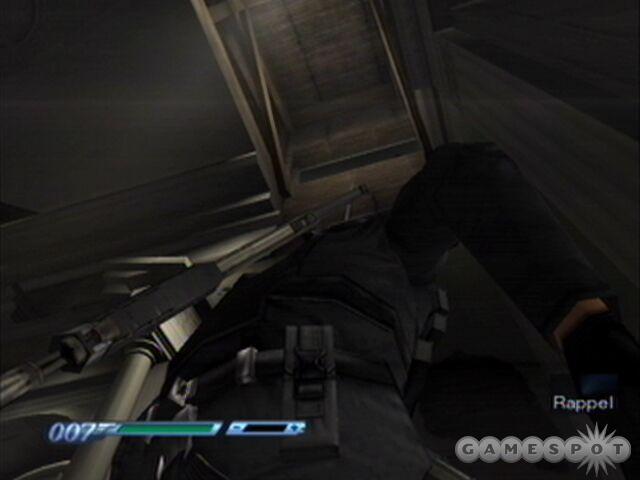
Rappel
| Used quite often to scale various surfaces, the Rappel is able to either help Bond scale impossible surfaces or to walk down drops that would otherwise mean certain death. |
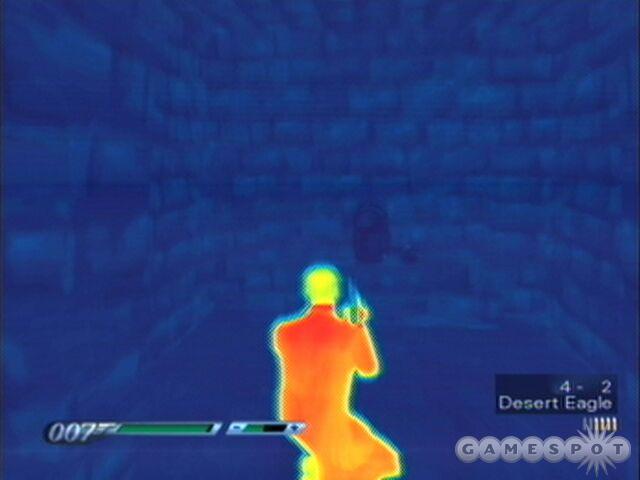
Thermovision
| The Thermovision helps Bond see in the dark by switching his normal sight for heat-sensitive vision. In other words, sources of heat show up in bright color, while darker areas are the surroundings. Doesn’t work too well in the light, but can help Bond see enemies in the dark easily. Thermovision can also help Bond to see enemies that are using a Nano Suit. |
Q-Spider Gadgets
Detonate
| By utilizing the detonation ability, a Q-Spider is able to cause itself to explode, enabling the Q-Spider to take out enemies or to remove obstructions. |
Nano Suit
| The Nano Suit can, as with Bond, render the Q-Spider invisible, providing it doesn’t move much. Just be careful, as the Nano Suit will utilize quite a bit of energy in a short amount of time. |
Sleeper Dart
| As with Bond’s sleeper dart gun, the Q-Spider Sleeper Dart is able to render an enemy instantly incapacitated. Use with care, however, as this will also drain Bond’s energy. |
Tips and Tricks
Getting Platinum
When going for platinum on a mission do not try to do it right off the bat. Instead play the mission through at the Agent difficulty, taking it easy and getting the lay of the land. Then, after you're intimately familiar with the level, and has already scored gold, tackle the platinum score. Besides, you must first get gold on a mission before you can get platinum.
Sleeper Dart
Every now and then, when in combat, activate Bond sense and switch to the sleeper dart gun, then shoot an enemy, and switch back to another weapon. Unlike other weapons, which typically take more than one shot, or require Bond to aim at a particular part of an enemy, the sleeper dart is a one-hit-one-dropped weapon. Besides, by using the Bond sense like that, Bond is able to take out enemies pretty quickly while risking little.
When in Doubt, Q-Spider
Sure, sometimes enemies that are in a shooting standoff with Bond will charge from their positions toward Bond, allowing him to pick them off, but usually they will stand still. As a result, if Bond is waiting for some enemies to make a move, or is just waiting around twiddling his thumbs, then he can usually set forth a Q-Spider to do the job for him. Besides, when there is a group of about four or five enemies, or more realistically two or three, the Q-Spider can make short work of them.
Bond Sense
This isn’t supposed to be Spiderman, but nonetheless Bond does have some special senses that can be used in-game. While generally this can help Bond target enemies or shootable items, as is demonstrated in the MI6 Training, the Bond sense can also pause time, in effect, allowing Bond to switch weapons and attack enemies while being able to ignore what is going on around him.
In other words, every now and then when you a moment or two to plan his next move, enter Bond sense. At this point he can choose the best weapon to use in order to continue, and pick his next target. In a pitched battle utilizing Bond sense in this manner can give Bond a decisive edge, even if he is surrounded by enemies.
Speed Control
There are times to run and there are times to go slow. Generally one of the biggest problems that people have is that they run ahead and get shot up, when, had they stuck back and hugged walls more, they could have lived. On the other hand, time is sometimes of the essence. When this is the case run at an enemy while shooting, half the time Bond will be able to take several enemies out in this manner while taking very little damage, if it is done right. Fortune favors the bold.
Walk-through
A Note on Goals
Bond must always complete the mission and obtain the gold objective before the platinum objective is unlocked.
Ground Zero
Summary
Starting the game with a bang, Bond is immediately shoved into the middle of a huge firefight and a quest to snag a briefcase nuke before anyone else can get away with it. Not too difficult--this is Bond, after all.
Goals
Gold: Score at least 75,000 points.
Platinum: Take fewer than 500 points of damage.
Step-by-Step
Retrieve Nuclear Device
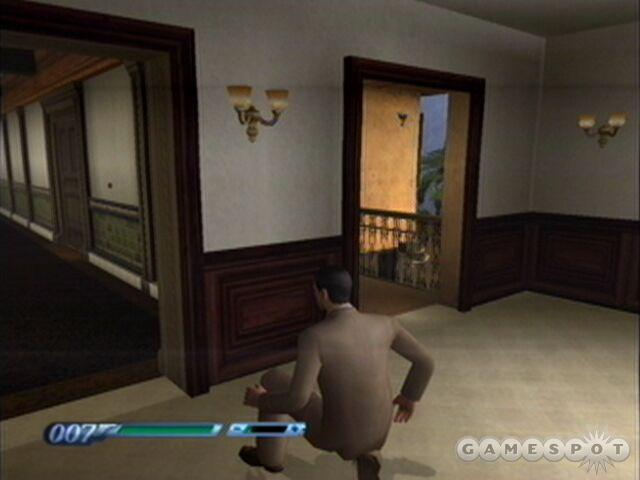
When the game first begins, before you are even presented with the chance to choose your game type, you will be presented with the first mission. After several cut scenes, the mission will start with Bond in the middle of a huge firefight. As a result, get against the wall as quickly as possible and duck out to shoot the enemy while keeping behind the cover of the standing obstructions.
If at any point you get shot up and need more health, there is an armor vest to the left, and when the majority of the enemies are dead you should venture from the enclosed area that you start out in to finish taking out the rest of the enemies. When the enemies are dead pick up the briefcase in the center of the courtyard.
Obtain a Rocket Launcher
After Bond has retrieved the briefcase with the nuke several more enemies will attack. When this happens take them out quickly, then proceed through the door that opens up across from the briefcase. Finally climb the stairs and, at the top, grab the rocket launcher and the armor vest.
Destroy the Hover Jet
With the rocket launcher in hand walk through the door that opens up and use the rocket launcher to take the jet out of the sky. This can take two or three rockets and, after the jet has been taken down, Bond will need to return to obtain more rockets.
Escape Through the Wall

With the hover jet destroyed a pair of tanks will emerge. Use rockets to take them out, and one of your guns to kill the soldier on the ground. When they have been dealt with rappel down the wall where Bond picked up the rockets, then once Bond reaches the ground, head back up the stairs quickly.
The moment Bond reaches the ground the enemies will bring forth a gun battery and reinforcements to deal with him. By heading upstairs Bond gains an advantage from his vantage point, and can use rockets to take out the gun battery, or gun rounds if he has to, and can shoot the reinforcements without having to worry about having to engage them in hand-to-hand combat.
Finally, when all the enemies have been dealt with from the balcony, Bond will have a Bond moment by taking out the enemies that rappel down. When everyone has been dealt with, and Bond isn’t being shot at any more, simply return to where Bond started to end the mission.
MI6 Training
Summary
This mission may seem out of place, as if it should have come before the first mission. The MI6 Training is used to familiarize Bond with all of the maneuvers that he is capable of performing. Simply run through the course, step-by-step, following the directions, and Bond will do just fine.
Goals
Gold: N/A
Platinum: N/A
Step-by-Step
Combat: Hand-to-Hand
This phase of Bond’s training revolves around three quick altercations that force Bond to physically assault one enemy, throw another, and counter another’s attack to throw him. When the three enemies have been defeated, continue through the hole that opens in the wall to the rappel training.
Gadget: Rappel

Begin by selecting the rappel gadget from Bond’s inventory, then look up to the right of where Bond entered the rappel training. Here aim with the rappel gadget, then fire up at the wall’s edge and walk forward to climb up the wall. When Bond reaches the top, walk forward and through the opening to the next section.
Combat: Crouching
When Bond enters the next section, follow the instructions to crouch down below the obstruction. Then, while avoiding the enemy fire, shoot the enemies that are attacking Bond one by one. When they are dead the obstructions will clear and the next opening will appear. Walk through to continue to the next section.
Bond Sense: Targeting Objects
Most certainly the least well-explained portion of the training, Bond needs to use his Bond sense with the gun selected, then when he identifies something as shootable, simply hold the aim button and fire to blow the items away. After they have been destroyed the obstructions will go away and the door to the next section will open. Walk through to work on wall cover training.
Combat: Wall Cover
To start the wall cover training Bond needs to first run over the edge and rappel down, which is done automatically the moment he walks off the edge. When Bond reaches the bottom have him hug up to the wall, then proceed to the left where he can shoot the first enemy.

After the first enemy has been dealt with have Bond jump down the next ledge to the area below, then hug up to the wall there and move to the right to take out the next enemy. From here move away from the wall and toward the next wall, where Bond will need to hug against it and move to the left to take out the next enemy.
Move around the corner then get up against the wall and move to the far left where Bond can take out the final baddie. When he has been dealt with Bond will need to rappel up the ledge near the enemy he just took down to continue to the sniper rifle training.
Combat: Sniper Rifle
Once Bond is at the top, use the sniper rifle to take out each of the three enemies that are facing him, then shoot the big red square to set off an explosive. After the explosion the obstruction in front of Bond will go away, at which point he will be able to continue forward then rappel up the wall to play with the Q-Spider.
Gadget: Q-Spider

Begin by selecting and deploying the Q-Spider, at which point control will shift focus from Bond to the Q-Spider. Run the Q-Spider through the small tunnel and out one of the exits on the far side, then run the Q-Spider to the opposite end of the landing from Bond to the lit object there. Finally, detonate the Q-Spider and control will be returned to Bond.
Exit Training
Have Bond run around to the other side of the landing, near where the Q-Spider blew up, to the door. Finally have Bond open the door and walk inside to complete the mission.
A Long Way Down
Summary
A rather direct mission, Bond’s unstated goal is to get down the face of the building, at which point he will see Dr. Nadanova being hurried away. Move quickly and, when faced with resistance, Bond can almost always just jump down the side of the building, with two exceptions, noted below.
Goals
Gold: Score at least 90,000 points.
Platinum: Complete the mission in under three minutes and thirty seconds.
Step-by-Step
Objective: Drop Explosive Into Vent
At the beginning of this mission Bond will find himself rappelling from a building into the midst of several enemies. Rappel down as quickly as possible and prepare to face the enemies. To Bond’s left will be a ledge where he can rappel up to obtain a Dragunov sniper rifle, while forward and to the right is some armor. Additionally, to the right of the rappel point is a switch that will activate a steam vent, which will stun several of the enemies.

When Bond reaches the ground, dive to the left then use the silenced pistol to take out the guy at the controls. Afterward run forward and flip the switch to activate the steam vents and use the time that they’re stunned to take them all out. Afterward run around and kill any other enemies left, grab the Dragunov by rappelling up near where Bond dove to the left, retrieve the armor, and drop the bomb down the chute. While the vest could be obtained sooner, if necessary, it would put Bond in a more vulnerable position.
After the bomb has been dropped into the steam vent Bond will be attacked by more enemies coming from where he started the mission. Instead of engaging them, jump off the ledge to the right, and rappel down this level to the next platform below, on the right.
Objective: Rappel Off Building Edge
When Bond lands on the platform, two enemies will rappel down to land next to him. Take them out with punches or kicks, then rappel down the right side of the platform to come to a small landing with some more armor.
Once Bond has the armor rappel up to the right of the armor into a small building area. Kill the two guys inside, as well as the guy that rappels down where Bond just entered the building area, then shoot out the glass at the far end.

Kill the two guys that have rappelled down to shoot at Bond through the glass, then rappel down through the broken window. When Bond reaches the ground kill the enemy that begins to shoot at him, retrieve the armor vest that is here, then rappel down again.
Objective: Shut Off Flame Vents
Once Bond reaches the ground trigger the steam vent to his left then shoot all of the enemies on this level that attack him. When they have been dealt with move back to where the steam vent valve was and walk toward where the three enemies attacked Bond to the right of it. Up ahead Bond should find the flame vents switch, which should be turned off.
Objective: Find Doctor Nadanova
The moment the Flame Vents are shut off several enemies will rappel down from above onto the level that Bond is on. Take a minute to shoot them to ribbons then head through the opening into the burning section of this level. Kill the enemies in here then run to the far side and jump off the ledge where the flame vents were to finish the level. Unfortunately, however, Dr. Nadanova will get away before you can get to her.
Train Chase
Summary
While the previous missions were somewhat long, and took a lot of finagling to finish, this mission is FAST. Whether Bond chooses the motorcycle or the Porsche to use, this mission will be a foot to the floor, shoot if you can, train chase.
Goals
Gold: Score at least 150,000 points.
Platinum: Complete the mission in under two minutes and fifteen seconds.
Step-by-Step
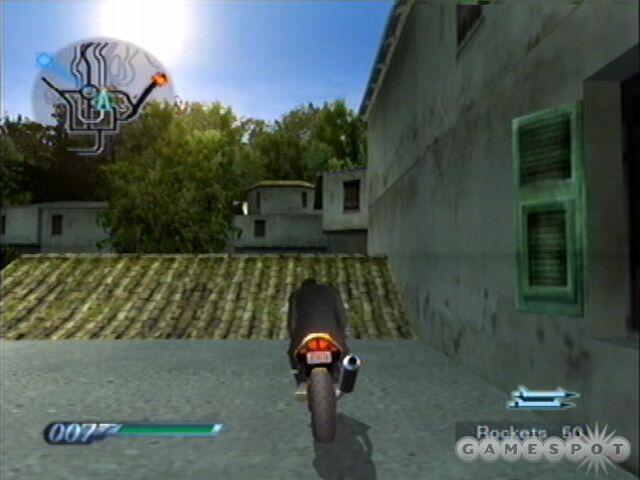
Objective: Catch Train
The first, and most important part of this mission, is to choose the vehicle that Bond will use. To the left is Bond’s Porsche, while to the right is his motorcycle. The motorcycle is much faster, and the track that it takes is shorter. Unfortunately, however, it is limited to using missiles and can take fewer hits. The Porsche, on the other hand, has both missiles and machine guns, and can take more hits, but it slower and takes a slightly longer course. Whichever vehicle is chosen, simply run toward it and get in as quickly as possible.
Taking the Car
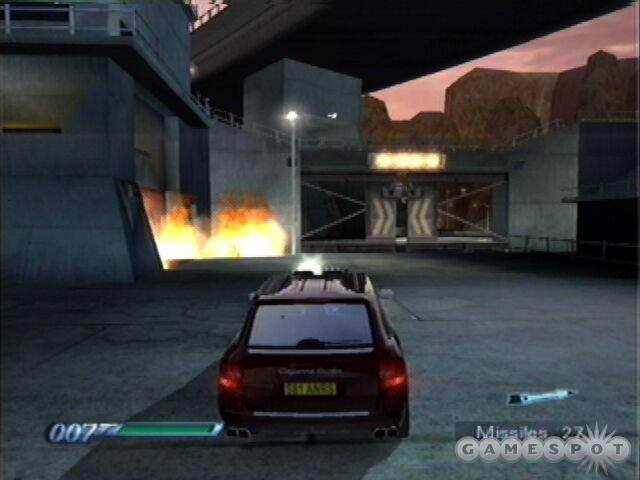
If the car is chosen then drive forward, through the first two gates, and shoot open the third with a missile. Afterward hold the gas down and drive as well as possible. After a short bit there will be a ramp to the left, right after Bond gets out of the first tunnel. Take this, and jump up to the next area to shoot down a helicopter.
A short while ahead Bond will come to an area with falling pillars. To the left of the pillars is a ramp; take the ramp to jump over the pillars, then continue forward and have another Bond moment. A little ways past the pillars Bond will come to yet another ramp. Take this ramp to gain a final Bond moment and to finally catch the train.
Taking the Motorcycle
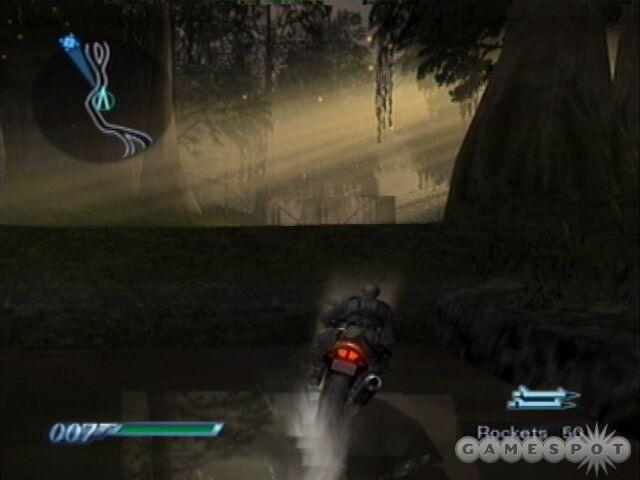
On the other hand, if the motorcycle is chosen, then Bond will need to head forward and take a ramp. Jump to the second level if possible, or simply the first. Either way Bond will end up crashing through some glass doors and up off a ramp. Continue forward, then when Bond is ambushed by several motorcycles and Jeeps, stick to the left to go off a jump with a helicopter in front. Shoot down the helicopter, then continue forward.
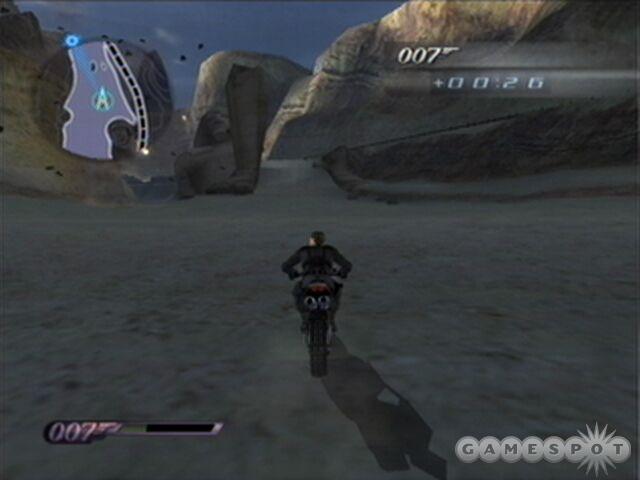
After continuing forward for a short bit Bond will come to the ruins of a temple. Simply slide the motorcycle under the falling pillars for another Bond moment, then continue forward for a bit until Bond comes to a small detour to the right, up a ramp. Take this ramp to finally catch up to the train ahead of schedule.
Objective: Get Under the Train
Once Bond is finally on the tracks behind the train it is only a matter of time until the mission is over. Simply follow the train close, using missiles to take out the guns on the back of it, until the ground begins to sink away. At that point have Bond get under the train immediately. If Bond delays then he may fall at the bridge which is up ahead just a little way.
An Old Friend
Summary
Quite a bit of fighting on this mission, and even some need for stealth. Use caution when tackling this mission in order to score Bond moments, or head through with reckless abandon to get through it quickly.
Goals
Gold: Score at least 125,000 points.
Platinum: Complete the mission while taking no damage.
Step-by-Step
Objective: Destroy 6 Missile Launch Computers
At the beginning of this mission Bond will find himself in a small compartment with three enemy soldiers. Kill them, then proceed to destroy six of the seven missile launch computers. If Bond doesn’t destroy six missile launch computers in this car then it isn’t much of a problem; there are others in the train.

It is possible to earn a Bond moment by killing all of the enemies in this train car silently, without anyone noticing. This can be done with stealth or by simply killing them all before anyone can reach the alarm at the end of the car. Either way works; the Bond moment is given out when exiting the train car.
In the second train car a Bond moment can also be earned by killing all three guards here without making any noise. Unfortunately it is much harder to do in this car, as there is no alarm and it needs to be done silently, however it is still possible.
The third train car presents yet another opportunity for a Bond moment, and like the last chance Bond must still take out all three of the enemies in it silently. If Bond is not silent, however, then this time around two enemies will enter the train car from behind, giving the potential for Bond to have enemies on both sides of him.
The fourth train car is the final chance for a Bond moment, and again all enemies must be dispatched with stealth. This time around there are four enemies, however, and since they patrol, it is much more likely that they will hear Bond. Use caution and, when they have been dispatched, pick up the armor in the middle of the train car and proceed to the fifth and final train car where stealth will not be necessary.
Since the fifth train car is exceptionally dark Bond will need to enter it with thermovision enabled. Additionally, due to how dark it is, there is no chance of earning a Bond moment there, so proceed with reckless abandon. If Bond has any need of it, after dispatching the five enemies in this car, then there is a Suit of armor available here.
Before proceeding to the sixth and final train car, ensure that Bond has destroyed at least six of the missile launch computers. Again, while this could have been done in the first car, there have been numerous chances along the way. Once inside the sixth car Bond will no longer have a chance. Additionally, be sure to turn off thermovision before entering the sixth car, as well.
Objective: Defeat Jaws
For some reason, when Bond encounters Jaws, he has dropped all his weapons and left them behind so that he can fight with Jaws unarmed... at least, that is the way that it appears. Anyway, in the area where Bond will fight Jaws there are four pillars. Jaws will grab one of these pillars, throw it at Bond, and the pillar will be replaced by a pillar of electricity. While it is possible for Bond to dodge the pillars that Jaws throws, it is easier to stand behind one of the other pillars and let the thrown pillar be destroyed by the standing one.

Now let’s face it, while Bond may be good with gadgets, apparently he isn’t even able to dent Jaws when it comes to bare-knuckle brawling. So why did he throw his guns away? I still don’t know. Anyway, the only way that Bond can damage Jaws is to hit him and knock him back into the electricity, while not being caught in the blast himself.
Sand Storm
Summary
This mission can be a bit tricky. It is easy both to run out of ordinance, and to take a lot of damage or get hit by falling debris. As a result caution is more important than speed. Oh, and Bond gets to fly a cool helicopter.
Goals
Gold: Score at least 160,000 points.
Platinum: Complete the mission in under forty-five seconds.
Step-by-Step
Objective: Catch Up to the General’s Helicopter
During the early phase of this mission it is critical to use as little ordinance as possible because it is very easy to run out during this mission. Additionally it is also best to avoid as much damage as possible so that Bond can strike at the enemy with impunity for the final part of the mission, not having to worry as much about dodging. Deploy flares continuously in order to accomplish this.

Additionally, getting Bond moments on this mission is somewhat easier than on others. In the beginning there is a ship to destroy. Take this one out, as well as the next three to score a Bond moment. Before Bond can even get that Bond moment, however, there is a bridge after the first ship that has some trucks on it. Hit this bridge with a missile to score another Bond moment.
Otherwise, just get through this section of the level and avoid the falling debris to get to the General. Just remember that, when Bond gets to the waterfall, the map continues to the left so take a hard left, otherwise you may get turned around somewhat easily.
Objective: Eliminate the General
When Bond finally catches up with the General, begin following him, but conserve ammo. Instead stick close to the General and deploy flares as he heads through some ruins, then out to his base. While in the ruins, however, avoid the flames that shoot out of the wall to get another Bond moment.

When the General retreats to his base Bond has reached the end of the mission. Deploy flares continuously and shoot missiles or bombs at the three shield generators. When they have been taken out simply drop bombs or use more missiles on the actual base structure in order to eliminate the General, and finish the mission.
MI6 Interlude
Not a mission, the MI6 Interlude introduces Bond to some new toys, namely the Q-Spider, a strobe grenade, a dart gun, Bond’s Q-Bike (which you’ve already had the chance to drive), and Q’s new assistant. Enjoy!
Serena St. Germaine
Summary
The first largely un-timed driving mission, Serena St. Germaine offers Bond a chance to really use each of the features of the Porsche to take out the various enemies on this mission, or to avoid them.
Goals
Gold: Score at least 150,000 points.
Platinum: Get from the hotel Americano to the finish in under a minute and fifty-five seconds.
Step-by-Step
Objective: Intercept Patrol Jeep Before it Reaches the Village

This can be quite tricky, especially if Bond tries to use missiles. Instead, switch to machine guns and fire continuously, while following the patrol jeep. In this manner Bond is likely to hit it more than a few times, and will likely take it out before it reaches its destination.
Objective: Locate and Enter 003’s Hideout
After the patrol has been neutralized, head toward 003’s hideout, which is shown on the map as a blue dot. As you near the hideout a bridge will lower. Drive up the bridge, then when Bond reaches the hideout simply get out of the Porsche and walk inside.
Objective: Get to the Hotel Americano
In order to reach the Hotel Americano Bond will need to move fast--very fast. Drive back up the ramp then take the first right, then a left, then the next right to head in the direction that the initial patrol car was originally heading in. This will take Bond to a village. From this point stay to the left until Bond notices the patrols blockading the road to the Hotel Americano. When Bond sees this continue straight, then hang a right to get to the fireworks manufacturer.

Across the street from the fireworks building is a blue circle hidden by some trees. Drive there, then deploy the remote control car, which can only be deployed from this position. With the remote control car deployed have it drive up the steps of the fireworks building, and to the right. Shoot open the grate there, then once inside, blow up one of the crates of fireworks with the laser. When the explosion starts to go off all the patrols in this area will converge on the fireworks building.
Have Bond drive back to the previous blockade, then continue up and toward the Hotel Americano. When Bond finally reaches the Hotel Americano, Serena St. Germaine will walk out to meet Bond to take him to the mountain fortress.
Objective: Reach the Base of the Mountain Fortress

Follow Serena St. Germaine’s instructions to the letter as she directs you on going from point A to point B. Eventually she will direct Bond into the path of a tank, which will proceed to shoot a pillar. After the pillar falls drive off the ledge that it opens up with its fall and proceed forward on the lower road.
Take the jump that is in front of Bond, then continue forward and toward the next blue circle, where Bond will get out of his car to complete the mission.
Vertigo
Summary
In Bond’s effort to reach 003, he will need to traverse some old mineshafts that are full of enemies. Take them out silently if possible, but feel free to let loose at will as well. Since Bond will typically only have to worry about his fore and aft, with little worry about his sides, fire fights can often be quite controlled.
Goals
Gold: Score at least 150,000 points.
Platinum: Complete the mission in under four minutes.
Step-by-Step
Objective: Get to the Top of the Cliff

Have Bond begin by walking forward, down the mining shaft, and take out the guards in the way. If Bond is able to take out the four guards without being spotted then he will earn a Bond moment. This is somewhat difficult and requires quite a bit of pausing behind mine cars, waiting to see if a guard shows up, but is quite doable.
After a short bit Bond will come to a mine elevator. Since the elevator doesn’t work at the moment Bond will need to rappel up to get to the next level, where more guards will be waiting. Have Bond move forward slowly and take out each enemy, making sure to wait for the enemies that rappel down to meet up with Bond.
Objective: Retrieve Agent 003’s Uplink Device
Rappel up the next mineshaft and kill the enemy that rappels down to shoot at Bond. From here grab the armor vest if there is a need, then continue to rappel up the next shaft to another armor vest. Make sure that Bond leaves one of these vests for later. It may, however, be better to take out the next enemy before grabbing either of the armor vests.
Just past the vest is a mining cart that Bond will need to shove toward an enemy. When he does, however, that enemy will begin firing rockets at him. As a result Bond will need to shove the mining cart and begin to fire at the enemy rather quickly. When the enemy is dead retrieve armor if necessary, then look out the opening on the right to see a signal-jamming antenna. In 00 Agent difficulty the second armor vest is not present.
While it might be a later objective, it is an easy one to complete now. Just fire a few AK rounds into it and it will be destroyed. Afterward Bond can continue down the mining shaft, kill the guards to the left, one on the ground and one hanging from a rappel point, then continue to rappel down into a darkened mining shaft, instead of up to where the guard was hanging from.
Walk to the end of the darkened mineshaft, killing the guards, until M says that it looks like a trap. Ignore her and grab the rocket launcher and armor that are down there, then return, taking out the guards that have flanked Bond.
When Bond rappels up the mineshaft have him shoot out the boards that are blocking the way for the Q-Spider to the right, then send a Q-Spider underneath them. Navigate the Q-Spider around the small tunnel, up the boards, and through the next tunnel to have it move up to the guards and detonate. After the spider has detonated have Bond rappel up the rappel point here, and continue down the hall to the now-empty gadget-filled room, where Bond can get some more armor and other items.
Next have Bond continue down the hall, rappel up the next point, kill the enemies in this spot, and rappel up to the final level where he will retrieve 003’s uplink device. Be especially careful in the last room, as there are multiple guards in close quarters.
Objective: Install 003’s Uplink Device
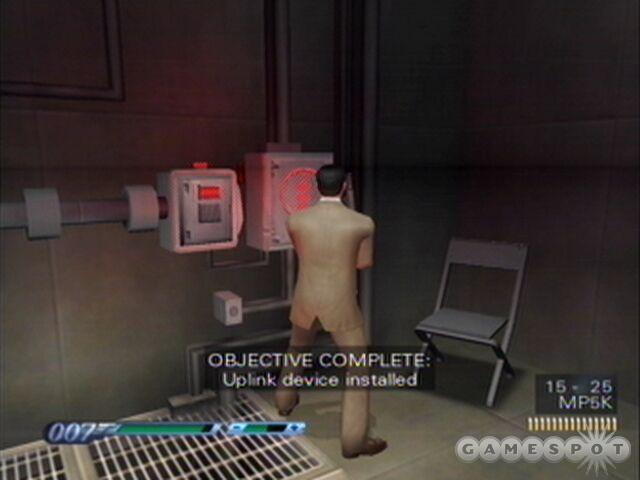
Return to the room with the armor and weapons in it, that Bond penetrated with the spider, then install the uplink device in the junction box there. Even though Bond is now going to be back-tracking on his previous path, there will be all-new enemies the whole way.
Objective: Destroy Signal-Jamming Tower
If Bond was opportunistic and took the tower down earlier, then this will not be an issue. Otherwise simply leave the room and blast the tower that is across the way to bits.
Objective: Get to the Top of the Cliff
This objective is quite easy. Simply rappel down the next passageway, back toward the beginning of the mission, then head toward where the armor was on this level and rappel down the two flights to another ambush by enemy soldiers, taking out the baddies that are along the way.
After Bond clears the ambush, simply have him walk into the elevator there and activate it. This will let Bond go all the way up to the top of the cliff and will complete the mission.
The Ruined Tower
Summary
A bit of a fun mission, the Ruined Tower is wide open and presents many opportunities for Bond to get shot. Additionally, Bond will need to use caution in the beginning and use stealth to take out the first four enemies. Just remember to be careful when faced with the rocket launcher-wielding enemies.
Goals
Gold: Score at least 175,000 points.
Platinum: Fire ten shots or less.
Step-by-Step
Objective: Infiltrate the Ruin

Begin by dispatching the two guards in the initial room while being as stealthy as possible in order to earn a Bond moment, or simply with reckless abandon if necessary. Taking the first guard out with a physical attack from behind, then nailing the second with a sleeper dart works quite well. After they are dead pick up the munitions from them, and the room, then look outside.
Jump to the cover afforded Bond from the ruined area just outside the building, then use a couple of sleeper darts to knock out the two patrolling agents for yet another Bond moment. Finally, use the rappel to climb the ledge that was to the right when Bond left the building and grab the Dragunov there, as well as the armor if need be.
With the Dragunov in tow leave and rappel back down as quickly as possible, as an enemy will emerge that will begin firing rockets. As a result begin heading toward the entrance of the ruins and, after the second turn back, before Bond reaches the main area, there is a place from which he may snipe the rocket-launching enemy. Use caution to take out the other enemies that will come at Bond, and dispatch the Rocketeer as fast as possible.
With the rocket-launching enemy having been dealt with have Bond explore the rest of this area, grab the vest near the stairs if necessary, than rappel up where the elevator is to reach the next area.
Kill all of the enemies in this area and grab the Dragunov and rocket launcher from the sheltered area where the first rocket-launching enemy was killed by Bond. After Bond has the rocket launcher another enemy will come forward, shooting rockets at him from across the way. Navigate the obstructions to find a relatively safe place to use the Dragunov to take out the second rocket-launching enemy.
When everything starts to feel safe again, move to the mineshaft and drop the crate, then push the mine cart in the area below through the wood at the far end. Kill the enemies along the cart’s path, then when it comes to a stop shoot it to detonate the dynamite inside. Afterward have Bond walk inside the ruins to end the mission.
Death of an Agent
Summary
After all the work Bond has done to try to catch up with 003 it is somewhat sad that Bond comes to him as he is dying. Oh well, at least Bond is able to save one person during this mission.
Goals
Gold: Score less than 200,000 points.
Platinum: Take fewer than 100 points of damage
Step-by-Step
Objective: Reach 003 Before He Dies

Between Bond and 003 are four enemy guards. In order to reach 003 Bond can either head down the hall and shoot all of them, or he can deploy a Q-Spider in the beginning, have the Q-Spider head down the corridor and enter the tunnel on the left, and navigate the tunnel in order to drop onto three of the guards to earn a Bond moment. Either way works, but Bond moments are always a good thing.
Finally head down the hall and kill the fourth guard, then reach the bottom of the stairs to come to 003.
Objective: Find Another Way Off the Cliff
At this point Bond will need to kill the enemy that interrupts him and 003, then continue out of the interrogation room. Follow the corridor down and kill the enemies along the path. When Bond reaches a small ambush take caution and kill the enemies one by one from cover, then continue along, grab the armor in this area, and drop down the small opening to enter the catacombs.
Objective: Locate Exit to the Catacombs
While not exactly extensive, the catacombs are full of enemies and can be a pain to navigate. As a result, if you want to explore them, then fine. Otherwise, take the first left then hug the right wall. This will bring Bond by a rocket launcher, which will earn him a Bond moment for picking up, and take him by two Suits of armor.
After Bond picks up the rocket launcher then the first Suit of armor is closely behind, and a few enemies later Bond will come to the second, both in a small offshoot to his left. Continuing beyond the second Suit of armor Bond will come to the stairs. Also on his left but, like with the armored vest and the place where the rocket launcher is, they are noticeable so Bond should not miss them.
Objective: Find Another Way Off the Cliff
When Bond reaches the top of the stairs, make ready to fend off several enemies, then flip the switch on the right to open the door. Once the door is open take out the enemies, diving from behind rail car to behind rail car until they are dead. For a Bond moment, Bond can shoot an explosive crate near the enemies to have it blow up and kill several of them. Whichever way Bond kills them, after they are dead he may continue forward to one of the most interestingly fast-paced parts of the game.
Objective: Catch Serena
Bond will now run into Serena St. Germaine being dropped from a helicopter, and will have to jump to try to catch her. On the way down Bond will need to avoid obstacles in order to avoid dying, and have several chances at some Bond moments. One important thing to know is that Bond does not automatically jump, instead he must be made to jump as SOON as possible, otherwise he will not be able to catch Serena in time. Additionally if Bond ever gets snagged on anything, and does not make a clean fall, then he will take too long getting down and the mission will fail.
The first Bond moment comes pretty quick. On one of the larger ledges on the right, there will be two enemies shooting rockets at Bond. Simply have him shoot the crates near the enemy on the left to make them explode, giving him a Bond moment. The crates must be targeted with the Bond sense.
A little further down Bond will come to a narrow gap on the left. Have him navigate through this gap, then immediately trigger the Bond sense to shoot an explosive tank to his right, while moving to his left to trigger yet another Bond moment, the third on the way down. It is a tricky maneuver, but it can be done. Afterward navigate toward Serena to end the mission.
A Show of Force
Summary
003 is dead and Serena St. Germaine thinks that she can pilot a tank. Needless to say, there are big changes going on in happy town. Anyway, Bond doesn’t have any control over much of anything that happens on the earlier part of this mission, so just have him shoot everything in sight. Afterward, enjoy a short bit on the motorcycle.
Goals
Gold: Score at least 200,000 points.
Platinum: Complete the motorcycle portion in under forty-five seconds.
Step-by-Step
Objective: Get Serena Safely to 003’s Hideout

Despite Bond’s lack of control early on, he can man the machine gun or main tank gun, and he is able to cause some Bond moments to happen. As a result switch to the tank gun and blow the main gate open for a Bond moment, as well as the enemy jeep. Afterward blow apart the enemy jeep and the helicopter that come at the tank.
Next switch to the machine gun for the ride up the stairs and slaughter the enemy troops that attack Bond, as well as the two jeeps at the top. The moment the jeeps have been destroyed have Bond switch back to the main tank gun as he heads into the alley. When two troops assault him have him shoot the crates near the one on the right for another Bond moment.

Bond will next head through an alley and into a courtyard on the tank. Switch to machine guns and use them to not only de-populate the alley but to also take out the enemy tank. Once the tank has been destroyed switch to the main gun and have it blow the over-street walkway apart before the enemies on it chew Bond’s tank to bits.
Finally kill the next tank and trucks that will attack Bond next, then Serena St. Germaine will get the brilliant notion to drive herself and Bond into an ambush put on by a helicopter and two tanks. Fortunately, however, you can simply execute a Bond moment by using the main tank gun to blow up the gas station where they are parked.
Objective: Get to the Extraction Point
Finally, with the tanks and helicopter destroyed, Bond will reach 003’s hideout and ditch Serena St. Germaine, at which point he will be able to take control of a motorcycle and reach Q. In order to do this, hop on the motorcycle and head out of 003’s base to the right. Blow apart the truck that begins to attack Bond then take the shortcut to the right, shown on the map, in order to get there faster, avoid several motorcycles, and earn a Bond moment.

Next have Bond continue along the track and, when he comes to a blockade with the bed of a truck open like a ramp, have him drive up the back of the truck. This will both get Bond past the blockade and earn him a Bond moment.
Objective: Drive Into Q-Plane
This is simply a matter of speed. Have Bond hold down the throttle continuously and shoot missiles early on, then when he nears the plane, turn on the side-mounted flame throwers. This will enable Bond to keep any motorcycles from bumping him away, provided he can drive well, and when he gets on the plane the mission will end.
MI6 Interlude
Cool, a new invisibility Suit, an explosive spider, and a new car. This day just keeps getting better and better. Biodegradable though? Doesn’t sound very durable to me.
Mardi Gras Mayhem
Summary
Quite a bit of racing action going on here, Bond is even able to use his oil slick. Just be careful; he is surrounded by citizens and killing them can put a premature end to Bond’s ambitions.
Goals
Gold: Score at least 200,000 points.
Platinum: Get from the phone booth to the van in under forty seconds.
Step-by-Step
Objective: Rendezvous with NSA Agent
OK, Bond hasn’t been made or anything yet, so as a result simply have him drive to the marked point on his map and get out of the car. To get there simply stay on the main road that Bond starts on and he will find the place in no time.
Objective: Steal Transport Truck
Begin by heading out and turning to the right. After a short bit it will look as if the way is blocked, but if Bond looks to the right he should see a small alleyway. Get him onto the alleyway then slam the gas to jump over part of the parade and into a building. Drive through the building and out the other end, then drive to the far side of the square and turn right.

Just a little bit further and Bond will be at the truck. When he reaches the truck have him get out of the car and open the back of the truck via a button on the left side. With the back open have Bond drive the car into the truck for a Bond moment, and to take control of the truck.
Objective: Infiltrate Compound
This part is easy, simply have Bond drive out in the truck, to the left, then straight ahead. After a short bit he will come to the compound.
Objective: Place the Tracking Device on the Truck
Simply have Bond drive inside the main building and get out of the truck. Once he is out have him place a tracking device on the truck nearby, then he will overhear plans to kill Mya.
Objective: Stop the Henchman

This part is quite easy; simply have Bond catch up to the limo, which will take different back roads trying to avoid Bond. When Bond reaches the Limo either shoot it with rockets, guns, or the EMP weapon, or hit it with the oil slick for an instant win and a Bond moment. Additionally, for another Bond moment, when Bond is leaving the compound initially he can drive through a pipe and through a building, which also gives Bond a shortcut.
Objective: Get to the Club
Drive toward the club as quickly as possible to complete this objective, and the mission. The moment Bond reaches the club he will automatically complete the mission.
The Kiss Kiss Club
Summary
Not too long of a mission, the Kiss Kiss Club will have quite a bit of combat centering around the central room, with some brief passages to and from it. Due to the central nature of the mission, however, it can help to leave some of the power-ups in it until later on.
Goals
Gold: Score at least 225,000 points.
Platinum: Finish the mission without firing a shot.
Step-by-Step
Objective: Enter the Kiss Kiss Club
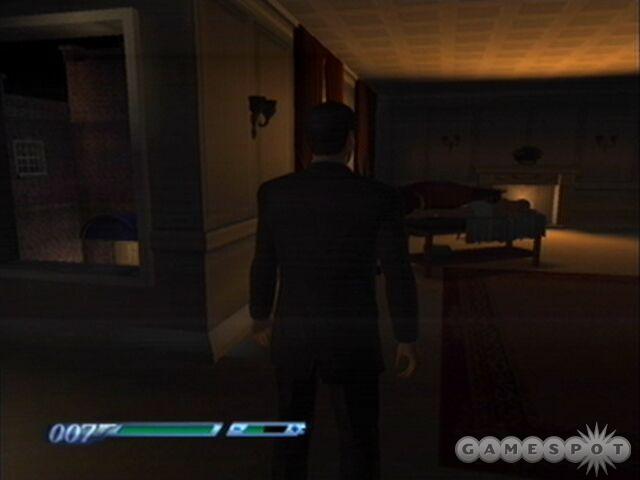
Unfortunately the front door will not open to Bond and, instead, Bond will need to enter a window that is to the right from where he starts, utilizing the Rappel gadget. Once Bond is inside he will find a girl laying on a bed; give her a massage for a Bond moment. Afterward exit the room.
Objective: Find Mya
Walk down the hall and, when Bond comes to the door, have him shoot the enemies that are through the door, waiting for more as they come. After the enemies are dead have Bond walk through the door and, instead of going down the stairs, head down the hall and to the left.
When Bond enters the control room have him move near the far right side to pick up the battery, then use the controls to open the door. With the door open have Bond walk down the stairs and through the door at the end of the hall. Once in the room he will find Mya being held, and will be confronted by several enemies.
Objective: Retrieve Security Access card
When the camera returns to Bond, and he is crouching at the bar, have him flip the switch at the far left side of the bar in order to cause the stage lights to fall and take out some of his enemies easily, and obtain a Bond moment. Afterward Bond should have little trouble taking out the rest of his enemies. Additionally another Bond moment can be picked up if Bond shoots the two enemies on the balcony above, in such a way that causes them to fall to the floor.
With the room cleared have Bond head into the elevator to the right of the stage. Once Bond is on the second floor have him shoot any remaining enemies up there, then Bond can enter the room to the right and claim the security access card from the table.
Objective: Rescue Mya
Head back downstairs and take out the armored enemies that await Bond. To do this Bond can either fight them downstairs, or, after taking the elevator downstairs and walking out of it to trigger their appearance, he can take the elevator back up and shoot them from above. Since few of them have a gun this can make the fight much easier.
When they are dead have Bond go behind the stage, where he will find a door that requires the security access card. Once through the door have him kill the guys that are in the dressing room and the hallway beyond it, then approach the far door in the hallway and the mission will end.
Underworld
Summary
In order to play this mission Bond will have to get a Gold score on eleven of the twelve missions so far, or in the game period. Not too difficult, but this can be a pain and many people may not even realize that this mission is available until later in the game if they don’t get them soon. Anyway, while this mission is not necessary, it is a fun little bloodbath.
Goals
Gold: N/A
Platinum: N/A
Step-by-Step
Objective: Rescue Mya
When this mission first starts have Bond kill the guy that is in the room with him, then pick up the skeleton key by the door and kill the two guards that are in the hall. After the guards are dead have Bond drop his Q-Spider. Near the next doorway is a spider hole. Run the Q-Spider through this hall and, in the next room, blow it up near the explosive barrels before the enemy guard can step on it.
After the explosion Bond will be able to stand along the wall near the hole and shoot the enemies that come for him, which will make taking out the enemies much easier. Additionally, have Bond walk into the room and back every now and then to trigger more enemies. Facing them at this spot is much easier then in the middle of the room. After they are dead head through the door opposite the hole in the wall.

Continue through the next large room, killing the enemies along the way, until the next doorway. Once Bond is in the small hallway here he will simply need to take out the enemy waiting for him, and the ones that try to ambush him from behind, and head forward to the next door to end the mission.
Death’s Door
Summary
A pitched battle in the middle of a cemetery, Bond needs to get to Mya as fast as possible or she will be cremated alive. Better lace up them running shoes.
Goals
Gold: Score at least 275,000 points.
Platinum: Finish the mission in under three minutes and fifteen seconds.
Step-by-Step
Objective: Find a Way to Enter the Crematorium
Proceed forward, taking out the guards that Bond encounters until he reaches the courtyard and can see the fountain. To Bond’s right is a sniper rifle. Grab it, then proceed slowly toward a run-down building, which was on the opposite side as the sniper rifle.
Once Bond nears the run-down building several enemies will come out at him. When they do, run back behind the tomb where the sniper rifle was, then dispatch them from there. After the enemies are dead enter the small area just outside the run-down building, killing the enemies waiting there, then use the Bond sense to blow apart the boards that cover the window to the right and shoot the sniper on the roof through the window.
Next up drop the Q-Spider and send it through a hole in the run-down building to find a secret armor vest, and obtain a Bond moment. Unfortunately, however, Bond will not be able to enter the run-down building at this time, and will need to find a skeleton key.
Objective: Retrieve Skeleton Key in Bell Tower
Have Bond head out of the run-down building and through the gate on the left. Kill the enemies that attack Bond, then continue down the courtyard and kill the enemies that come at Bond in a second wave, particularly the one that runs toward the gate to the right. If Bond kills him before he opens the gate, then he will gain a Bond moment; if not, then if he is going for a platinum score, he may have a better chance with the gate open.

During this tome a sniper will be shooting at Bond from the bell tower. Ignore him and wait for Bond to rappel up to the bell tower to kill him in hand-to-hand combat. When the sniper is dead Bond will get a Bond moment for using hand-to-hand maneuvers on him. Pick up the skeleton key when he is dead.
Objective: Gain Entry to Run-Down Building
With the skeleton key in hand, Bond will need to rappel down to the ground under heavy enemy fire. Take out the enemies and return to the run-down building. Turn on thermovision and have Bond open the door to gain entrance.
Objective: Destroy Security Box to Open Gate
Once inside the run-down building have Bond take out the enemies inside and make his way to the second floor. When Bond reaches the second floor have him kill the enemies there, and make his way onto the balcony, which will trigger more enemies to come at him.
After the enemies are dead have Bond turn off thermovision, while still on the balcony, and use the sniper rifle to shoot the electrical box on the building across the cemetery. This will not only open the gate, but it will give him a Bond moment, as well.
Objective: Find a Way to Enter the Crematorium
With the security box destroyed, the way into the crematorium is open. To get there have Bond walk past the bell tower and toward the Crematorium, then, once he reaches the entrance, he will face his next big foe.
Objective: Defeat Jean Le Rouge
Have Bond walk forward to find Jean Le Rouge sending Mya into the cremator. The moment Bond is able to, hit the switch to stop Mya from moving forward, then begin to kill Jean Le Rouge. Just keep Mya in mind, as any time he is able to, Jean Le Rouge will trigger her again and send her into the cremator.
The Jean Le Rouge battle is a fun one. He’s quite strong and can take several hits, and the battle area is dotted with armor and weaponry along the walls, which should be enough. Additionally there are some hazards. Along the walls Bond can find some explosive canisters which, if he hits one when Jean Le Rouge is there will give him a Bond moment and do serious damage to Le Rouge. Likewise there are some gas valves hanging from the ceiling and on the walls that will do the same. Just be careful: Jean Le Rouge can use them against Bond, as well.
Battle in the Big Easy
Summary
A quick mission, Bond can fly through in relatively short order. Just take care not to slow down, as the initial sequence in this mission somewhat resembles the movie Speed.
Goals
Gold: Score at least 250,000 points.
Platinum: Drive from Bond’s hideout to the compound in under fifty-five seconds.
Step-by-Step
Objective: Take Mya to Bond’s Lair & Allow Mya to Defuse the Bomb
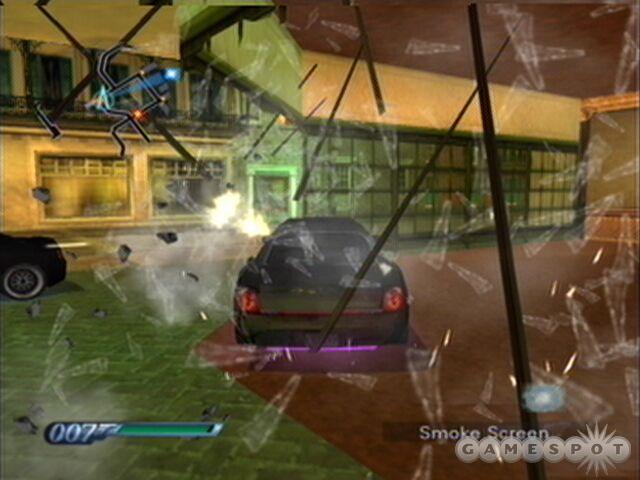
Begin by driving straight down the street, taking the forced right, then the first available left, crashing through the windows in both places to cut some corners while constantly releasing the smoke screen. If Bond is able to get an enemy caught in the smoke screen, then he will earn a Bond moment.
Right about this time Bond will be informed that if he slows down the limo will detonate, so don’t slow down and keep moving as fast as Bond is able. After a short bit, and two enemies pull out right in front of Bond, there will be a park on Bond’s left. Drive through it to get near Bond’s headquarters. Once there drive around the block until Mya is able to defuse the bomb, then drive into the headquarters on the next go-around.
Objective: Destroy the Compound

Once Bond is in his real car drive out as fast as possible, and nail the enemy limo as Bond exits with missiles. Afterward turn left, then left again, then make the next right to go toward the compound.
After Bond reaches the compound have him park on the lit blue area and deploy the remote-control car. Right in front of Bond’s car, or maybe slightly to the left, is a pipe through which the remote-control car can enter the building. Drive in and up the pipe, then when the remote-control car reaches a ledge, shoot the gasket and steam will distract two enemies.
With the enemies distracted, drive off the overhang and straight ahead, taking the first left then the next right, and finally turning left toward the large explosive tank. Right near the tank is a junction box, at the bottom of the ramp. Drive down the ramp and shoot the box with the RC car to destroy the compound. If Bond can do this while only using one RC car then he will earn a Bond moment.
Objective: Deliver Mya to her Apartment
Drive as fast as possible and get Mya to her apartment in little time to earn a Bond moment. To do this have Bond drive straight ahead and, once he is past the compound area, take the next left. Shortly ahead will be a right, toward the blue dot on the map. Take it, then make the next left to reach Mya’s apartment.
Faded Splendor
Summary
An interesting mission, Bond will need to fight through an old, decrepit mansion in order to reach Yayakov’s lair. Neatly enough, the mansion even has quite a few hidden surprises to keep Bond busy.
Goals
Gold: Score at least 300,000 points.
Platinum: Take fewer than 100 points of damage throughout the mission.
Step-by-Step
Objective: Find Yayakov’s Lair
Begin by taking out the three enemies on the first floor, and the sniper if necessary. If Bond can do this silently, without alerting the sniper, then he will earn a Bond moment, however it does require much preparation and possibly the use of the stealth Suit. The Bond moment is earned when Bond reaches the third floor with the sniper still looking down below.
With the guards dead Bond can use a Q-Spider at a hole down the left wing of this room; otherwise, in the central area, there is a rappel point where Bond will be able to go up to the third floor. On the second floor kill the sniper then dispatch the two guards that come at Bond from the left. When they are dead either head to the left or go to the right, where Bond can first use a Q-Spider down a hole to kill a guard on the first floor.
To the left Bond will find a suit of armor at the far end or, in a room just to the left, there is a staircase heading down with a guard patrolling it. Grab the armor if necessary, then dispatch the guard and head down the stairs to the second floor.

On the second floor have Bond shoot the guard that comes out at him, then head into the main room. The moment the guards start shooting have Bond use his Bond sense to target the chandelier to have it fall on the guards for a quick victory and a Bond moment.
With the guards dead head down the stairs and to the left, where Bond will find a switch. Flip the switch, then grab the battery and get up against the wall. Kill the guards that come at Bond here, then go to the other side of the stairs for another switch, and flip it.
More guards will now come at Bond. Shoot as many of them as possible, then get to the first column and, with Bond’s back against it, shoot the remaining guards and head to the second floor, and, while heading to the left, shoot the two guards behind the fallen door in the room at the far side. Use the table for protection if necessary.

Continue down, past the room with the fallen door, and through the next door on the right. Kill the guards that come up at Bond from the stairs, then head into the room on the right, where the two guards were shooting at Bond earlier. In the left corner of this room is a switch; activate it and Bond will have access to an armory. Pick up weapons and armor here, then return to the stairs and shoot the sniper that is at the rappel point to the left.
Rappel up to where the sniper was and kill the two guards, then grab the vest and rappel down into the computer room at the far end. Finally kill the guards on this level, then walk into the computer room to end the mission.
Machinery of Evil
Summary
One of the more intriguing boss levels yet, Bond will need to take out Yayakov without ever actually shooting at him, by destroying the complex around him. Just watch out for those Bond moments.
Goals
Gold: Score at least 300,000 points.
Platinum: Fire ten or fewer shots throughout the entire mission.
Step-by-Step
Objective: Destroy All 4 Processing Chambers
This level is essentially one giant arena. When the mission starts have Bond grab the armor if necessary, as well as the shotgun, then walk through the door. A cut scene will ensue after which four guards will attack Bond. To deal with them either dodge to the right and shoot back and forth, or run right at them and take them out quickly, as they have a slow reaction time.
Once the guards have been dispatched head below and, under where the main enemy is standing, there is a rocket launcher that Bond can grab by shooting one of the pipes. With the rocket launcher in hand, head back to where Bond started and take the right path down to the dip in the floor on the first level.

There is a Q-Spider hole here that, if Bond can send the Q-Spider through it and along to one of the processing chambers, he will get a Bond moment. To do this, however, may take some time so it is usually best to wait until enemies emerge from one of the side areas so Bond can kill them and have a few moments’ peace to do this.
Finally, with two of the three Bond moments on this level taken care of, have Bond return to where he started, facing Yayakov. The order in which Bond wants to destroy the processing chambers is the closer right one first, the further right one, then the closer left one, then the further left one. Simply approach the control panels in the rooms and detonate them. Each time one is destroyed, enemies will rush out at Bond; dispatch them then continue to the next one.
Objective: Destroy Transformer Cores

After the fourth processing chamber has been destroyed Bond will need to head downstairs, as electricity now blocks his path. Kill all of the enemies down below except the two near the large pipe. To take them out have Bond use his Bond sense to target the pipe, which will spew steam at the enemies to stun them, making them easy prey for Bond and gaining him a Bond moment.
Head back to the top level once the enemies are dead, then target the two large transformer cores in the middle of the room and shoot them to blow them up. Once they have both been destroyed the mission will end.
The Pontchartrain Bridge
Summary
While many of the previous missions have involved quite a bit of looping back and slow progress, this mission is nothing but fast-paced frenzy. Once Bond hops onto the motorcycle and slams down on the gas there is really no reason to ever let up; simply keep the pedal down and floor it until Jaws is taken out, again.
Goals
Gold: Score at least 300,000 points.
Platinum: Finish in under three minutes and ten seconds.
Step-by-Step
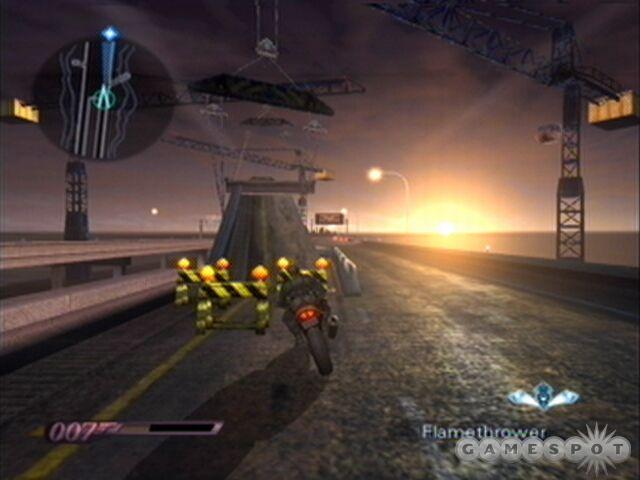
Objective: Disable Jaws’ Tanker
Begin by stepping on the gas and taking the left branch. Shortly up ahead Bond will come to a small pond and a barbed wire gate and fence. If Bond can get up enough speed up until, and on, the pond, and use the lip of it as a ramp to jump over the gate without crashing through it, then he will earn his first Bond moment.
Next up have Bond take another left, then a right toward a building manned by some enemies. Shoot the building with missiles for another Bond moment, then continue forward and onto the highway.
Once on the highway Bond will first need to crash through a toll plaza. In order to do this safely Bond should stick to the right and go through the gate that has the red indicator above it, instead of the green one which is closed off due to an accident.
Next Bond will need to bob and weave through traffic while taking out the enemies that will appear on motorcycles. The baddies will come in two waves, initially, both of a pair of motorcycle riders. Take them out with missiles as quickly as possible, then shortly after the second wave, Bond will come up to a ramp on the left. Take the ramp in order to jump to the other side, into the path of oncoming traffic, to earn a Bond moment.
Shortly after Bond is in the way of oncoming traffic, which he will have to dodge around at a much greater pace than the other traffic, he will need to take the path to the right in order to get back into the other direction, to catch up to Jaws.
When Bond gets close to catching Jaws, Jaws will knock over a gas truck. While it is possible for Bond to go around the truck, if he slides underneath it then he will earn another Bond moment. You will know that you performed the move successfully if a cutscene ensues.
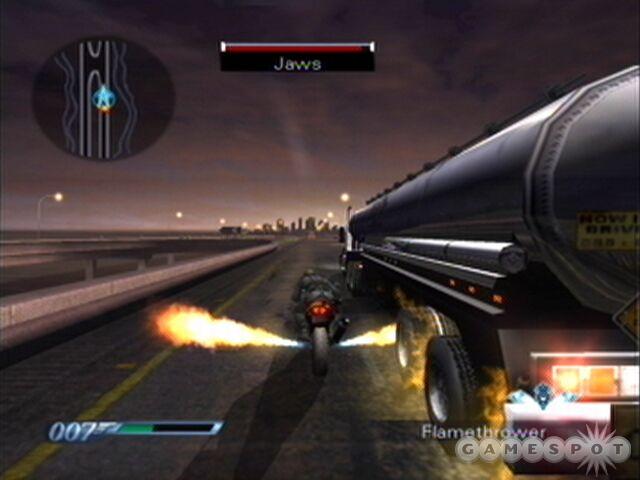
Finally, with the tanker truck past, Bond simply needs to catch up to Jaws and begin blasting him to end the mission. Protecting Jaws are several smaller trucks with enemies in back that both throw objects at Bond and shoot at him. For the most part he can ignore the minor trucks and focus largely on Jaws. When Bond’s missiles run out using the flame thrower on the motorcycle can take down Jaws in fairly short order.
MI6 Interlude
So, now Bond understands a bit more about the Nanobots that are about to be unleashed, and may even have a notion as to how to stop them and where to go next. Additionally he now will have some EMP grenades, and those will come in handy on the next mission.
A Simple Exchange
Summary
First and foremost, regardless of the objectives, casualties are OK. The only trick is that you can’t shoot anyone, but you can use stealthy physical attacks to subdue them, and, of course, you can use your sleeper dart. Other than that, guns are a no-no. Next up, keep Bond crouched whenever his NanoSuit isn’t active, and be ready to stay hidden at all costs.
Goals
Gold: Score at least 325,000 points.
Platinum: Finish in under 40 seconds.
Step-by-Step
Objective: Disable Security Lasers

At the beginning of the mission have Bond crouch and move toward the guard in front of him, then dispatch the guard with a silent physical attack. Once the guard has been dealt with have Bond move behind the counter to collect a battery, then look to the next room near the counter.
Inside this large room Bond will find three security cameras and a guard at the far end. Bond will need to dispatch the guard at the far end and, to get there, he can either use his NanoSuit and run to the far side, or he can use two or three EMP grenades to disable the cameras; both methods work.
Just remember, Bond will need to return as well, and that can use quite a bit of energy, and EMP grenades should be manually detonated when they are near the cameras, not on the ground after falling. Use Bond sense before entering the room to discover where the cameras are. The guard at the far end also may hear the EMP, so be careful and hide when he comes to look and figure out what happened.

However Bond gets there, once he will need to disable the enemy at the far end and take his keycard. Afterward there is a switch on the wall that Bond can use to deactivate the laser security, for which he will earn a Bond moment, and he can also move a wine rack out of the way to reveal a secret room for a Bond moment. While Bond may not need the sleeper dart ammo yet, he may need to come back later for more. This is much easier if Bond has used EMP grenades to disable the cameras. There are also some more EMP grenades in the room.
Objective: Find the Racecar Driver’s Room
When Bond heads back across the room with the security cameras, to return to the front desk, there is a small alcove to the left with another battery; don’t forget to pick it up. Upon reaching the front desk, again, head up the stairs but stop before Bond steps off of them.
Right in front of Bond is a security camera, so use an EMP grenade to knock it out, then turn invisible and wait for the guard to run out to investigate. When he is present use a sleeper dart to shoot him. If this is the fourth security camera that Bond has destroyed, then he will earn another Bond moment.
Providing Bond hasn’t activated a camera then, at this point, Bond can use his gun to take out security cameras. As a result either use an EMP grenade, or Bond’s gun, to take out each of the cameras that Bond comes across going forward.
Head straight up the stairs and, after they turn to the left, enter the second room on the right. Inside is another battery, so grab it, then continue forward but don’t yet enter the main room. While crouching just outside of it use the Bond sense to target the nearby security camera and throw an EMP grenade at it, or shoot it, and take out any other cameras that Bond can see. Once they have all been dealt with have our hero move down and enter the last room on the right.
Inside this bedroom Bond will need to take out the camera on the balcony that is through the other door. With the last camera taken out have Bond move into the final room, across the balcony, and put on the racing Suit to end the mission.
Red Line
Summary
It’s race time; first place is easy to get, so it’s time to just get through this match so that Bond can meet with Diavolo. Just step on the gas and drive carefully and Bond will likely beat out all of the enemies with ease.
Goals
Gold: Score at least 350,000 points.
Platinum: Finish in under four minutes and fifty seconds.
Step-by-Step
Objective: Place First in the Race
Since the course is relatively set out for Bond, and he won’t be able to use any of his famous gadgets on this mission, there really isn’t much to say. The trick is getting the Bond moments, and doing it in as short a time as possible in order to get the platinum.

While going around the track, however, there are two Bond moments to complete, and these will need to be done in order to get the platinum as they will make the race slightly quicker. First off, just after the first left turn, there will be a small bump on the right. Go over this, then go over the next bump, which is to the right of a rock, for a Bond moment. This lets Bond jump over some of the cars and, if done right, Bond should be in second by the time he lands the second time.
Next up, near the end of the course, is a small detour to the right. Very small, however, so it won’t change things up too much, but it does make a difference and give Bond that sacred Bond moment.
Otherwise simply drive well, tap the brakes or reverse on sharp turns and tap the gas on long turns to stay in control. By doing this and by having any skill at driving whatsoever, finishing the race with style won’t be hard.
Ambushed!
Summary
Unlike the previous time Bond was here, this time he will face severe resistance and the mission can be quite difficult. In fact, Bond won’t even start out with any guns or serious weaponry, and will have to obtain his arms through taking them from the cold dead hands of his enemies.
Goals
Gold: Score at least 350,000 points.
Platinum: Complete the level without firing a shot.
Step-by-Step
Objective: Disable Security Shutters
Begin by moving forward as soon as possible and pounding the two guards that are attacking Bond at the beginning of the mission. After they have been dispatched have Bond hide near the door and beat senseless the two guards that attack him.

Next up have Bond leave the room and take the first two rights. As he enters the large room more guards will attack him. If Bond is able to throw one of the guards over the railing and onto the first floor, then he’ll will earn a Bond moment. Use caution, however, as while some guards will attack Bond, others will shoot at him from a distance and can be difficult to get to.
After the guards are dealt with, head to the outdoor balcony where Bond took out one of the security cameras last time he was here. From the second floor balcony have him shoot, or throw something at, both the guard down below and the shutter switch. This will earn him a Bond moment.
Objective: Find Serena
Have Bond head back to the stairs, taking out the enemies that come at him, and walk down to the first floor. More enemies will jump Bond once he reaches the first floor, so be careful, as one of them has a shotgun. Once they have been dealt with have Bond head into the main room on the first floor.
Kill the enemies that attack Bond, then have him go to the hall where a battery was last time. Open the door on the right at the end of the hall for a Bond moment, as well as a chance to arm Bond, as well as take some armor. Afterward return to the main room then walk to the patio at the far end. Once on the patio he’ll need only open the secret door behind the wine rack to end the mission.
The High Road
Summary
While early on this may seem like yet another driving mission, the end is quite cool. Sure, this is the fourth time this map has been used, reused, overused, and exhausted, but at least this time Bond is able to drive on the roofs of the buildings, and go through some slick antics on the motorcycle.
Goals
Gold: Score at least 300,000 points.
Platinum: Get from the demolished mine entrance to the end of the mission in under a minute and twenty seconds.
Step-by-Step
Objective: Deliver Serena to Hotel and Acquire the Q-Bike
When the mission first begins have Bond take off down the road and ram the enemy motorcycles, forcing them to explode. Since Bond is in the racing car he will not have the luxury of any weaponry and will need to use his car as his weapon.

With the motorcycles destroyed have Bond continue forward and, when he enters the city, there will be two tanks creating a roadblock. In order to circumvent the roadblock drive up the stairs at the fireworks company, using them as a ramp, for a Bond moment and a shortcut.
Continue forward past the ramp and up the windy road to the next section of the city. Once there, crash through the roadblock between the two trucks and drive through the square. Behind a light blue building Bond will find a road that leads to the hotel Americano. After Bond reaches the hotel he will hop onto his motorcycle.
Objective: Arrive at Mine Entrance

Have Bond drive, on his motorcycle, up the stairs to the right for another Bond moment, and to avoid the enemy trucks. Drive across the balconies, crashing through several railings, and down to the square below.
Next up Bond will need to take a left, from the square, back down the windy road that he just drove up to deliver Serena St. Germaine. Once at the bottom drive through the center of the town and toward Diavolo’s compound, toward the blue dot on the map. Naturally all of the shortcuts missions will be available.
Upon reaching the mine entrance Bond will find that it is blocked and that he will have to find another way in. Fortunately, near Bond is an opening in one of the buildings. Drive into the opening and up the roof-tops, crashing through guard rails. Use caution, however, as some of the jumps are a bit tricky.
Shortly Bond will come to an area that looks like ruins. Have Bond drive quickly through this part because, at the end, when he returns to the city roofs, he will need to make two jumps and, if he fails on either one of them, he will crash down below and need to start all over again.
Finally make another jump, drive through a building, then make a sharp left and make two more jumps. Crash through the gate at the end and Bond will find himself at the other end of the ruins. Drive along the path and he’ll will jump out again onto more roof-tops. Drive across them quickly as enemies will fire on him from above.
At the end of the rooftops Bond will find himself driving along an aqueduct. Drive to the end and slide through the small opening under the face for a cutscene. Use caution and slide early, otherwise Bond will hit the face and his motorcycle will explode. After the slide Bond will need to drive through the short stretch of caves to complete the mission.
Diavolo’s Plan
Summary
Sure, you would think that the fiendish villain who explains his plot and walks away with some death trap would be an overused plot device, but tell that to the guys at EA. Anyway, just be careful to move quickly in the timed section, and do not die. Unlike other missions where, if Bond dies in a timed area, he starts back where he started the timer, he will have to redo the entire mission this time.
Goals
Gold: Score at least 375,000 points.
Platinum: Finish in under three minutes and ten seconds.
Step-by-Step
Objective: Escape & Retrieve Equipment
The drill is electric and Bond has an EMP grenade. Good combination, no? Anyway, use Bond’s Bond sense to equip the EMP grenade and detonate it before he dies a grisly death. Afterward crouch and move to the table in the small room to obtain Bond’s equipment.
Objective: Destroy Both Exhaust Gear Systems

Wait for the guard to enter on the right side of the door, then sneak up behind him and use a physical attack to disable him, or nail him with a sleeper dart. Once he is on the ground take the locker key from him and use it on the weapons locker to grab some actual firepower.
Crouch in the little corner to the right of the door again and fire one shot at the wall to attract the enemies. Each time they will enter and head to the left; target and shoot them as they do, and Bond should be able to dispatch them while taking very little damage. Afterward grab their gear and head out of the room to the right.
Trigger the elevator on the console near the door, then dispatch the guards that rush at Bond from the platform he is on. Across the chasm two more guards will shoot at Bond. To dispatch them target the explosive canisters near them and shoot, blowing up the canisters as well as the enemies, and earning a Bond moment. Afterward head up the elevator at the opposite end of the platform.

At the second floor take out the guards that come at Bond, and move out on the catwalk taking out any other guards. Once Bond is alone again target the pressure valves to the left of the plungers on the conveyor belt. After they have been destroyed Bond will be able to walk along the conveyor belt.
Walk along the conveyor belt and grab the goodies that are on the sides, such as a battery and an armor vest. When Bond reaches the other end of the conveyor belt several enemies will rappel down to attack him. Shoot them as they come down then, on either side of where the enemies rappelled down is an exhaust gear system. Shoot each of them or throw a wrench into them to start a timer.
Objective: Activate Override Switch in Control Center

Rappel up to the right of where the enemies rappelled down to attack Bond and, once on the third floor, shoot any enemies that rappel down. Additionally, at the far side of the catwalk Bond can find an armor vest. Walk through the door and kill the enemies on the first floor inside.
Head down the stairs, killing enemies that attack Bond, until in the control room. Take out everyone that opposes Bond and, at the console in the center of the room, activate the override switch.
Objective: Escape the Mine Before it Blows
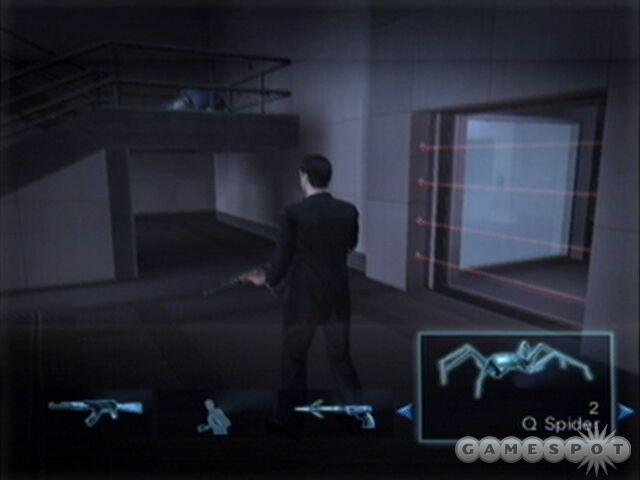
Now it is time to pick up some Bond moments. First off, send a spider under the stairs to grab the armor there, then have that spider go through the opening with the laser bars. If Bond isn’t standing too close then, once the spider is on the other side, blow it to deactivate the lasers. Bond will get Bond moments for both grabbing the armor and for blowing the lasers.
Have Bond enter the small room and pick up the rocket launchers, more armor, and any other goodies inside, then leave the room and climb up the stairs. Back at the top of all the stairs have Bond enter the room that was blocked by lasers previously, then enter the elevator to complete this mission and head to Moscow.
The Platinum War
Summary
Finally, this time around Bond isn’t just driving some wimpy little car. No, he has a huge armored tank. So, use the tank to the fullest extent of its abilities and take down the enemy tanks, blow holes in walls, and generally wreak havoc on the surrounding terrain.
Goals
Gold: Score at least 400,000 points.
Platinum: Take out the bomb in under two minutes and fifteen seconds.
Step-by-Step
Objective: Neutralize the Bomb Under the Kremlin

Begin by driving forward and, after the left turn, use the main gun on the tank to blow apart the wall blocking Bond’s path. Once through the wall have Bond switch to his Nano shells and drive to the right. After Bond passes under the first arch have him target the second and shoot, which will cause the arch to fall on an enemy tank for an easy kill and a Bond moment.
Switch back to the main gun and turn left. Shoot the tanker truck with the main gun to blow a hole in the wall of the building, and to gain another Bond moment.
Drive through the hole in the wall and through the center of the building. Take out the two tanks that attack Bond on the other side with the main gun, then turn left and drive behind the cathedral.
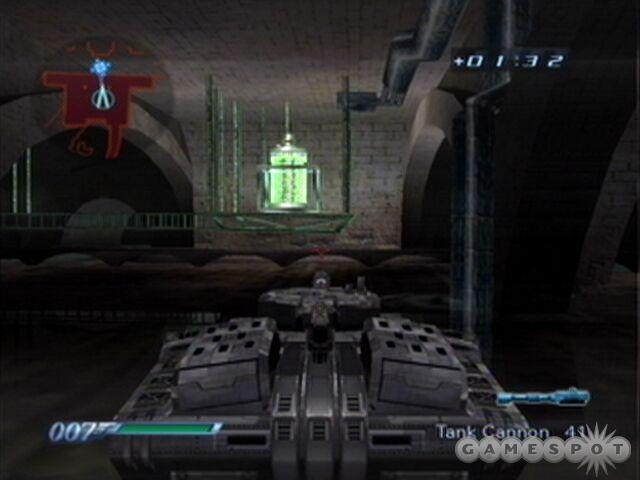
Behind the cathedral are two more tanks. Shoot them, then enter the underground through the door in the back of the cathedral. Once inside drive forward and take the first left, then, when Bond dispatches the tank guarding the bomb, target the bomb with the Nano shells.
Objective: Prevent Tanks From Penetrating Kremlin Wall
With the bomb dealt with Bond will have to move exceptionally fast this time. Head back the way that Bond came out of the bomb room, and take the right. If Bond takes a left he will be able to get out, but it will take longer and he will have to drive by a small room filled with several enemy tanks.
Once Bond gets out from under the cathedral turn right, destroy the tank there, and turn right again. Blast each of the tanks here and, if Bond hurried, then he should be able to take them out before they breach the wall. If not then try again.
Dangerous Descent
Summary
An interesting mission; nearly all of the action, and everything else that matters on this mission, takes place on one little platform. Use caution, however, as supplies are very limited, and Bond will need them for his dance with Jaws.
Goals
Gold: Score at least 300,000 points.
Platinum: Finish the mission while taking fewer than 101 points of damage.
Step-by-Step
Objective: Find Diavolo

Begin by dropping the Q-Spider and have it move through the railing opposite the stairs, and move along the crates to the far wall, then down the ramp. Navigate the Q-Spider along the crates to the window, through the window, and down onto the ground below. Next move the Q-Spider through the door and watch the guard open the security door, then move the spider up to the guard and detonate it to kill the guard, and score a Bond moment.
Next have Bond walk down the stairs, then shoot the crate next to the stairs and pick up some rocket rounds from it. There is another wooden crate near the larger shipping crates that has some more rocket rounds inside; get them as well. Next, near the ledge, there is a wooden crate. Target it with Bond sense, then shoot it to clear a path for the Q-Spider. Afterward drop another Q-Spider near the crates.

Navigate the Q-Spider toward the wall, then through the gap in the crates, along the ledge, and out to the other side of the ledge. At the other side of the ledge, near the far side and a bit of fencing, is a battery. Next up have the Q-Spider head through a small hole in the wall and into a lit room. While the armor in this room may be useless, have the Q-Spider blow up near the computer to free the laser beams.
Now that all the Q-Spider footwork is done, line Bond up in such a way that he won’t trigger any lasers and have him head down the ledge. Providing Bond picked up the rockets, simply destroy the rocket launchers that pop out of the wall and avoid the lasers on the way down. Once Bond reaches the floor kill the enemy troops that come after Bond, but do not yet enter through the doorways.
Objective: Reactivate the Lift

With the assault force having been dealt with have Bond move inside the left door and drop a Q-Spider. Just around the corner is a large holding tank; move the Q-Spider under it and through the hole underneath. When the Q-Spider comes to an intersection take the left for a battery, then return and go in the other direction. Move the first Q-Spider onto the fan, at which point it will blow up. Afterward send another one in and, at the far end, the Q-Spider will emerge to obtain an armor vest and can detonate behind several guards for a Bond moment.
Next up have Bond activate the lift controls at this end, then move him down the hall toward where the spider detonated to obtain the ammo from the fallen foes, and duck. Several enemies will emerge and Bond will need to take them out. Once they have been dealt with, activate the console here to enable the lift controls.
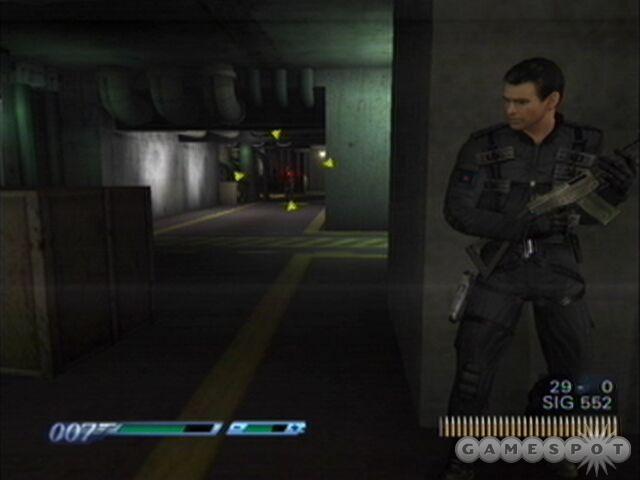
With both lift controls activated more enemies will emerge. Proceed with caution and return to where Bond first entered the hallway, shooting enemies as he moves. A rocket-wielding enemy will be standing in the doorway that is to the right of where Bond entered the hallway; kill him, then take the armor and battery near his position and walk back out onto the lift.
Objective: Shoot Out the Brake Controls
After the cut scene plays, have Bond move to cover and shoot the rocket-wielding enemies that begin to attack him. Err on the side of caution instead of simply killing the enemies, otherwise Bond will die relatively quickly. When they have been dealt with, shoot the brake controls.
Objective: Disable Jaws’ Flamethrower
With the brake controls destroyed Jaws will emerge with a flamethrower and begin to attack Bond. If Bond has been able to maintain some rocket rounds, having just had some great opportunities to pick them up when in the hallways, then fire them all at Jaws and, afterward, unload any guns that Bond still has at him.

When Jaws begins shooting flame at him, Bond will need to duck behind crates in order to avoid the blast. Use caution or else Jaws will take him down fast. Whatever Bond does, however, don’t let him stop shooting at Jaws; if this takes too long then Bond will fail the mission.
Objective: Enter the Plane’s Cockpit
With Jaws having been dealt with Bond needs only hop into the cockpit in order to end the mission by ejecting and taking a parachute down.
Red Underground
Summary
This mission, like the ones that follow it, feels more like an arena battle then like a dungeon crawl. Bond will need to take out numerous enemies and will be under constant fire, fortunately this time around he can enlist the help of some, shall we say, metal friends.
Goals
Gold: Score at least 425,000 points.
Platinum: Fire less than 11 shots while finishing the mission.
Step-by-Step
Objective: Find a Way Out of the Shaft
Begin by rappelling up the surface directly in front of Bond, then walk through the door onto the catwalk. Once on the catwalk, move left to grab the battery, then move back behind the door to take cover and shoot the enemy walking on the upper catwalk for a Bond moment.
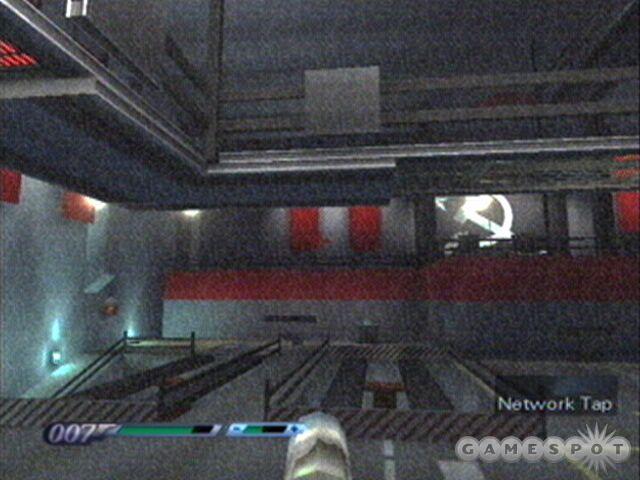
Next, when the enemies start shooting at Bond, use the network tap on the tank below and control it for another Bond moment, having it shoot the enemies. After they destroy it take out the rest of the opposition.
With the enemies below neutralized, have Bond move to the right on the catwalk and activate the platform, then grab the sniper rifle from the right edge of the far right catwalk. Sniper rifle in tow, have Bond head down to the ground.
Objective: Locate the Tank Hanger Exit
Once on the ground have Bond dispatch any remaining enemies that he did not see from above, then move slowly forward, from cover to cover. About halfway forward enemies will rush out of doors on the left and right, dispatch them with care, making sure to backtrack for any necessary armor that Bond may have spotted while slowly moving forward.
There are several ways in which Bond may wipe out the various enemies that attack him. First off, Bond can simply network tap a tank, have it attack enemies until it has been destroyed, then repeat the process for each tank. This works out well and can save Bond from having to expose himself much. Then again, a Q-Spider with a sleeper dart can work out well, as well. Whichever way, make sure that Bond uses at least one tank on this mission to kill an enemy for the Bond moment.
After the middle enemies have been taken out Bond will need to brace himself. From here forward there will be an occasional enemy that is using a NanoSuit, like Bond’s. As a result, since Bond will not be able to easily target them, use rockets to pepper the far back left area and, once the ground floor has been cleared of enemies and Bond has retrieved any stray Suits of armor, have him head to the back left area.

Walk down the ramp here to the underground and take out the enemies that await Bond there. Afterward have Bond move onto the platform that, from the ramp where Bond went down, is to the back left. Activate the lift controls on the platform and Bond will raise up to the catwalk in the middle of the room.
Kill the enemies that attack Bond on the catwalk while moving into the room in the middle of it. Once in the room wait for an enemy to get under the platinum sprayer, then use the platinum sprayer to kill the enemy for yet another Bond moment. Afterward proceed to kill any enemies still on the catwalk.
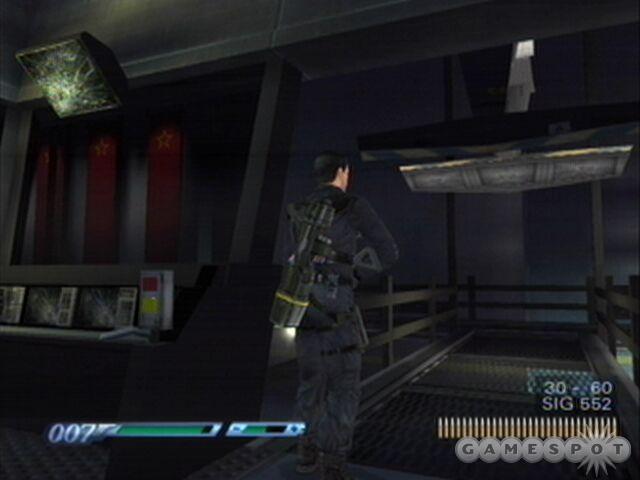
Back in the small room on the catwalk have Bond activate the bridge controls to lower the bridge, after which there will be a small cut scene. When the cut scene is over grab the battery and the armor that are to the left and right, respectively, then trigger the console in the middle to open the door ahead of Bond. When the door opens proceed to kill the enemy soldiers, then move forward to end the mission. Additionally, Bond can use a strobe grenade on the final enemies for a Bond moment, and it helps take them out with ease, anyway.
The Final Card
Summary
Another arena level, this one is actually quite interesting, and will have Bond moving all over the place doing different things, one of them being the enlistment of some new metal friends. In particular, that is, some ceiling-mounted rocket turrets. Talk about an easy way to take out the enemy soldiers.
Goals
Gold: Score at least 325,000 points.
Platinum: Finish the mission while taking fewer than 101 points of damage.
Step-by-Step
Objective: Defeat Diavolo
Begin by immediately entering Bond sense and switch to the sleeper dart gun. Use that on the enemy to the right, then, due to the long reload time for the sleeper dart gun, switch to the P99 and shoot the enemy on the left, again using Bond sense. This will enable Bond to take out the two initial enemies in just a few seconds, without having to deal with either of them.
Afterward shoot enemies that come at Bond until the objective changes, taking out as many of them as possible. Beware, however, as they will come at Bond from both ends, and as a result it is often easier to go left or right to take out the enemies there first, then to turn back and deal with the enemies on the other end.
Objective: Use the Network Tap on Turret
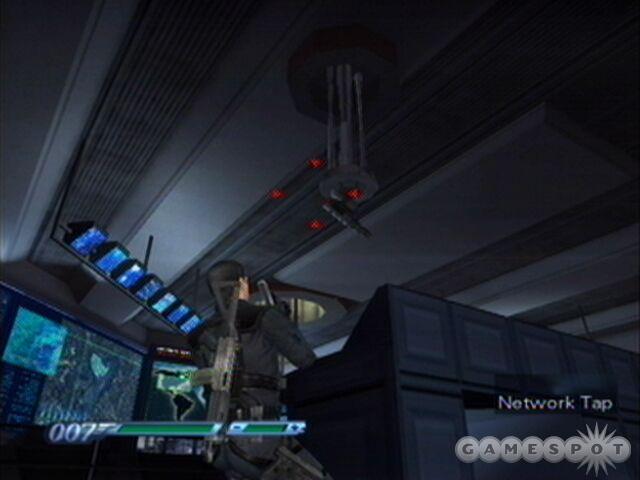
Once the objective changes have Bond head down the red carpet in the center, taking out any enemies that he has to. Once Bond reaches the end walk up the stairs and hide behind one of the computer consoles on either side.
From here Bond will be safe from the turrets that come down from the ceiling and can use the network tap on one of them. Keep in mind, however, that Bond needs to target the rear of the turret, otherwise he won’t be able to shoot it.
Controlling the turret, have Bond first take out the other turret with a few rockets, then target the enemies that come out where Bond started the mission and along the left side of the room for a pair of Bond moments. Once they have been dealt with have Bond take out any other enemies, then target the glass structure hanging from the ceiling in the center of the room.
Objective: Disable Missile Silo Exhaust Vents
With Diavolo seemingly taken out, disable the two exhaust vents on the upper platform where Bond is, then go down below and disable the exhaust vents at either end of the computer bank area, starting with the one on the right.
Be careful while doing this, as the area will now be swarming with enemies that need to be shot. The vent on the left is hidden behind a closed door, so Bond will have to get quite close to it to open it, and will need to take out the enemies behind it.
Objective: Clear Obstruction from Override Module
With the last exhaust vent having been disabled, Bond will now need to clear an obstruction from the last one. In order to do this have Bond drop a Q-Spider near the exhaust vent and send it into the small hole in the wall.
Once inside pick up the battery, then to the left, Bond can have the Q-Spider use the sleeper darts on the two enemies waiting for Bond there for a Bond moment. Afterward return and head down the path to the right to get to the obstruction. Detonate the Q-Spider to clear it.
Objective: Escape Through the Main Entrance
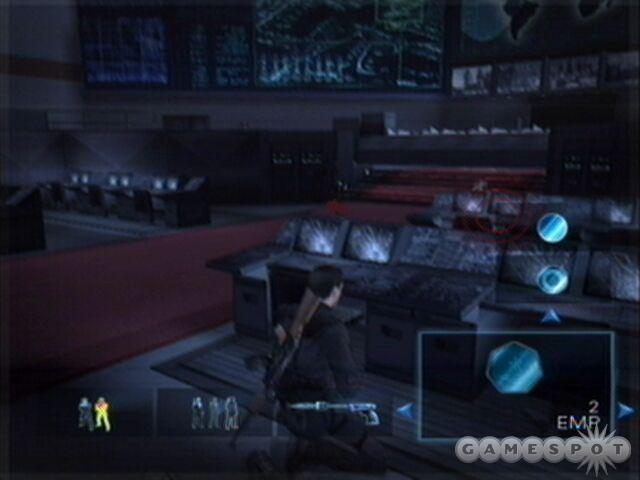
Now all that Bond needs to do is get out. Complicating this situation, however, are several enemies in NanoSuits that will now attack Bond. For a Bond moment, and to make one of them an easy target, Bond can hit them with his EMP grenades, but otherwise he will need to take them out another way. Rockets work well. When Bond has dealt with the enemies find an armor vest laying around somewhere to Suit up, grab the arms that are laying around, and head back out the way Bond came in.
Objective: Destroy Diavolo’s Hoverjet
Diavolo and Dr. Nadanova will show up in a hoverjet, somehow having escaped the rocket blast to their small confined glass room - go figure. Anyway, since Bond is now back on the elevator from an earlier mission, he will need to maneuver around in a confined area and take down the jet.
In front of Bond are three crates of rockets, while behind him are a pair of armored vests, on either end of the platform. Simply have Bond target the jet with a rocket, taking one from the box if necessary, and fire it at the jet. If he is quick enough, then Bond should be able to do this without ever having to face the wrath of the jet’s machine guns, otherwise it may be somewhat trying.
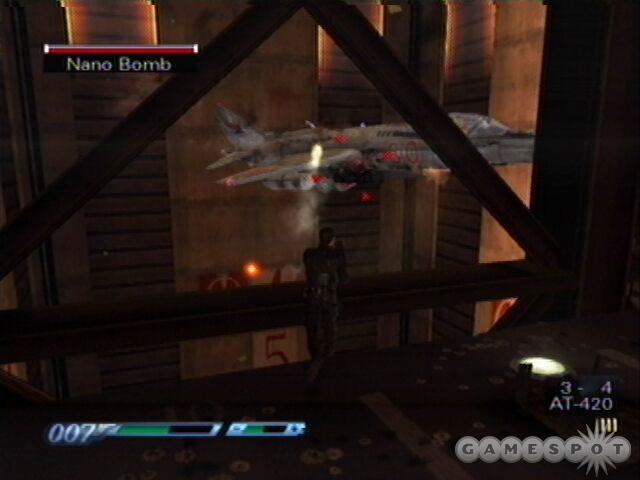
The trick is, when aiming at the jet, aim higher than the center of the point of aim. Since both the platform and the jet are constantly moving upward, this will enable Bond to hit the jet despite the upward movement. Just a few rocket hits and the mission will end.
Everything or Nothing
Summary
One heck of a huge arena level, aside from the corridor action at the beginning and the ending, the central chamber is where everything in this mission happens. Just be careful at the end, after Diavolo is dead, again. The way to destroy the missile he fires isn’t exactly apparent, and it is odd that Bond’s rockets can’t take the missile down as well, but that’s the way it works, so deal with it.
Goals
Gold: Score at least 450,000 points.
Platinum: Finish the mission in under five minutes.
Step-by-Step
Objective: Find the Launch Area
When the mission begins, have Bond immediately duck behind the crates in front of him and take out the enemies that storm his position. Afterward grab their armament and go back to where Bond first started, then turn around to face the lit room at the end of the hanger area.

Providing Bond let the enemy open the secret vault door several missions ago at last time he was in this area, have him drop a Q-Spider. Move the spider forward, through the crates and around the open chain-link fence, and have it head toward the lit room. If Bond left it earlier there is a Suit of armor in the lit room, otherwise have the Q-Spider retrace his tracks back to the vault that the enemy opened up on that previous mission.
Once in the room before the vault room have the spider charge past the enemy on the right and up to the door with the bar across it, after which the Q-Spider can detonate to make the vault accessible to Bond, as well as earn a Bond moment.

Next have Bond head inside the room that the enemies came at him from. Kill the guards in here then head through the door to the left. Inside kill the guard who is protecting the vault, then enter the vault and stock up on weaponry galore. When Bond is ready simply leave the vault and walk up the ramp to the end and grab the sniper rifle. Once Bond has the sniper rifle leave this room for the next.
At this point Bond will effectively be in several rooms that are really more like a hallway; there aren’t any branches and Bond simply needs to clear them of enemies in order to reach the big room ahead. Do so with caution, and if he ever needs to, Bond can retrace his steps at any point in this mission back to the vault where he can obtain more armor and weaponry, providing the rounds dropped by the enemy corpses aren’t enough. Just use a little extra care in the dark section, as there is a sniper up high.
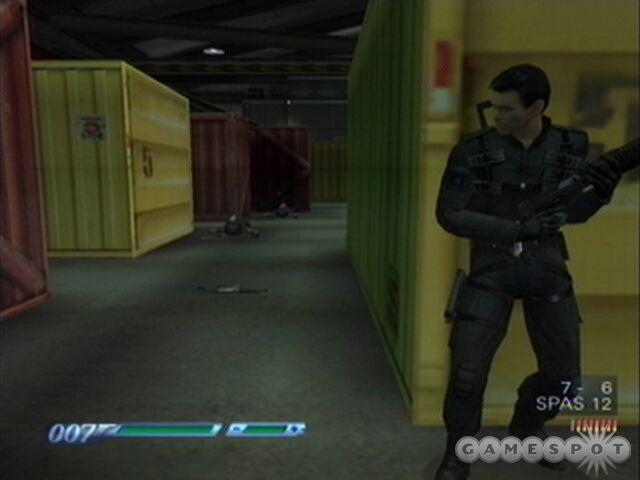
Once in the large room approach with caution for there are likely to be enemies around every corner. Simply move slowly, and take them out along the route that Bond has to take. Additionally there are armored vests in almost every nook and cranny so Bond can always grab one of those in a pinch, though it is still best to first run back to the vault when possible, that way when Bond REALLY needs one, they will be closer to him.
Immediately upon entering the room, however, have Bond target and shoot the enemy standing upon the suspended red freight canister. Just a few shots will put him down, at which point he will accidentally launch a pair of rockets into the terrain, changing things up quite a bit. Make sure to hit him before he can hit Bond, however, or else Bond will be seriously injured.
A short way into the path along the large room is an open freight canister to the left. Sending a Q-Spider into it will yield an armored vest and two batteries. Additionally, when an enemy flings open the doors to a freight canister that is stacked on top of another, kill him, but the next right that Bond takes he will be swarmed with enemies. Instead of fighting them all look up and target the big red box in order to cause a suspended freight canister to drop on them.
Shortly after dropping the freight canister Bond will be attacked by more enemies, among them one who is wearing a NanoSuit. Kill him, as well as the rest of the enemies and proceed toward the small door. When Bond nears the end of this area there will be another enemy wearing a NanoSuit. Take him out, as well.
Once Bond reaches the building at the end of the large hanger area he can take out the enemies inside, or rappel on top of it. From here he can walk out onto the central beam and grab the armored vest there, or drop down through the hole in the roof to a small platform with another armored vest. In either case, take out the enemies inside, though avoid the large red door; then, when the coast is clear, make sure that Bond has full armor.
Objective: Defeat Diavolo
To Bond’s right is a door under which a Q-Spider can slip to obtain an armored vest but, if Bond came through with full armor from the two vests he had access to just before entering this area, that should not be needed. Instead head forward through the next double door, then in the next room, grab some rockets on the left if needed. Afterward continue through the next double door with a rocket launcher selected.
Diavolo will be in a tower, from where he will launch rockets down on Bond. Run past the open missile silo, then launch three rockets into Diavolo’s tower to do away with him. If Bond does away with Diavolo beforehand then he will fail the mission as he will not be able to stop the missile that Diavolo accidentally fires, so use caution.
Objective: Destroy the Missile

With Diavolo dead have Bond run away from his tower and into the opening in the wall. Continue down the hallway and into the room at the far end, where Bond will be able to use a central cannon. Target the missile with the cannon and fire repeatedly until it is destroyed to finish the game.
Bonuses
MI6 Combat Simulator
After Bond completes the entire game, regardless of score, the MI6 Combat Simulator will become available. Inside the Combat Simulator, Bond will be placed in a room with enemies that spawn in waves. The goal is to see how many waves Bond can successfully repel before being overcome by the enemies. Bond’s health is restored to full at the end of each wave.
MI6 Survival Test
After Bond completes the entire game, regardless of score, the MI6 Survival Test will become available. Inside the Survival Test, Bond will be placed in a room with enemies that continually spawn in order to attack him. The goal is to see how many individual enemies Bond can successfully dispatch before he is eventually killed. The MI6 Survival Test moves much faster than the Combat Simulator, as Bond’s health does not get restored at any point. There is, however, an armored vest on a beam crossing the second floor.
Gallery
To unlock the Gallery, Bond must complete the entire game and score at least a gold on each and every mission. Needless to say, this is very difficult. That said, Bond won’t have to undergo any more combat; instead he’ll will simply be able to browse production stills from the game, and other goodies. Enjoy--if Bond makes it this far then he CERTAINLY has earned it.
Multiplayer

So, Bond has managed to save the world again and is ready to test his skills against a worthy opponent. Sure, there are some story elements that dovetail the single-player campaign.
Gameplay Type Synopsis
Cooperative
The most basic of multiplayer modes, cooperative isn’t focused on the amount of time it takes to finish a mission, at least not as much as with Race, as it is on total score. In other words, work together, go slowly, and play this as if it was solo, with the exception that it is best to work with the other player.
Race
Since the goal is to get through the mission in as little time as possible, spend time covering one another and, whenever feasible, simply blowing past enemies. After all, it doesn’t matter that much how many enemies are killed; what matters is that it takes as little time to do it as possible. So run, run, run as fast as you can.
Scramble
This time players are competing against each other for points, based upon parameters that are set at the beginning of the match. Simply run through as fast as possible, dying as little as possible, and taking out as many enemies as possible. Fortunately, however, each player is able to attack the other players.
Arena
This is where the rubber meets the road. Simply kill the other player as many times as you can without getting killed in order to win.
Things to Remember
Bond Sense
That is, there is no Bond sense in multiplayer. Make use of things nearby without having to slow things down in order to use them. Additionally, take wall cover any time you need to switch weaponry.
Share and Share Alike
Don’t be a hog; don’t run around taking everything and leaving nothing for allies. Anyone who doesn’t let their ally get a near-equal share of the loot will find themselves unpopular at home, and swarmed in the game when their ally dies because they didn’t have the necessary equipment.
Use Basic Military Tactics
OK, few of us are green berets, or have even served in the armed forces, but it doesn’t take an armed services vet to understand some basics. That is, have one player advance while the others cover their advance, taking out any enemies that come at them. Move with caution and don’t walk around in the open: stick to cover when possible. Don’t let someone stand with their back to an open door.
Unlocking
The multi-player game must be played in order; that is, a mission is unlocked after the previous mission has been successfully completed. This is true for all but the Arena gameplay mode: in that case points are earned in other gameplay modes that allow players to unlock maps and other character models for use in the Arena mode by playing other gameplay modes, and by pulling them off successfully. So if you want to be able to kick back with some friends and beat the tar out of each other you will first have to learn to work together to achieve a common goal.
Cheats
Eventually most people who are having problems in a game will look for some form of a cheat, in order to get that extra little bit of edge. Well, in James Bond: Everything or Nothing the player has to prove that he or she is good enough in order to show that they deserve to be able to do a cheat. That is, they actually have to unlock their cheats, in addition to the production stills and other unlockable items in the game. Once a cheat is unlocked it is shown on the cheats screen, which is accessed off of the unlocks screen. The following chart shows the requirements for each available cheat.
| Cheat | Requirement |
| All Weapons | Earn 17 Platinums |
| Cloak | Earn 13 Platinums |
| Double Ammo | Earn 7 Platinums |
| Double Damage | Earn 9 Platinums |
| Full Ammo | Earn 11 Platinums |
| Full Battery | Earn 15 Platinums |
| Golden Gun | Earn 1 Plantinum |
| Improved Battery | Earn 5 Platinums |
| Improved Traction | Earn 3 Platinums |
| Platinum Gun | Earn 27 Platinums |
| Slow Motion Driving | Earn 25 Platinums |
| Unlimited Ammo | Earn 23 Platinums |
| Unlimited Battery | Earn 19 Platinums |
Got a news tip or want to contact us directly? Email news@gamespot.com
Join the conversation