The Sims Bustin' Out Walkthrough
This guide will tell you everything you need to know to build your character, get through the Bustin' Out campaign, build your house in the most efficient way possible, and more. Cheat codes are also included for every platform.
Design by James Cheung
It's unlikely that anyone needs much of an introduction to the Sims phenomenon, seeing as how it's one of the best-selling PC games of all time. The Sims: Bustin' Out is the second version of the game to arrive on consoles, and comes complete with new professions, items, and a goal-based story mode that sees you rise through the corporate world until you amass enough power to crush your power-hungry stepfather once and for all. Along the way, you'll have to juggle the various needs of your Sims in an attempt to keep them happy, healthy, and in full control of their Bladders. Luckily for you, this guide is the electronic equivalent of an adult undergarment. If you can't quite get the hang of the game's many terms and mechanics, take a look inside for tips on:
- Creating a Sim: Curious about what the heck your Sim's personality traits do? Look here.
- Relationships: Unless you want your Sim to wind up on Jerry Springer, you'd best avoid some common blunders when dealing with your friends and loved ones.
- Home Construction: How to build a home that'll please everyone who enters.
- Careers: Learn about the various careers and which has the most money for the fewest hours.
- Bustin' Out Mode: A rundown of the story mode, complete with tips on how best to gut your houses and rebuild them from the ground up.
Table of Contents
Planning for Careers
Motives
Hunger and Hygiene
Energy and Social
Comfort and Bladder
Fun
Room
Before We Begin...
Getting to Know You
I'll Be There For You
Let's Get It On
"In the Family Way"
I Don't Even Know Who You Are Anymore!
How To Be A Good Host
Let's Par-Tay
Careers
Bustin' Out Mode Careers
Paramilitary
Fashion Victim and Counter-Culture
Mad Scientist and Jock
Movie Star and Gangster
Free Play Mode Careers
Computer Geek and Artist
Swindler, Slacker, and Rock Star
Conspicuous Consumption
No, Really, Don't Get Up
At Your Service
Compromise Means Doing What She Wants
Level 1 Locations
Level 2 Locations
Level 3 Locations
Level 4 Locations
Level 5 Locations
Level 6 Locations
Creating a Sim
Before you can play the game, whether in Bustin' Out or Free Play mode, you'll need to create a Sim to control. In Bustin' Out mode, you'll only be able to create one adult Sim; in Free Play, you'll be able to create a family of four Sims, in a mixture of adults and children. 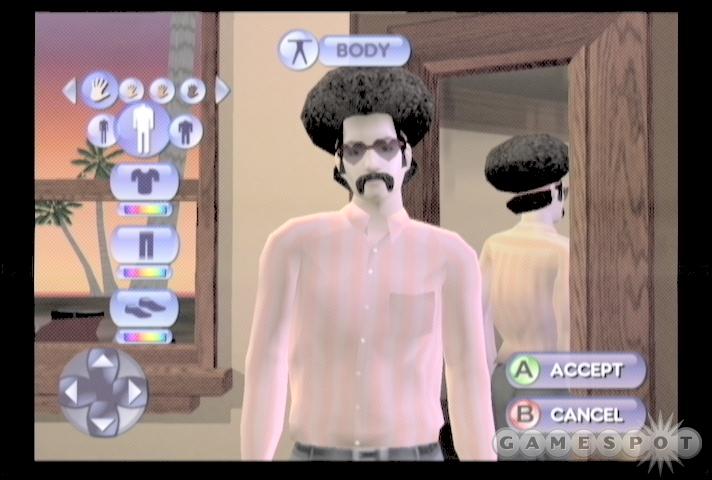
Much of the character creation process is given over to deciding how your Sim looks; you can choose hairstyles, clothing, accessories, skin colors, and so on. None of this has an impact on gameplay; even if you make the most aesthetically displeasing Sim possible, he or she will still be able to interact with other Sims in the same way as a Sim with a stylish outfit. The only part of the Sim creation process that has an effect on the game is the first part, under the Personal tab, which lets you modify your Sim's most basic personality traits.
First off, your Sim's age affects what they're allowed to do within the game world. Only adults, for instance, will be allowed to fall in love with other characters, while children will have their own actions that their parents won't be able to perform. (In Bustin' Out mode, you're only allowed to create an adult Sim.) Second, your gender affects whom your Sim will be able to propose to; you can only marry a Sim of the opposite sex, although you can initiate romances and move in with a Sim of either sex.
Beyond these physical attributes, though, you'll also need to determine your Sim's personality, as measured by their score in five different personality traits. Your Sim's traits will have a huge impact on how they maneuver through the game world, how they prefer to recreate, how they Socialize, and so on. The five traits are: Neat, Outgoing, Active, Playful, and Nice; you'll have twenty-five points to allocate between these five traits, but each trait can only be boosted to a maximum of ten points total. The zodiac signs can be scrolled through to bring up various templates for these trait allocations, or you can manually adjust the allocations with your D-Pad.
Traits
Neat:Neatness determines how obsessive your Sim is with keeping his or her living environment clean and tidy. Characters with high Neat scores will go out of their way to clean up the messes that they encounter, even if they didn't create them themselves, while characters with medium Neat scores will generally be satisfied with only cleaning up their own messes. Characters with little to no Neatness will usually avoid cleaning up anything, unless otherwise ordered to by the player. The catch is that you can always order your Sim to clean up something, whether or not they have a high Neat score; thus, having a high score here serves little purpose other than to save you the trouble of clicking on each mess in your Sim's house. Neatness also has no effect on your skills or motives, so in general, it's best to avoid putting any points into your Sim's Neatness trait, and instead allocate them to traits that actually affect the game. Your Sims' house will obviously become something of a sty if you leave them to their own devices, but you can always order them to clean up a particular mess, or, better yet, hire a maid to come along and tidy up after you.Outgoing: Extroverted Sims, such as those with eight or more points in the Outgoing trait, will have a much easier time making friends and will obtain a broader array of Social options than introverts. Although characters with a low Outgoing skill will require less Socialization time to stay happy, and will pick up mechanical skills slightly quicker than a character with a high score in this trait (they have to spend their time doing something, after all), the benefits of a high Outgoing trait generally make it worth pumping this category to near the maximum. For one thing, they earn Charisma more quickly when they practice in front of a mirror, and they will gain more Fun from engaging in group Social activities like wading in a hot tub. Most critically, though, is the fact that they make friends with other characters much more easily than Sims with low Outgoing scores; since your career promotions will eventually rely heavily on how many friends you have, the ability to Socialize and interact with people will make it easier to attract a large circle of acquaintances. The main drawback to a high Outgoing score is that your Sim will need to Socialize more often to avoid feeling depressed, but this is not too hard to compensate for, since there are usually more than enough Sims to interact with in one form or another.
Active: Your Sim's Active score affects how he or she feels about physical activity. Slothful characters, with low Active scores, will gravitate towards relaxing actions, such as watching TV or reading, and conversely will be less entertained by physical actions, like dancing, or sports. A low Active score will also cause your Sim to lose more Comfort than a Sim with a balanced score, and will cause them to take more time to get out of bed, which will cut into their valuable free time between sleep and work. Highly Active Sims are much more energetic, and will enjoy physical activities a great deal, thus gaining more Fun from them. Since they're used to exerting themselves, they won't face the steep decay of Comfort that less Active Sims have to deal with, and they'll gain more Body points when they exercise.
The Active trait is generally best kept in the middle of the road, however, since your trait points are in such short supply. A character with a balanced Active score will be able to gain Fun from almost any activity, allowing you maximum flexibility when purchasing items designed to raise your Sim's Fun motive.
Traits - cont.
Playful: Playful Sims are always looking for entertaining, high-Energy methods of having Fun. They enjoy doing just about anything stimulating, such as playing video games or telling a few jokes at a party. As such, they tend to make friends fairly easily, especially when paired up with similarly easygoing NPCs. Unfortunately, their desire for Fun will cause this motive's rating to decay rapidly when they're forced to deal with the more mundane aspects of life. Less Playful characters enjoy serious activities, such as reading, and will receive a Fun boost from them, and won't be charged with dealing with an increased Fun decay rate.
A Sim with at least five ranks in Playful should be able to hold their own in most Social interactions, and won't have any special preference regarding what items to use to gain Fun. A balanced approach will work for most Sims; if you plan to head along a career path that emphasizes creativity, though, you may want to boost this trait somewhat, as Playful Sims get a lot of motive benefits from the activities that boost their creative skill.
Nice: Nice, along with Outgoing, is the most critical trait to raise in order for your Sim to be successful in making and keeping friends. Unfriendly Sims will be more likely to insult or put off other characters when talking to them, while Sims with a Nice level of 8 or more will get more points from each successful interaction and will have a much easier time obtaining positive Socialization results. Since each career track will require you have plenty of friends to obtain the higher-level promotions (networking is everything!), you'll find yourself at a serious disadvantage if your Sim is incapable of forming close friendships with other characters because of a low Nice score. For this reason, the Nice trait acts as something of a difficulty level for the game; if you want an extra challenge, try making your Sim as mean as possible.
Planning For Careers
Each of the careers in the game will emphasize different skills (which are different than traits; you can learn more about these in the Careers chapter). Your traits will have an impact on how quickly you learn your skills, however, so if you wish to speed through a certain career track, it helps to plan your trait layout during character creation. Movie Star: Movie stars are required to be highly Charismatic, and have the highest friends requirement to reach level 10 in their career. For both of these reasons, you'll want to get your Outgoing score to eight or above. Having extra points in Nice will also help with the friends requirement.
Mad Scientist: You'll need a lot of Mechanical and Logic points to exceed in this job, while friendship won't be quite as important. Playfulness and Active can therefore be set somewhat lower than normal.
Counter-Culture: Having a lot of friends, Charisma, and, oddly enough, Cooking skill will get you to the upper ranks of the Counter-Culture career. As such, Nice and Outgoing will be helpful here.
Jock: Jocks benefit from having chiseled abs and the like, so pump your Active score to make working out a bit quicker. No other skill track requires more than five points, so your other personality traits can be allocated as you wish.
Gangster: Creativity and Body are the orders of the day here, so get a nice Active score, and pair it up with Outgoing to meet the requisite of eight friends.
Paramilitary: Paramilitary is arguably the most difficult of career tracks to exceed in, as the highest level requires a score of ten in both Body and Logic and an eight in Mechanical. You won't need to be very friendly, though, so spend your points in Active to cut down on the Comfort drain you'll be taking as you study up for your skill promotions.
Fashion Victim: Oddly enough, this career requires less Charisma than Creativity. You'll also need a lot of Body, so pump your Active trait and get ready to work out.
In Bustin' Out mode, though, be aware that you can only complete the final goal of the game by achieving level 10 in each of the game's seven careers. For this reason, it's best to stick to a balanced approach when you make a Sim for Bustin' Out mode. A good overall template is to have eight points in Outgoing and Nice, five in Playful, and four in Active, with zero points in Neat. You'll need to socialize, sleep, and replenish your comfort motives a bit more often than a perfectly balanced character, but the high Outgoing and Nice traits will let you get your Charisma skill up quickly and make friends more easily, which is vital to every career.
Motives
After you've set your Sim's traits in place, you'll be ready to let him or her loose upon the world. Of course, your Sims will still require a lot of guidance; in fact, you'll want to be constantly aware of their various needs and attempt to address them quickly if you don't want your electronic alter-egos to pass their days in a depressed funk.These needs are portrayed in the game as a collection of eight motives, each of which affects your Sim's overall mood. These motives can be accessed at any time during gameplay by pressing right on your D-Pad; this will pop up a bar which displays each motive along a continuum bar. A happy, healthy Sim will have most or all of these bars filled to the top with green, but, given the exigencies of time and money, this is often not possible. Instead, you'll usually be juggling your Sim's free time simply to avoid having any of the bars hit the bottom. When the bars begin to fill with red, you'll notice that your Sim's mood becomes worse, as represented by the red and green bars in the bottom-left corner of the screen. If a Sim's mood starts to veer into the red zone, he or she will start to become dissatisfied with their very existence, and this carries over to their social interactions and responsiveness to your commands. An unhappy Sim will likely be uninterested or hostile during conversations, causing penalties to their relationships, and perhaps demotions at work, and will be less likely to follow the orders that you issue. Keeping your Sim's motive bars filled with green is the primary goal of the game; if you fail, you'll find your Sim peeing his pants, falling asleep while attempting to work, or, worst of all, fending off the Grim Reaper.
There are eight motives: Hunger, Hygiene, Energy, Social, Comfort, Bladder, Fun, and Room. Some are critical, some are less so, but you'll need to keep an eye on every one if you want your Sim to remain happy. Keep in mind that most motives affect your Sim's mood more greatly when they're close to full or empty; the Bladder, for instance, generally won't make your Sims feel depressed until they urgently need to go to the bathroom, at which point you may notice their moods shift dramatically until they can relieve themselves, after which they'll regain their usual happy-go-lucky demeanor.
Hunger and Energy monitor your Sim's overall health, and should be prioritized when you are forced to choose between motives to work on. A Sim becomes quite unhappy as they become more hungry, so be sure to allocate time for them to fix themselves food or, if in dire straits, get on the phone and order a pizza for them. If you neglect your Sim's feeding, he or she will eventually starve and die, which has obviously harmful effects on your ability to complete the Bustin' Out mode of the game. Energy is critical as well; if your Sim goes for a day or so without sleep, you can expect them to begin nodding off while performing other tasks. A rested Sim is a content Sim.
The next two most important motives are Social and Fun. Both of these are critical to your Sim's overall mood; a Sim can be in great shape, and live in a fantastic house, but if he or she spends all day at work and has no time to Socialize, they'll be morbidly depressed and in a foul mood much of the time, and thus will have a very difficult time gaining promotions at work. Luckily, there are plenty of ways to boost these motives.
The remaining motives, Hygiene, Bladder, comfort, and room, all factor into your Sim's overall mood, but are usually the easiest and least time-consuming to deal with, and have little impact on your Sim's mood until they reach near the bottom of the motive bar. Deal with these when they reach a critical level; if they're near the middle of the pack, you should usually focus your attention on one of the four more important motives instead.
Hunger
Every Sim needs to eat, but luckily for you, this motive is fairly easy to satisfy (if somewhat time-consuming), and the effects of a full meal will last for quite a while. Early in the game, you may find it difficult to feed your Sim; Sims with no points in the Cooking skills have a good chance of setting their kitchen on fire when they attempt to make a meal for themselves. For this reason, one of your first priorities should be to get your Sim to a bookshelf and have them study up on Cooking. One point will reduce the frequency of fires (which will force you to pay a Firefighter to put out, by the way), while two will almost completely eliminate them. (You can also buy and use a microwave to avoid accidental fires in the very earliest portions of a game.) After incidents of accidental arson are put behind you, you can steer your Sims towards the refrigerator whenever they feel the need to eat. 
Unfortunately, cooking and eating a meal is quite time-consuming, so you should generally set aside at least an hour for a full meal. There are ways to shorten this time, such as by telling your Sim to get a snack or a "quick" meal, or by ordering pizza, but these won't satisfy your Sim's hunger motive quite like a fully prepared meal will. Alternately, you can instruct one of your roommates to serve a meal while your main Sim takes care of his or her other needs, then run over and grab a plate after the food is ready.
There are quite a few cooking options available to your Sim, but the most satisfying meals will usually require a nice refrigerator, a food processor (which cuts down the food preparation time), a stove or range, and an empty countertop for final assembly of food. A Sim tasked with eating a meal will grab raw materials from the fridge, take them to the processor, heat them up on the stove, and then prepare the food on a clean countertop, in that order, so it helps if you can arrange your kitchen with these items roughly in a line, with a clean table and a few chairs near the countertop. Grills are generally best for serving food to numerous people, such as when you have a party, but don't offer the raw Hunger satisfaction that a full kitchen does. Microwaves are not worth the money, as they offer very, very small bonuses to your Hunger motive. Lastly, a quality dishwasher will help your Sims (or your Maid) clean up after their meals with less risk of a breakdown and subsequent mess.
Best Hunger Items
| Freeze Secret Refrigerator | $2,500 | 8 Hunger |
| "Pyrotorre" Gas Range | $1,000 | 7 Hunger |
| XLR8R Food Processor | $220 | 2 Hunger |
Hygiene
Hygiene is a relatively low-priority motive, and one that's not too difficult to take care of when you notice it reaching the bottom of the bar. Luckily, it decays fairly slowly, so you won't have to worry about cleaning your Sim every day; three times a week or so should do the trick. The slow drain is a constant, so Hygiene will always be going down if you don't bathe, but this loss will be accelerated after your Sim uses the bathroom or works out. You can also experience a massive drop in Hygiene if you deprive your Sim of bathroom privileges - they'll eventually wind up peeing themselves. Cases of low Hygiene such as this obviously doesn't do much to endear your Sims to their friends and neighbors: if your Sim is walking around with pee-stained pants, you can expect to have a very difficult time making friends and initiating romances.Taking care of Hygiene isn't that big of a deal, though; as long as you ensure that your Sim has easy access to a shower or bathtub, one instance of bathing every other day will usually be enough to sate their desire for cleanliness. They'll probably have to go to the bathroom two or three times during this time span, after which they may be inspired to wash their hands; cancel out of this action and just wait for your next shower, which is a much more efficient method of bathing. Between showering and actual bathing, bathing is the more time-consuming of your options, but it also provides your Sim with a huge boost to comfort, thus helping to kill two birds with one stone, which is always a bonus in the time-hungry world of the Sims. This is true until you obtain the ultimate Sonic Shower (unlockable in Toane's Gym), which provides your Sims with all the comfort of a bath without taking as much time. Just be sure to clean it before you use it, if required, as it can easily malfunction if you don't keep it in top form.
Besides traditional solo bathing, your Sim can also choose to take a dip in one of the many varieties of hot tubs if they want to get a bit of their Hygiene score back. These don't offer nearly the same sanitary benefits of a shower or bath, but will help out with your comfort and Fun motives, and what's more, you'll be able to bring your friends and neighbors in with you, which will help you satisfy your Social desires at the same time. So, you can conceivably be plugging away at four of your motives at one time with a hot tub; just make sure you pick one with suitable capacity, as a two-seater hot tub will obviously only have room for your Sim and one other character.
Best Hygiene Items
| Sonic Shower | $3,999 | 10 Hygiene, 8 Comfort |
| Klassiklean "More-Saic" Tub | $4,500 | 10 Hygiene, 8 Comfort, 1 Room |
Best Hot Tubs
| Whirlwizard Hot Tub | $6,500 | 6 Comfort, 2 Hygiene, 2 Fun |
| Hot Spring Conversion Kit | $5,000 | 6 Comfort, 3 Hygiene, 2 Fun (Unlocked at Pixel Acres) |
| Niagara Love Tub | $7,999 | 5 Comfort, 2 Hygiene, 3 Fun, special use for lovers |
Energy
Sims with low Energy motives are very likely to fall asleep at inconvenient times, and on the nearest available surface, such as the floor. These forced sleep periods are awful for your Sim, compared to a normal night's rest in a bed, because they regain very little Energy and no comfort at all. The best way to ensure that your Sim has plenty of Energy is to give them a nice, quiet room of their own with a high-quality bed and let them get six to eight hours of uninterrupted sleep every night. This will usually get their Energy motive back up to the top. It will steadily dissipate throughout the day; you can give your Sim a boost of Energy by using a coffee or espresso machine, although this will hasten the onset of their next bathroom visit. 
You can help speed your Sim's rest by installing an Aromaster Whifferpuff aromatherapy device into their bedroom, and setting it on the "Juniper and Rosemary" setting. Although this appliance is expensive, and costs $150 for each use, it restores a lot of Energy to your Sim. When used in concert with a bed, you can expect to see your sleep periods fall to nearly half their previous length, which will more than justify the cost of installation, since you'll be able to use that valuable time to work on relationships and your other motives. In fact, if you've got plenty of extra money, you can install another Aromaster in the living area of your house and use it to replenish your entire household's Energy while they go about their normal routine. If you manage to constantly reactivate the Whifferpuff after it shuts off (a single charge lasts for three hours), you'll be able to stave off your rest motive indefinitely.
If you need a bit of Energy, but don't have time to go to sleep before work, you can either attempt to take a nap on a couch or recliner, grab an espresso from an espresso machine, or grab a bug zapper. Both of the latter two options have negative impacts on your other motives, so avoid them if possible.
Best Sleeping Options
| Modern Mission Bed | $3,000 | 10 Energy, 9 Comfort, 2 Room |
| Aromaster Whifferpuff Gold | $2,500 | 3 Energy (Juniper and Rosemary scent) |
Alternate Sleeping Options
| Miss Memo Sleeper | $1,290 | 11 Energy, 7 Comfort |
| Vibromatic Heart Bed | $4,500 | 8 Energy, 10 Comfort, 2 Room, special interaction for lovers |
Alternate Energy Replenishment
| Gagmia Simore Espresso Machine | $450 | 2 Energy, 1 Fun, -2 Bladder |
| Electronic Insect Control System | $4,500 | Energy boost, Comfort penalty |
Social
A Sim's Social motive is vital to their overall mood. Your Sims enjoy being around other people, and get lonely very quickly if they don't have easy access to Social interactions. Thankfully, there are a huge number of ways to get your Social motive to increase, so long as your Sim can find a way to consistently be around other people. Having a roommate is a pipeline to easy Socialization; if your Sim is living on their own, you should try your hardest to get another character to move in with them as soon as possible. Otherwise, your Sim will have to either ask people over or visit other characters themselves, which takes a lot of time.The simplest way to restore your Social motive is to select another character and pick one of the interactions that appears on the menu. Some of these interactions may be off-putting to your target, but the Talk option is generally foolproof, although it does eat up time. Socialization can also be combined with other activities, however, to boost multiple motives while keeping your Sims happily networked with their friends. Dancing, for instance, boosts a Sim's Fun motive while satisfying some of their Social needs, while serving a meal to guests will let you Socialize while your Sim eats. Hot tub visits with multiple friends will help your Sim boost their comfort, Fun, Social, and Hygiene motives all at once!
Socialization is probably the most difficult motive to restore if you let it slip down to near the bottom of the meter. Even if you live in a house with a few other people, you won't always have other individuals available to interact with, and even if you do, an extremely low Socialization motive will negatively affect your mood, rendering it more difficult to get positive benefits from your interactions, thus making it more difficult to get back to a safe Socialization level! It's a vicious circle, and one you should avoid by devoting a part of every day to Socialization. If you do let your Sim's mood slide to the bottom, your best bet for restoring it is to get all of their other motives taken care of, skipping a day of work if necessary, and then grabbing another Sim for some "face time". If need be, take a visit to another Sim's house. Encountering a character in their own house will increase the likelihood that they've taken care of their own motive needs, and thus increases the chance that they'll respond favorably to your Socialization attempts. It can take a few hours of interaction to completely recharge a depleted Socialization motive, so try to stay on top of it and not let it drop too far.
In addition to the Social motive's normal degradation, lover's spats can drop your bar right to the bottom if you attempt to cheat on one of your paramours or witness one of your lovers cheat with someone else. Keep in mind that any physical contact will send a Sim into a rage, where they'll attempt to slap whomever they perceive as a threat; in addition to drastically harming your relationship score, this will also have a huge negative impact on your Social motive as well, meaning that you'll have to spend twice as much time Socializing just to get back to where you were before. If you're in love with someone, try to avoid being at the same party with them if possible, especially if they're outgoing; non-controllable Sims often seem to enjoy flaunting their physicality, which will almost always lead to an altercation.
Comfort
A Sim's comfort level can be difficult to keep up in the early portions of the game, but as they progress through their career track and begin to earn more money, you should find that your increased purchasing power will help you remedy their comfort needs while you keep them tasked on their more vital motives. This is because many of the more expensive items that you can buy for your Sim's house will have substantial comfort benefits which will be activated as soon as your Sim uses that item, even if he or she is performing other actions at the same time. A couch, for instance, will always lend its comfort replenishment to a Sim, whether he's napping or watching TV for Fun, while a bathtub will boost your Sim's comfort level quite nicely while also restoring their Hygiene score. If you take the time to carefully choose just the items that your Sims are likely to sit down on during the day, and select the items with the largest boosts to comfort, then you will soon find yourself with a Sim with a comfort motive that never drops below the halfway mark.Since meals take so long to eat, you'll generally want to splurge on your dinner table's seating arrangements. The most expensive armchairs available will usually boost your room score, but you may want to save your money and just get the Country Class Armchair, which has a respectable four comfort, and use the money you save to buy decorative items. Don't forget to buy multiple armchairs for the dinner table if you plan on throwing parties or have multiple Sims living together.
Another item you don't want to neglect is the television; most Sims get nice boosts to their Fun motive when they sit down to watch TV, or play videogames, so you'll want to make sure that you have nice recliners or couches. For the modern bachelor lifestyle, a Von Braun or Q3 Recliner (at around $850) will give you a huge boost to comfort; for two or more Sims, a Luxuriare Loveseat ($875) will give you almost as much comfort as a Von Braun, and will give your room a boost to boot. The ultimate model of couch is the Deiter, but at $1,100 dollars, you'll only want to consider it should you need to have multiple Sims watching television at the same time. The extra energy is nice, but you'll ultimately spend more time sleeping in a bed than napping, and the room score can be easily compensated for via solely decorative items.
Last, but not least, the $1,200 Flush Force 5 actually gives your Sims a boost to comfort while they're sitting on the toilet. The benefit, while small, is worthwhile, so you should make your way over to Toane's Gym and unlock this item as soon as that location becomes available to you.
(Note that not all chairs can be used for all purposes. For instance, a Sim won't sit in a recliner to eat, or play chess. If your Sim refuses to sit down in a certain chair, enter Buy mode to replace that chair with another one until he or she takes a seat; the Comfort boost will always be worth your trouble.)
Best General Comfort Items
| Luxuriare Loveseat (2-seater) | $875 | 8 Comfort, 2 Room, 4 Energy (when used for a nap) |
| The Deiter (3-seater) | $1,100 | 8 Comfort, 3 Room, 5 Energy (when used for a nap) |
| Von Braun Recliner (for television or video games) | $850 | 9 Comfort, 3 Energy (when used for a nap) |
| Empress Dining Room Chair (for meal seating) | $600 | 4 Comfort, 2 Room |
Bladder
Taking care of your Sim's urinary needs is one of the easiest tasks that you'll face. Although every Sim will need to pee once or twice a day, proper house construction should ensure that you have a toilet within easy reach of them, and best of all, after one trip to the bathroom, their Bladder motive becomes completely filled. On the other hand, if you let your Sim go too long without heading to the bathroom, or start a time-consuming task when their Bladder motive is near empty, they're apt to pee in their pants, causing their Hygiene rating to plummet and their mood to become suddenly dour. Unless you want your Sims to smell like hobos, you'll need to plan ahead to make sure that they have enough time to visit the bathroom before they lose control of their Bladder. Eating a meal contributes to Bladder motive degradation, so if you notice that your Hunger and Bladder motives are both dropping, get some food before going to the bathroom.There are relatively few items to choose from to relieve your Bladder. The Hygeia-O-Matic and the Boggs' Memorial Commode (unlockable at the Goth Manor) are nearly identical, in that you'll need to make sure you flush them after you use them to prevent future clogs. (You may also want to install a Drain nearby, just in case they do happen to overflow.) After you climb up the corporate ladder and can afford it, you should definitely trade in your old model for the Force Flush toilet, which auto-flushes and gives your Sim a nice comfort boost.
One thing to keep in mind when constructing a house is that Sims with medium-to-low Outgoing traits will stop using the toilet if someone walks into the bathroom while they're micturating. There isn't much you can do to prevent this, but if your Sim is pee-shy, you should hold off on visiting the bathroom if your house is overrun with guests, or just wait until after your roommate or neighbor has used it before traveling there yourself.
Best Toilet
| Flush Force 5 XLT | $1,200 | 8 Bladder, 4 Comfort |
Fun
Fun works synergistically with your Social motive, in that a Sim with high Fun and Social scores will usually be in a good overall mood, which will help you Socialize and get promotions. Keeping your Sims entertained will make them much more easy to command. On the other hand, a workaholic Sim with no time for Fun and games will be consistently depressed, and thus less likely to make friends and get noticed at work.Luckily, there are many dozens of items that you can purchase and utilize to let your Sim have Fun. To begin with, you should definitely buy and make use of a television set so that all nearby Sims can join in, which will help you satisfy your Fun and Social motives at the same time. Televisions are relatively inexpensive group activities, and offer a fairly decent bang for their buck. The Trottco 27-inch Television will offer your Sims four Fun when they sit down to watch it, and, depending on their personality traits, you can change the channel to add even more Fun.
- Playful Sims enjoy watching Cartoons
- Active Sims enjoy watching Action
- Outgoing Sims enjoy watching Romance
- Sims with a low Nice score enjoy watching Horror
Beyond the basic models, there's also the Soma Plasma TV, which replenishes six Fun and two room at a cost of $3,500, and the Information Overlord, which is essentially the televisual equivalent of a tactical nuclear device. If you can unlock it at Tinsel Bluffs, then afford to pay almost 10,000 simoleons for it, your Sims will get to watch every channel of television simultaneously, resulting in nine Fun, eight room, and whatever television bonus your Sim gets as a result of their personality traits. (Since all channels are on simultaneously, Sims with differing personality needs can sit together and they'll all receive their bonuses.) 
There are other group activities that your Sims can use to boost their Fun and Social scores at the same time. The most prominent of these is dancing; you'll note that there are numerous models of stereo systems available to you. If you position one of these on a surface near an area of your house where your Sims have a bit of room to move and congregate, you'll find it much easier to host impromptu get-downs. If you combine the Strings Theory Stereo (five Fun), the Floyd Co. Laser Light Show (unlockable at Studio 8 for three Fun), and the Bounce My Booty Dance Floor (unlockable at Club Rubb for 10 Fun), you'll find your Fun rating going through the roof. Unfortunately, this equipment will set you back over $13,000 all told, but you can always substitute for the expensive parts with cheaper equipment. You can also dance by yourself if you're not looking to build up your relationships. For more general, one-on-one Fun, two Sims can use the Table Tennis board for a large boost of Fun, but a pool table may be a better choice once you can afford it, simply because you have the extra option of letting your Sim use it by him or herself.
Speaking of solo Fun, you can choose to enjoy most of the group activities, such as dancing or pinball, by yourself, or you can dedicate your Sim's free time to playing computer games. An inexpensive computer is a useful tool for job searching, but any of the three models can also be used for a bit of recreation, with the Meet Marco computer doing the best job of satisfying your Sim's Fun need. Although the nine Fun is substantial, the MM will also set you back $6,500. If you can't make the payments on that, consider the Microscotch Computer (five Fun for $1,800), or the SSRI Virtual Reality Set (seven Fun, $2,300).
In addition to pure Fun, however, you'll also want to consider items that boost your Sim's Fun score while also taking care of their other needs. For example, there are plenty of items underneath the Skill section of your Buy menu that will help your Sim have Fun while they learn vital skills that will help them advance their careers or be more handy around the house. Your skills aren't something you need to worry about every day, like your motives, but you will need to gradually increase them to ensure that your Sim is able to gain promotions. Combining your skill advancements with Fun is a great way to satisfy your immediate motives while ensuring that your Sim's future is rosy. Unfortunately, most of the items that combine Fun with skill advancements are fairly expensive. (You can learn more about these skill-boosting items in the Careers section below.)
Best Fun Items
| Hellagraphix 1024 "Diamond Edition" (game console) | $4,999 | 9 Fun (group) |
| Information Overlord (television) | $9,499 | 9 Fun (group), 8 Room |
| Meet Marco (computer) | $6,500 | 9 Fun (solo) |
| Strings Theory Stereo | $2,550 | 5 Fun (group), 3 Room |
Room
Room is your Sim's last and most enigmatic motive. It tells you, at a glance, how your Sim is responding to the room that they're currently inhabiting. A spacious, clean room with plenty of high-quality furnishings will enhance their mood, while rooms with dirty dishes scattered about, trash on the floor, and lamps with burnt-out light bulbs will prevent them from feeling content. Boosting this motive will require you to buy many and sundry decorative items to place throughout your Sim's house.First, though, keep in mind that your Sim's mood is only affected by the room that they're currently in, with the area outside your house considered as a single room. Sprucing up your bathroom and bedroom should therefore be considered a low priority; instead, focus on the areas of your house that your Sim spends a considerable amount of time living in, such as wherever your television is, or the dining room/kitchen area. Some items add to the room score while allowing you to fulfill another motive at the same time, such as a high-end television. Items need to be used to gain motives or build skills, but any item with a room score will always add that score to your room motive, whether it's being used or not. Indeed, most of the items that will help you with your room score will be simple decorations, some of which will have interactions, but most of which will just sit around passively adding to your room motive, and thus your Sim's overall mood, while he or she can concentrate on the more urgent motives.
Apart from the high-end electronics and furniture, most of your room-boosting items will be found in the Decorative section of your Buy menu. One of the earliest items that you should consider are the Pink Flamingos, which add two to your room score for a mere 12 dollars. Since your Sim's mood is checked immediately before they go to work, and their mood before they get on the bus or carpool depends on your outdoors room score, you'll need to make sure that it's high, and the Pink Flamingos are a great, cheap way of boosting it.
You have many more items that are available for your indoors areas. Most of the cheap items will only boost your room score by one or two points, and can actually wind up costing you extra money and time in the long run. For instance, indoor plants require periodic watering, and you'll need to feed the fish in fishtanks or they'll die, which will have a negative impact on your room's décor. It's usually best to stick with static, nonliving items like paintings and rugs. As you scroll through the item listings, you'll notice that there are many different items that offer the same room boost at varying prices. Some of these items, like the Love in Baghdad movie poster, have random appreciation, meaning that they have a slight chance of becoming more valuable after you buy them. In general, though, you're going to have to rely on your job to bring home the bacon, so choose the cheapest item that has the room score that you're looking for.
One of the best early items to unlock is the Anatomical Skeleton Display, which you obtain in the Bustin' Out mode by holding a séance at the Goth Manor. At $550 for three room points, it offers the same benefit as items that cost twice as much. The best high-cost item is the Portrait Grid by Payne A. Pitcher, which isn't cheap, at $3,200, but offers eight room points. Many of the insanely expensive decorative items actually offer a smaller room boost, or improvements that simply aren't worth the money. As far as bang-for-the-buck goes, the Portrait Grid is definitely something you should save up for.
Lighting also affects your room score. Not all lighting options will read out as having a room boost (although the more expensive options will), but your Sims enjoy staying in well-lit rooms, so ensure that the common areas of your house are brightly lit with multiple lamps, if necessary. Lighting is generally cheap, so feel free to be profligate with the expenditures here.
If you value your room score, it's important to keep your house clean and free of unpleasant messes. Each dirty plate or puddle of water on the floor can effect a huge swing in your room score, so be sure to get the best kitchen equipment possible, and charge one of your roommates with always picking up after the messiest guests. Maid service can help a great deal with general maintenance of this sort, so be sure to call one up and let her deal with the worst situations.
The exterior of your house, as mentioned, is important due to the effect it has on your Sims' mood before they go to work. There aren't quite as many options for improvement outside as there are inside, but with Pink Flamingos and a variety of plants (which you can buy using the Build menu, instead of the Buy menu), you can make sure that your outdoor parties are a hit, and that your Sim catches the ride to work in an upbeat mood. If you notice that your exterior room score is nose-diving, you may want to sell any dead plants that are scattered around (these will have a sell value of zero dollars in your Buy menu), or knock down a wall leading to the interior of your house so that the room scores can be combined.
Best Room Items
| Portrait Grid by Payne A. Pitcher | $3,200 | 8 Room |
| Neo-Prima Sun God Calendar | $1,299 | 4 Room |
| Anatomical Skeleton Display | $550 | 3 Room |
| Pink Flamingo | $12 | 2 Room |
Relationships
Whether you're playing in Free Play or Bustin' Out mode, a large portion of your Sim's time will be dedicated to making and keeping friends. Although having a large group of friends has benefits in and of itself, it's also important because each career path will require your Sim to have numerous friends before you can earn promotions. Before you get to the highest level of earning in a career, your Sim will need to have at least half a dozen close friends; acquaintances don't count! This chapter will tell you how to make, and more importantly maintain, your friendships.
Meeting Other Sims
In either mode of the game, your Sims will have the opportunity to interact with dozens of other characters. They will have the opportunity to become friends with the other Sims that they live with, any neighbors who stop by to visit, or they can call up any of their acquaintances and ask them if they'd like to stop by. You're going to need to take advantage of all of these avenues of relationship-building if you want your Sim to be healthily Socialized; this will keep his or her Social motive near the top of the bar, but will also let them build up a network of friends.You can keep track of your Sim's friends by pressing right on your controller's d-pad; while holding the button down, you can use your right analog stick to scroll through the Sims that he or she has met. (A Sim won't appear on this relationship menu until you've interacted with them in some way.) After you've talked to a Sim, you'll be able to check up on your relationship score at any time. This score is on a scale of -100 (absolute enmity) to 100 (best of friends). Positive interactions will boost this score upwards; while interactions that cause two Sims to like each other less will send you towards the negative zone. Luckily, there's a lot of feedback during your Sims' interactions; pleasing Social transactions will result in large green plus signs floating above your Sim's heads, while displeasing interactions result in red minus signs.
You'll know when a mere acquaintance becomes a friend: you'll spot a big, green happy face float up above their head on the game screen, and another happy face will appear next to their portrait on your relationship menu. This doesn't occur until your relationship score reaches above 60, so you'll have a lot of work to do to transform a Sim from a stranger into a friend.
Keep in mind that, although two Sims usually become friends at the same time, it is possible for Sim A to consider Sim B a friend, while Sim B doesn't have Sim A as a friend. This is because each Sim keeps his or her own relationship score with each other Sim. Generally these scores will be close enough for each other for any two Sims to always be friends with each other, but if you let your relationship score with another Sim drop dangerously close to 60, that other Sim's score may actually be lower, so they may stop considering you a friend before you do. If you notice that one of your relationship scores is nearing the lower threshold for friendship, you'll want to call up that Sim and get some relationship points before they start to drift away! Your relationship scores with other Sims automatically decay by two points every day, which means that even a steadfast friend will slowly but surely become a mere acquaintance if you don't attempt to stay close.
Before We Begin...
It's important to remember that other Sims in the game world have their own needs and, indeed, their own motive ratings. Although you won't always be able to see these motives, they will affect every other Sim's mood during the game, and thus, their ability to Socialize with your Sim. Relationships are a two-way street, after all, and even if your Sim is having a grand old time at a party, if every other Sim there is in desperate need of a bathroom break, you can expect to have a hard time making friends, since everyone else will be fretting about their impending loss of Bladder control or mortified about the mess that they've left on the floor.When Sims arrive at your door, they'll usually be in dire need of food and Bladder relief. After they've satisfied these motives (in that order), they'll start to consider moving on and getting some Fun and Comfort. For this reason, your kitchen should be situated as closely as possible to the primary point of entry into your house, which is usually the door that's closest to the sidewalk. Ideally, this door should open directly into the kitchen, or at least onto the countertop where your Sims place food after preparing it on your stove. Since other Sims will be wanting food first, you should always choose the Serve option when clicking on your refrigerator to make a plate of meals, at least during "visiting hours". (Guests will never come by between 1 AM and 10 AM, so don't worry about making extra food then.) A nearby table should have at least six chairs around it..
Next up is the bathroom. You'll notice as you play the game that Sims dislike having to pee when other Sims are in the same room. You'll therefore want to have at least two toilets within easy reach of your kitchen and Fun areas. These don't have to be elaborate affairs, and in fact the room score of a bathroom isn't something you need to worry about at all. As long as a bathroom has enough room for the toilet, and perhaps a floor lamp, you're golden. You can add simple 2x2 rooms onto the exterior of your house, where applicable; put a window onto one of the walls for light, add a toilet and a sink, and your bathroom is finished. Adding one, two, or even three of these to your house will help prevent your guests from getting bunched up in bathroom doorways. Don't worry about showers or baths; your guests will never attempt to satisfy their Hygiene scores while visiting you, except via hand-washing.
Lastly, you'll need to have somewhere to entertain your guests. If possible, have this in a separate room from your kitchen, to avoid a dropping room score due to messes there, but if this isn't possible, don't worry overmuch. You'll need to have a few Fun items that your guests can interact with, preferably in groups. We'll mention the Hellagraphix console multiple times in this guide; it's unlockable at the very beginning of the Paramilitary career track, and offers nine Fun to anyone who plays with it. It is expensive, but very much worth the money. You should also throw in a nice stereo system for your more Active guests. Visitors will gravitate towards group activities, so spending an exorbitant amount of money on a computer or other solo-Fun object isn't recommended. Don't forget to spend extra money on the most comfortable couches and recliners available for this area.
Getting to Know You
Transforming a character from a stranger to a friend isn't a difficult process (depending on the character), but it can be time-consuming. It greatly helps to have a Sim with high marks in the Outgoing and Nice personality traits; they'll have more Social interactions available to them, and will be more likely to get positive results when they attempt to engage other characters. If your Sim is nice and outgoing, you can accelerate the rate at which you make friends, which helps you scale the career ladder at a quicker pace. When you're in the early portions of the game, your careers won't require a large number of friends, so you should concentrate on making one or two friends and getting your relationship scores with them as high as possible. As your career begins to require more and more friends, you'll need to expand your Social horizons while not letting your earlier friendships disintegrate, all of which requires a precarious kind of balancing act. 
First off, though, you'll need to know how to make a friend. Socialization options are obviously available with your roommates, but you'll need to expand beyond just the people you're living with if you want to gather a large enough group of friends to earn the highest promotions. During the game, you'll notice that Sims will continually be dropping by your house and ringing the doorbell. None of these Sims will come in unless you greet them, which consists of walking outside and shaking their hand. After they've been greeted, your guests will make themselves at home and begin abusing your hospitality. Note that this greeting action is required for both random passers-by and Sims that you call on the phone and invite over. Also note that Sims won't arrive in a mood suitable for Socialization; see the Before We Begin section above for more information on this.
When you move your cursor over a character, you'll notice that a few different interactions become available. The most basic of these is the plain talk option; this is a low-risk way of getting a character into your relationship menu. You won't earn a huge amount of relationship points from simple talking, but conversely, you won't be risking any huge losses, either. Sims are more likely to be offended by overly friendly actions, like joking or compliments, if they don't know your Sim very well. Also, even if a Sim dislikes the topic of discussion, their relationship score with your Sim will never drop more than three points, which is relatively insignificant. So start out by talking, and repeat the action until you hit a relationship score of around 20.
After the Sims have hit it off, you can move on to more powerful, but still relatively low-risk actions, like joke and compliment. Joking more than doubles the relationship score bonus of talking, when your target laughs out loud at your witticism, but it also has a larger penalty for backfiring, so you may want to preface this interaction with talking to gauge your target's mood before proceeding. Other mid-level interactions, like scare, tickle, and tease, have disproportionately large penalties when they backfire when compared to the bonus when they succeed. Best to stick with the jokes; you may offend a Sim, but not as much if you try to touch them when they're not in the mood. As you get closer to the 50's and 60's, entertainment is also a good choice. Overall, though, compliment is your best bet for non-friend interactions.
I'll Be There For You
After you've made a friend, you'll be able to move on to the riskier physical interactions, which will help you get your relationship score up to 100. Reaching 100 isn't always necessary, unless you intend to propose to that character, but getting up around 80 with each friend will help forestall the inevitable backslide in your relationship score, and give you a couple of weeks before you'll need to call that Sim over to Socialize.Of the physical interactions, Dancing is definitely the least risky. If your partner accepts your invitation, your Sim will gain eight relationship points, while the other character gains ten. If they choose not to dance, you both lose five points, which is not much worse than with a failed talking interaction. For this reason, a sound system should be prominent in your Socialization room, and don't skimp on the cost; a high-end stereo will let your guests fulfill their Fun motive on their own, before you move in and take advantage of their excellent mood. Hugs are also good ways to get large bonuses to your relationship scores. Although the penalties for a failed Hug go up negative ten points for both characters, you're much more likely to get a neutral reaction from a character you're already friends with. Neutral reactions aren't great, but they do add a small number of positive points to both characters' relationship scores.
At any rate, once both characters acknowledge each other as friends, the physical interactions are much more likely to succeed. Things like Kissing and Hugging can also lead to a romance between two Sims.
Let's Get It On
After you've become very good friends with a character, your Sim can try to take things to the next level by becoming lovers. As mentioned above, the more physical your Sims get, the more likely they are to get large boosts to their relationship scores, which in turn lets you attempt the riskiest maneuvers. After you've gotten a character into the 70's or 80's on your relationship menu, you can attempt to Kiss or Flirt with them, which should initiate a romance. You'll see hearts float above each of your heads, which will let you know that you're now considered to be lovers. Other intimate physical interactions can lead to love, which has its own drawbacks, so try to avoid anything involving kissing or touching. Hugs are safe, though. 
Being a lover with another character gives you a much better chance of pulling off the high-boost interactions like Feather Tickle or Passionate Kiss, which should rocket you to a 100 score very quickly. It's very important that you make sure your partner is in a good mood, however, because these interactions have huge penalties if you fail. Passionate and Friendly Kisses, for instance, knock off 15 points from your relationship score when your partner rejects you, which wastes time, since you'll have to work your way back into their good graces before trying again.
After you reach the high end of the relationship spectrum, you can try to lock on the ol' ball and chain by proposing to one of your lovers. It's difficult to get a Sim to accept a proposal; they'll need to be in a very good mood, they'll need to be of the opposite sex, and both of your relationship scores will have to stay near 100 for a while. You can expect to be shot down after your first few attempts at proposing; your lover will usually give you an idea of what's wrong. They may be hungry, or tired, for instance. You'll have to take care of whatever ails them before they'll accept your proposal. One way to boost your chances of success is to propose early in the day; if your lover and you sleep together, try to get both Sims to hit the sack at the same time, then propose as soon as possible after you wake up, when your lover's comfort and Energy scores should be nearly maxed out. If they're hungry, serve them a meal and then try again. Keep hammering away, and eventually you'll have a spouse! (In Bustin' Out mode, you can only propose to a Sim from one of the free play houses, which means you'll either have to call up the Tutti or Frutti houses and invite someone over, or visit them and get your charm on.)
Even after you've obtained a spouse, you still have to be careful to maintain your friendship. If you let your relationship with your spouse slide too far down the scale, he or she will eventually get fed up and move out.
Also, be aware that your lovers don't particularly appreciate polygamy. The game doesn't penalize you outright for being a skank, or even for cheating on a spouse, but if your spouse or lover happens to see you getting intimate with another character (via pretty much any interaction that involves physical contact), he or she will get very upset, and will usually attack your paramour, leading to bad feelings all around. Feel free to satiate your carnal desires all you like, but ensure that you're alone with your partner when you do. This also works in reverse, though; if you have a lover who insists on dancing the day away with your guests, your relationship with the guest will drop through the floor, and what's more, your Social motive will plummet as your Sim becomes more and more despondent. For this reason, it's a Very Bad Idea to become lovers with Sims that you can't control, such as Dudley, because you'll essentially be forced to retreat from whatever room they're in when a party is going on, lest your Social motive plummet to the bottom. In point of fact, there isn't much point in making a Sim your lover if you don't plan on getting married, so you may want to stick to the basic Social interactions until you find that special someone.
"In The Family Way"
Sims in love can start a family in a variety of ways. First, you have a random chance of getting a phone call offering a baby for adoption; you can choose whether or not to accept. (This works for same-sex couples, by the way, but can take a while to occur.) Second, the Kiss Passionately Social option will occasionally let lovers procreate. Lastly, the Vibromatic Heart Bed has a special interaction for lovers which will also sometimes result in a child. In any of these cases, you'll be able to choose whether or not a child is the result of your interaction, so don't hesitate to try out these interactions if you're just looking for extra relationship points.Sim babies appear as an object in the house. You'll be able to interact with them in three ways: feeding, singing, and playing. Feeding is, obviously, the critical option here, since your baby will require a constant influx of nutrients. What's more, if your baby goes hungry for more than an hour (it'll cry quite loudly during this period), a Social worker will appear and take the baby away, which lets you escape the responsibility if you change your mind about actually taking care of a kid. You'll also need to be able to put your child to sleep; if it begins to cry because of its lack of Energy, sing to it before letting it sleep for a while.
A baby's rhythms will not coincide with the usual sleep/wakefulness cycle of an adult, so you'll likely have to keep your adult Sims sleeping in shifts to deal with the baby. At the end of three days, though, the baby will become a kid and will have much more palatable sleeping rhythms.
Child Sims don't go to work; instead, they go to school. School and work are fairly similar acts, but instead of building up your child's skills to earn promotions, you'll need to have them study (via a bookshelf or, preferably, a computer) to earn higher grades and scholarship money.
I Don't Even Know Who You Are Anymore!
Like anything else worth having, friendships and love affairs require maintenance. As with your motives, your relationship scores decay over time, albeit much more slowly. With every day that passes between instances of Socialization between your Sim and an acquaintance, their mutual relationship scores will drop by two points each. This isn't something that you'll need to worry about daily, but it can cause even your closest confidants and lovers to eventually stop counting themselves as your friend, which will eventually prevent you from gaining promotions at work.For characters who are your friends, you'll receive a warning or two as your relationship score drops towards the terminal point for friendship. If this occurs, you should try to call up that character and invite him or her over for some intense one-on-one interactions in an attempt to drive your scores back up into the 80's or higher. If you ignore the first message, you'll receive another message soon afterwards notifying you that you let that friend slip away. Nevertheless, you don't have to be too diligent about keeping your friends close by; the same Socialization moves that worked before can make that character your friend again, so feel free to wait until a convenient moment to Socialize.
The same basic process is true of lovers. If you let your relationship with a lover decay down into the 60's, they will become "just friends". The only difference here is that you aren't notified of this change, so keep an eye on your relationship menu and take the necessary steps to keep your lovers interested in you.
How To Be A Good Host
When you reach the higher levels of your career and have been happily situated in a home for awhile, you'll need to exert extra effort to maintain the broad number of friendships that got you to that point. Luckily, you should have plenty of money to spend on items that can be used to entertain large groups of people. Most of these items can be used by one Sim to boost your Fun score, but if multiple Sims are around, you can let them join you for extra relationship points.The most basic group activity is the boob tube. If you pick out a nice, wide couch, up to three people will be able to restore their Social, comfort, and Fun motives at the same time, all while adding to their relationship scores. The Soma Plasma Television is probably the most cost-effective choice here, as it is 50% more Fun than the normal color television, and adds a room bonus as well. It will set you back $3,500, plus whatever you spend on your couch, but even that's a drop in the bucket compared to the Information Overlord TV at $9,499. The Soma is well worth the investment, if you can swing the cash, so you may want to wait until your Sim gets a raise and splurge with his or her bonus money to outfit one of your nicer rooms with the big-screen tube.
Another good choice for mass Socialization is a hot tub, if you can afford one. The Hot Spring Conversion Kit is unlockable at Pixel Acres, and offers up six comfort, three Hygiene, and two Fun for everyone who takes a dip, as well as adding Socialization and relationship points when two Sims get in together, but will set you back a cool $5,000. The Whirlwizard is available without needing to be unlocked, but actually offers fewer benefits than the Hot Spring while costing $1,500 more. Whichever model you choose, your hot tub will help you satisfy a large number of motives while letting you rack up relationship points, especially at parties.
Next, the various stereo systems will let any Sims within earshot join your Sim for a dance or two. The Strings Theory Stereo is very cost-effective here, offering five Fun to anyone who chooses to dance at a bargain cost of $2,550. If you're really looking to get down, you can combine this item with the Bounce My Booty Dance Floor, which adds another ten Fun for anyone who interacts with it. Combined, this duo will set you back over 10,000 simoleons, but ensures that all of your guests will have maxed-out Fun motives, and thus will be a bit more appreciative of your Socialization attempts.
One last big-ticket item for group Fun is the Hellagraphix 1024 "Diamond Edition" video game system, easily unlockable early in the Bustin' Out mode by getting a promotion in the Paramilitary track. It'll set you back almost 5,000 simoleons, but offers a massive nine Fun to anyone who uses it. What's even more impressive is the number of people who can sit around and enjoy the Fun: if you throw a party, you should rearrange your house to have as many comfortable chairs around the Hellagraphix as possible, because it's not uncommon to see half a dozen characters pick up a controller and go for the top score.
If you're looking for cheaper forms of Fun, though, the Miscellaneous category in your Buy menu has a host of options, some of which will especially appeal to Sims that have chosen to be highly Active. The Strip Poker and Basketball Hoop both let a pair of Sims Socialize while having Fun together, although an even better choice is the Table Tennis set that's unlockable at Pixel Acres. For a mere 50 dollars more than a Basketball Hoop, Table Tennis offers two more Fun points; just keep in mind that this isn't something a Sim can do by himself. If you have more cash to spend, one of the pool table models lets one or two Sims play together, but neither of these offers a substantially higher Fun rating than ping-pong.
Let's Par-Tay
In Bustin' Out mode, a few of the houses will require you to throw a party to achieve one goal or another. Although you'll have to throw these parties, you should also keep in mind that your Sim can throw a party anytime he or she wants, merely by picking up the phone and selecting the last option on the list that appears. Party goers will gather by the door and come in by themselves (no need to greet them) and will stay until past midnight, if you care for their motives properly. For maximum Socialization opportunities, you'll want to skip work and kick a party off around noon. This will give you at least twelve hours of face time with your guests, but you will have to satisfy their motives, or they'll leave prematurely. 
First up, all party-goers will require easy access to food and toilets, as usual. If your house is properly constructed, this shouldn't be a problem, but you do have to consider the number of people that arrive; a typical party will see at least five guests arrive at your door, and perhaps more, if you called up other guests individually. All of these people will be looking for food, and since the Serve Food option from your refrigerator will only serve up six portions, you're going to need to make up at least two plates full of goodies for your guests. The easiest way to do this is to get one Sim working on a plate, then have another Sim follow a few seconds later with the same action. Since party-goers don't need to be greeted, you won't have to worry about meeting them at the door; just make sure the food is accessible when they arrive. Periodically check for dirty dishes and empty plates, and make another tray of food if one is empty or running low. You'll probably need a few empty countertops to hold everything, so plan ahead. With any luck, one or two of your guests will have high Neat scores and will clean the kitchen on their own.
After food and Bladder are taken care of, your guests will be in the mood for Fun. The most efficient way to feed this motive is to have a Hellagraphix machine in the middle of a bunch of Deiter couches and Von Braun recliners; the Sims' Fun and comfort motives will be simultaneously fulfilled, and they'll be able to Socialize with all other players. After a Sim disengages from their Fun activity, they should be almost sated in terms of their motives, so pounce on this opportunity and get your interactions in quickly. You can repeat your Socialization with multiple guests, if you have more than one target for friendship, but give them a breather every now and again to take care of their needs. If a Sim starts getting thought bubbles above their head indicating that a certain motive requires attention, make sure they have access to an outlet for their desires, or they'll leave. This occurs most often when you don't have any fresh food for your guests to eat.
If you notice your guests getting tired, try switching on an Aromaster to the Juniper and Rosemary setting to restore their Energy. In point of fact, you should probably have one of these going non-stop during a party, just to counteract time's winged chariot and let all of your guests stave off sleep while they're partying. It will cost you some big bucks over the course of a day, but it'll ensure that your guests are in high spirits throughout the party. If you want to have everyone feeling extra-wired, you can even use a laser show set to "Chakra", which also restores Energy to everyone within range. No more dozing off at your parties!
House-Building 101
Whether you play Bustin' Out mode or Free Play, you're going to have to get used to using the game's Build menu to construct a house or remodel an existing one to suit your purposes. Many of the houses in the game are decent enough, and you can live in them without any major alterations, but they aren't efficient; your Sims won't be able to satisfy their motives quickly without some major revisions. So get ready to take that virtual sledgehammer and heft it against that virtual wall; you're going to have to do some major rebuilding if you want to get each of the available houses set up properly.In Free Play mode, you're going to have the option of either constructing your own home or selecting a pre-built one, while Bustin' Out will see you shuttling around from house to house, each of which you'll be free to destroy as you see fit. In either case, there are a few basic principles to keep in mind when constructing your stately pleasure-dome.

First off, you should never forget that your ultimate goal is to build a space wherein your Sims will be able to fulfill their motives in the least amount of time. The constant degradation of your motives will be the Damocles Sword that hangs over your head throughout the game, so you want to ensure that your Sims don't have to walk all over your lot to get from the kitchen to the bathroom to the bedroom. Consolidation and compact design should be your goals; there's no rule saying that you have to use all of the rooms in a house for something. If you move into a huge house, feel free to gut some of the rooms that are farthest from the bus stop and use the items within to spruce up your living room.
Secondly, though, you'll also have to make your house livable. Parties and Socialization are going to be difficult if you modeled your house on a cheap Tokyo apartment; your Sims, and their guests, need to be able to walk around each other and have access to other rooms. Putting everything in a small space is desirable, but you also have to ensure that your Sims have room to move. So, not too big, not too small. As you play the game, or examine the screenshots in this guide, you'll hopefully get an idea of what the proper proportions for a house are.
Last, when constructing a house, keep in mind that your Sim will have to get to work in the morning. The bus always shows up in the same place, so try not to place vital spaces, like the kitchen, too far away from the road. In fact, if you can swing it, you should build your entire house as close to the sidewalk as possible, just to cut down on the time it takes your Sims to reach their bus. This is possible when you construct your house in Free Play mode; in Bustin' Out, or if you select a pre-made house in Free Play, the best you'll usually be able to do will be to expand your house in the general direction of the bus stop, and attempt to place your critical items in that general area of your lot.
The Entrance
The entrance to your house is considered to be the door that's closest to the sidewalk. This is the door that visitors and party-goers will come to by default, so if you don't like the default door placement on your house, feel free to move the door closer to the sidewalk and/or closer to the bus stop. In most instances, it's best to have two or even three doors side by side to prevent Sims from getting in each other's way. If a Sim tries to enter your house, but finds their way blocked by another character, they'll spend a few minutes standing around pouting until their AI kicks in and tries again, so you'll want to have as wide an opening into your house as possible.Because your visitors will be looking for food as soon as they arrive, this main entrance should open up onto your kitchen and dining area whenever possible. It's best to have the refrigerator, stove, etc., lined up so that your Sims will serve the food on a countertop in the immediate vicinity of the doorway, so that your guests will be staring at a plate of vittles as soon as they come inside. The dining room table should also be a short distance away.
Beyond the main doorway, though, feel free to put as many other doors on the outside of your house as you like, but make sure none of them are closer to the street than your main entrance, or all of your visitors will group there instead. It's best to have at least one alternate exit from your house, along the wall that faces the side of the lot. Sims don't like to walk across grass, however, so be sure to lay down a concrete path to the sidewalk.
Kitchen / Dining Room
After you've established a main entrance into your abode, your focus should shift to creating a space for your Sims to eat and entertain themselves. The first priority should be the kitchen. Although all you really need for a kitchen is a refrigerator, you won't be getting very much nourishment from a cold meal. A fully-stocked kitchen will have a fridge, food processor, and a stove, in that order. The food processor will need its own counter, but you can save on space by putting it on top of your trash compactor or dishwasher. These latter two pieces of equipment are optional, but quite handy; the dishwasher replaces the kitchen sink as the preferred Sim method of cleaning dishes, when purchased and installed, while the trash compactor acts as a high-capacity trashcan. Compactors can actually replace trashcans around your house, if you don't mind the aesthetic unpleasantness involved; they hold more garbage than any normal trashcan, and have a flat surface for a lamp or Aromaster to boot.When a Sim gets done cooking the food in the stove, he or she will look around for the a clean countertop to set the food down. (Assuming you Served food; a solo meal will be taken right to the table.) This countertop shouldn't be an appliance; this can cause trouble if people are queuing up for a meal while another person is waiting to use the machinery that the food is set upon. Instead, buy a plain countertop from the Buy menu and set it wherever convenient. You'll often have multiple people attempting to get food at the same time, so try to set this countertop away from the wall if at all possible. It'll need to have at least two sides free, but the more the merrier.

Your dining room table doesn't contribute to your Sims' comfort motive while they're sitting down; all it's good for is a bit of a room bonus and to act as a place to eat. There are a variety of models available, in a number of sizes, but the most efficient is usually a 2x2 table with eight chairs around it. Sims can share a corner of the table with another Sim sitting beside them, so you will be able to use all eight chairs simultaneously, if it comes down to it (although you'll have to serve some damn tasty food before this occurs). This also lets your Sims pick up plates by walking to the corner of the table; a 2x3 table, with three chairs along the long side, will force a Sim, or your maid, to sit down at the middle chair before they can reach a plate there, which wastes time. A Sim won't sit where there's a dirty plate, so you'll need to make sure you clean up after yourselves if you plan to eat many meals after your Maid leaves. At parties, one or two of your guests will usually have a high enough Neat score to make them clean up after everyone.
Most Sims will just leave their plates at the table when they're done, but your Maid, or Sims with high Neat traits (even your guests), will clean up. This involves taking a plate to either a kitchen sink or a dishwasher. Your best bet for clean-up is to buy the most expensive dishwasher possible, which will set you back around $1,000, but will essentially eliminate the chance that a spill will occur. Should a plumbing mistake occur, you can expect your room score to fall through the bottom; the same is true if a large number of empty plates stack up on your dining room table, so don't hesitate to force your Sims to clean up, especially during a party.
Living Room / Den
Now that you've set up your kitchen to your satisfaction, you can move on to the entertainment area. You'll need to decide whether or not you want to set this up in the same room as your kitchen and dining room, first off. On the upside, the entire area will reap the benefit of a high room score, and your Sims won't have to maneuver through doorways to reach their Fun-building items; on the downside, a spill or mess in the kitchen will reduce the room score for your entertainment area, as well. In most situations, it's easiest just to eliminate or not build any walls between the dining room and the living room, and deal with messes as they appear.In the living room, you're going to want to have at least one high-Fun item that large groups of Sims can enjoy concurrently. The best choice for this task is usually the Hellagraphix game console, which offers nine Fun to your Sims and lets them remain seated, and therefore enjoying their comfortable chairs and couches, while they play. Another good option is a high-end stereo, which lets your guests dance themselves silly without having to walk too far.
Items you definitely want to avoid are the skill-boosting items that involve showing off to the crowd, such as pianos and the microphone. While these can be nice if your Sim has a high score in the related skill, these items can sometimes be monopolized by poor-performing Sims, who will try to belt out a tune while the other Sims gather around and heckle. Unless the Sim is one of your controllable roommates, you won't be able to do much except wait until that Sim gets tired of playing their instrument, which can take quite a while. Best not to tempt fate; close off any of these items into a separate room before you entertain.
Pools are also a problematic item. While it may seem neat to have a huge pool outdoors, they have a tendency to draw your guests away from your living room, thus making them less accessible for Socialization. If you notice that your parties fragment into smaller groups, try eliminating some of the outdoors entertainment options. This should force your guests to stick to the living room that you've set up.
Bathrooms
Every house will need a couple of bathrooms to satisfy your guests. The more the merrier, in fact, but you will have to consider the spatial relation between these bathrooms and the rest of the house before you attempt to build them.At its simplest, a guest bathroom is a mere 2x2 room with a toilet and a sink, which are easily built onto the outside perimeter of a house. Even the sink is optional, especially if a bathroom is near another sink. If you wish, you can make a little gym-club-style bathroom, with two toilets in small, enclosed rooms, with a bathroom sink accessible nearby. The Toane's Gym location in Bustin' Out mode has a good example of this, but you'll need to ensure that your guests have room to maneuver around the entrances to the bathrooms. At any rate, you'll definitely need at least two toilets in separate rooms before you invite guests over to your house. And don't skimp on the appliances, either; go for the Flush Force 5 XLT as soon as you can afford it to avoid clogging and leaks.
A master bathroom should also be appended to your house's main bedroom. Functionally this bathroom isn't going to be much different than the guest bathrooms, so if you want to attach it to your living room as well, feel free. If you have space, you can throw in a bathtub or Sonic Shower (the best choice for adults, but kids can't use it). Given the option, though, your Sonic Shower is better situated in your bedroom. Since guests will never require a shower, you'll save space in your bathroom, and since your Sims don't get naked when using the Sonic Shower, they won't hesitate to use it when other Sims are in the room, whether they're awake or sleeping. This will also prevent your other Sims from entering the bathroom when someone is taking a shower and being upset at not being able to use the toilet. Just make sure that the shower is near the entrance to the bathroom, so that your Sims can use them in immediate succession without having to walk a long distance.
Bedrooms
Your bedroom is the last room of the house that you'll need to worry about. The recipe is about as simple as it was for your bathrooms; a bed, a countertop, and an Aromaster Whifferpuff for its Energy-boosting capabilities. Most of the pre-built houses have multiple bedrooms, but this is usually unnecessary; given enough space and enough beds, your Sims can be quite content sleeping in the same room as each other, and this will allow them to share the benefits of the Aromaster and any room-enhancing items you decide to place into the bedroom.Sims will only share a bed with another Sim (of either sex) if they're considered to be friends, so check your roommates' relationship menus before shorting the house on beds. If all of your house members are friends, you can use the Modern Mission bed to get the maximum amount of comfort from your sleeping arrangements. Just make sure that both sides of the bed are accessible before you place it. For multiple Sims that are not on sleeping-together terms, the Miss Memo sleeper is the best single-sized bed that you can place into a bedroom.
Besides the bed and the Aromaster, a bedroom is distinguished by the items that it shouldn't contain. First and foremost, check for any noise-producing items before you lay your Sims down to sleep; stereos are a big no-no in the bedroom, as are telephones. You also won't need an exorbitant amount of room-enhancing items, because your Sims won't be spending much time in the bedroom when they're not sleeping. A couple of windows and lamps should be all you need to make room in your budget for.
General Tips
- Whenever possible, double up on the doors leading into and out of a room. Placing two doors side-by-side will ensure that your Sims will never have any trouble getting into or out of any room. If a room has a corner, place a door on each connecting wall.
- Your Sims need plenty of light to feel at home, so pump up your rooms with lots of floor lamps, wall lamps, and windows to ensure that everything is well-lit.
- When you feel comfortable with your house's arrangement, throw a test party and examine your guests' movements. Note particularly if they wander off to far ends of the house to interact with an object, or if a particular area is acting as a congestion point. After the party ends (or even while it's still going on), redesign your house so that problem areas are eliminated.
Careers
No Sim will survive in the world of Bustin' Out without a steady source of income. Fortunately for your Sim, there are a number of desperate employers in Simsville, all of whom are willing to pay exorbitant amounts of money for a few hours of work. Your Sim will have to get a job in Bustin' Out to unlock new locations, and to earn the money required to buy the best items. What's more, the best ending to the game requires you to advance to the end of each career's promotion track, so that by the end of the game, you will have been required to earn seventy promotions across all different careers! Since you can only earn one promotion a day, you can probably do the math for yourself to figure out how long you'll be playing the game to earn everything possible.Careers aren't as different as they seem, if you're browsing through the various names. In fact, they're all mechanically identical: your Sim catches a bus before work, stays at work for a few hours, and comes home. You don't get to interact with or control your Sim during this period. The only true gameplay differences between careers lie in how much they pay, what the hours are, and what kind of skills and number of friends are required for each promotion.
(The aforementioned bus to work will always arrive in the same place each time it comes to your street. It comes an hour before your work day's starting hour, will wait for an hour, and will take off then if you haven't embarked. You should take advantage of this waiting period by setting up a motive or skill-building item near the bus stop, so that your Sim can do something productive while the bus waits. If your Sim gets on the bus as soon as it arrives, you're essentially giving up a whole hour in which to satisfy motives or build your skills; try to use this time for constructive purposes.)

Promotions are relatively easy to obtain; if your Sim possesses the listed prerequisites for skills (more on which later) and number of friends, and arrives at work in a good mood (anything on the green side of your Sim's mood bar will usually suffice), he or she will arrive home with a brand new promotion. Promotions, again, don't change the mechanics of going to work, but they will let you earn more money each day. What's more, upon earning a promotion, your Sim gets a bonus of twice the new level's daily salary. So if a Sim went from Chopper Pilot to Covert Ops in the Paramilitary career track, upon earning the promotion, they'd earn $550 for the day's salary and take home a one-time bonus of $1,100. You can only earn one promotion per day, though, even if you meet the skill and friend prerequisites for more than one level above where you begin.
You can always check your Sim's career progress by pressing left on your D-Pad. The current rank, hours, and career will cycle on the flashing bar, while the rest of the screen will show your current number of friends, the number you need to obtain your next promotion, your current salary, and your current rank in each of the game's six skills.
One last, important thing to note is that your Sim is not required to have perfect attendance at work. In fact, you can skip a day or two in a row without having to worry about getting fired. If you do wind up missing three successive days, however, your Sim will get canned, and will lose a point in one random skill and a level in whatever career he or she is currently undertaking. You'll have to head back to the newspaper or computer to find a new job after this occurs. Still, taking a day or two off of work will occasionally be required to patch up an ailing friendship or simply to work on tackling a set of low motives. If you've got plenty of money, then feel free to call in sick. (Your Sim will automatically get on the bus to work if you have Free Will set to "on" in the options mode. If you don't want them to go, cancel out of this action when the bus arrives.)
Skills

The six skills of the game are cooking, mechanical, creative, body, logic, and charisma. If you're planning on getting to the highest level in each career, then you'll need to get all of these skills to their maximum level (10); otherwise, you may want to just specialize in one or two skills while letting the rest lay fallow. Each career's highest promotion requires a 10 in at least one skill, however, so you can plan on having your Sim do some serious studying in the latter portions of the game. There are multiple items that your Sim can use to advance his or her rank in a skill; the more expensive the item, the faster your Sim will advance. Your Sims will refuse to work on skill improvements if they're in a bad mood, however, so satisfy their motives before you put their noses to the grindstone.
Cooking
The Counter-Culture career track is the only one with a substantial investment in the cooking track; it requires you to completely max it out. None of the other careers require a skill level higher than four. Low-level advancement in this skill is accomplished through studying cooking via a bookcase (all of which advance you at the same rate, by the way), while Mimi's Place has a couple of unlockable stoves which will give you a higher rate of advancement, and will also let you create food which can be served at parties or eaten by your own character. At its highest ranks, though, Cooking is the hardest skill to learn quickly, so you may want to start dedicating a little time to it early on.
Mechanical
Although you can increase your mechanical skill by studying at a bookcase, your best bet is to buy a Tesla Coil 3.0 and use it for rapid acceleration in your learning speed. If you can't afford to spend almost $9,000, though, you can settle for second best and pick up the Kraftking Inventor's Workshop at $3,330. The Workshop also lets you create salable gnomes; select these in the Buy menu and sell them off to earn back the cost of the Workshop itself. The price you'll get for the gnomes will increase as your mech skill improves. Your mech skill will also improve your chances of repairing any broken items around your house.
Creative
Your Sim's score in the creative skill can be somewhat important, and not just for satisfying promotion requirements. If you choose to build up your creative muscles with an easel or an Artist's Block, for instance, you can sell off the art that you create for profit; the higher your skill, the more money you make.
If you're not interested in moolah, though, a Tumultech "Sim-Phony" Synthesizer is the fastest way to get a high Creative score, and also gives you a big boost to Fun while you play it. Until your Creative score gets to around five, though, you can expect to offend anyone who listens to you and lose relationship points. You can unlock this item at the Goth Manor, as well as find one built into that house; if you plan on practicing on it, move it into an out-of-the-way location before using it to make sure that no one can hear you.
Body
Every career except for the Mad Scientists will require at least four points in the body skill. Your options for body-sculpting range from the lowly exercise machine all the way up to the $8,000 dollar Abdominator, which is unlockable at the Octagon. The low-level exercise options are pure skill-increasing machines; the more expensive items will get you a small Fun boost while you work out. Your Body skill will rarely affect gameplay outside of your careers, but if you initiate an Attack Social option on another Sim, the one with the higher body score will emerge as the victor.
Logic
Your logic skill has no bearing on any gameplay matters except your career advancement, so don't bother studying up unless you're looking for another promotion. The most expensive item in the game (Miss Gyrotic, unlockable at the Octagon) is a logic study item (among its other functions), and is great for quick skill boosts if you can swing the 10,000 dollar price tag. The other options are the telescope (unlockable at Shiny Things Labs), which gets you a bit of Fun while you stargaze, and the more expensive Gene Genie Incubator (unlockable at Goth Manor), which breeds mutant plants which you can sell.
Charisma
Charisma is the most taxing skill to master, as there are precious few skill-building items to buy, and those that are available don't allow you to double up on your skills and motive replenishment, with one exception. The most basic skill-building items are mirrors, which your Sim can stand in front of and practice a speech with. Beyond those cheapie items, however, is the Nostalgico Microphone ($1,100, unlockable at Tinsel Acres), which lets you sing your way to a high charisma, and have a bit of Fun while doing it. Its price belies its relative ineffectiveness at building your skill, though, so you can expect to spend a lot of time belting out the oldies before you gain to 10 charisma. As a bonus, though, other Sims will listen to you sing, and if you're decent at it, any listeners will see their Fun and relationship scores with your Sim boosted.
Bustin' Out Mode Careers
In Bustin' Out mode, your Sim can choose from any of the seven available careers by picking up a newspaper or hopping onto a computer. You can choose from any available career at any time; if you decide to leave one career for another, you retain all of the promotions that you gained in the first career and can switch back to it at any time you wish without penalty. So, feel free to mix and match your careers based on what skills you have at any given time; if you don't feel like raising your stats to qualify for the next promotion in a career track, just switch to something else and get back to work.You can only earn promotions in a career if you're living in the correct house, which means that you'll need to be moving from house to house in order to climb the corporate ladder. Each location only has two possible promotions in a career, so if you're attempting to quickly accelerate through a single career track, you can expect to be moving once every couple of days. Luckily, all of the low-level promotions are available through Mimi's Place and Dudley's Trailer, so you can work for a couple of days in each job, then switch to another job from the same location and not have to move. You can repeat this process at each higher tier of houses until you start running into jobs that require you to increase your skills; doing so will help you avoid having to move back into the lower-level houses, since you'll probably be able to complete all of their non-career goals in the week or so that you'll be living there while you get all of the available promotions.
Although, as mentioned, you'll have to get to level 10 in all careers if you wish to complete the final objective in Bustin' Out mode, it's usually advantageous to start out in the Paramilitary career track at Dudley's Trailer. It offers much better pay after the first four or five promotions than do the other careers, letting you get a head start on buying the more expensive equipment. From there, you can dabble in the other careers and pick which ones suit you, or match whichever house you feel like living in at the moment.
Paramilitary
Level 1
Title: Latrine Cleaner
Pay: $250
Hours: 10 AM - 2 PM
Total Skills Needed: None
Friends Needed: None
Level 2
Title: Boot Polisher
Pay: $325
Hours: 8 AM - 12 PM
Total Skills Needed: None
Friends Needed: None
Level 3
Title: Drill Instructor
Pay: $400
Hours: 9 AM - 2 PM
Total Skills Needed: Logic 2
Friends Needed: None
Level 4
Title: Paratrooper
Pay: $450
Hours: 6 AM - 12 PM
Total Skills Needed: Logic 4, Body 2
Friends Needed: None
Level 5
Title: Chopper Pilot
Pay: $500
Hours: 6 AM - 12 PM
Total Skills Needed: Logic 5, Body 4
Friends Needed: None
Level 6
Title: Covert Ops
Pay: $550
Hours: 9 AM - 3 PM
Total Skills Needed: Logic 6, Body 4, Charisma 2
Friends Needed: 1
Level 7
Title: Secret Agent
Pay: $580
Hours: 9 AM - 3 PM
Total Skills Needed: Logic 7, Body 5, Charisma 2, Mechanical 1
Friends Needed: 2
Level 8
Title: Code Breaker
Pay: $600
Hours: 9 AM - 3 PM
Total Skills Needed: Logic 8, Body 5, Charisma 2, Mechanical 4
Friends Needed: 5
Level 9
Title: Intelligence Director
Pay: $700
Hours: 9 AM - 3 PM
Total Skills Needed: Logic 9, Body 8, Charisma 2, Mechanical 7
Friends Needed: 6
Level 10
Title: War Minister
Pay: $1,000
Hours: 9 AM - 3 PM
Total Skills Needed: Logic 10, Body 10, Charisma 4, Mechanical 8
Friends Needed: 6
Fashion Victim
Level 1
Title: Hand Model
Pay: $200
Hours: 10 AM - 2 PM
Total Skills Needed: None
Friends Needed: None
Level 2
Title: Lingerie Model
Pay: $225
Hours: 10 AM - 2 PM
Total Skills Needed: None
Friends Needed: None
Level 3
Title: Body Waxer
Pay: $275
Hours: 10 AM - 3 PM
Total Skills Needed: 2 Creativity
Friends Needed: None
Level 4
Title: Fingernail Painter
Pay: $315
Hours: 10 AM - 3 PM
Total Skills Needed: 4 Creativity, 1 Body
Friends Needed: 1
Level 5
Title: Wig Designer
Pay: $400
Hours: 11 AM - 5 PM
Total Skills Needed: 5 Creativity, 1 Body, 1 Charisma
Friends Needed: 2
Level 6
Title: Hair Stylist
Pay: $550
Hours: 11 AM - 6 PM
Total Skills Needed: 6 Creativity, 1 Body, 2 Charisma
Friends Needed: 3
Level 7
Title: Makeup Artist
Pay: $650
Hours: 12 PM - 6 PM
Total Skills Needed: 7 Creativity, 3 Body, 3 Charisma, 1 Cooking
Friends Needed: 4
Level 8
Title: Runway Model
Pay: $900
Hours: 6 PM - 1 AM
Total Skills Needed: 8 Creativity, 4 Body, 4 Charisma, 2 Cooking
Friends Needed: 5
Level 9
Title: Centerfold
Pay: $1,100
Hours: 2 PM - 9 PM
Total Skills Needed: 9 Creativity, 5 Body, 4 Charisma, 3 Cooking
Friends Needed: 7
Level 10
Title: Supermodel
Pay: $1,200
Hours: 10 AM - 4 PM
Total Skills Needed: 10 Creativity, 8 Body, 5 Charisma, 4 Cooking
Friends Needed: 9
Counter-Culture
Level 1
Title: Panhandler
Pay: $110
Hours: 10 AM - 2 PM
Total Skills Needed: None
Friends Needed: None
Level 2
Title: Leaflet Distrubitor
Pay: $120
Hours: 10 AM - 2 PM
Total Skills Needed: None
Friends Needed: None
Level 3
Title: Basket Weaver
Pay: $180
Hours: 10 AM - 3 PM
Total Skills Needed: 1 Cooking, 1 Creativity
Friends Needed: None
Level 4
Title: Flower Child
Pay: $200
Hours: 12 PM - 5 PM
Total Skills Needed: 3 Cooking, 1 Body, 1 Creativity
Friends Needed: 2
Level 5
Title: Massage Therapist
Pay: $220
Hours: 11 AM - 4 PM
Total Skills Needed: 5 Cooking, 1 Charisma, 1 Body, 1 Creativity
Friends Needed: 3
Level 6
Title: Yoga Instructor
Pay: $300
Hours: 10 AM - 5 PM
Total Skills Needed: 6 Cooking, 1 Mechanical, 2 Charisma, 1 Body, 2 Creativity
Friends Needed: 4
Level 7
Title: Transcendentalist
Pay: $350
Hours: 12 PM - 5 PM
Total Skills Needed: 7 Cooking, 2 Mechanical, 2 Charisma, 2 Body, 2 Creativity
Friends Needed: 6
Level 8
Title: Love Guru
Pay: $450
Hours: 12 PM - 5 PM
Total Skills Needed: 8 Cooking, 2 Mechanical, 4 Charisma, 3 Body, 2 Creativity
Friends Needed: 6
Level 9
Title: Psychic Activist
Pay: $550
Hours: 2 PM - 7 PM
Total Skills Needed: 9 Cooking, 3 Mechanical, 6 Charisma, 4 Body, 3 Creativity
Friends Needed: 7
Level 10
Title: Full Time Freak
Pay: $1,100
Hours: 10 AM - 2 PM
Total Skills Needed: 10 Cooking, 3 Mechanical, 8 Charisma, 5 Body, 4 Creativity
Friends Needed: 8
Mad Scientist
Level 1
Title: Lab Cleaner
Pay: $155
Hours: 10 AM - 2 PM
Total Skills Needed: None
Friends Needed: None
Level 2
Title: Potion Tester
Pay: $230
Hours: 11 PM - 3 AM
Total Skills Needed: None
Friends Needed: None
Level 3
Title: Pyro
Pay: $320
Hours: 2 PM - 10 PM
Total Skills Needed: 2 Mechanical
Friends Needed: None
Level 4
Title: Virus Breeder
Pay: $375
Hours: 11 AM - 4 PM
Total Skills Needed: 1 Cooking, 2 Mechanical, 1 Logic
Friends Needed: 1
Level 5
Title: Chemist
Pay: $450
Hours: 11 AM - 5 PM
Total Skills Needed: 1 Cooking, 1 Charisma, 2 Mechanical, 2 Logic, 1 Creativity
Friends Needed: 2
Level 6
Title: Vivisectionist
Pay: $540
Hours: 10 AM - 7 PM
Total Skills Needed: 1 Cooking, 2 Mechanical, 1 Charisma, 4 Logic, 2 Creativity
Friends Needed: 2
Level 7
Title: Gene Splicer
Pay: $640
Hours: 11 AM - 3 PM
Total Skills Needed: 1 Cooking, 4 Mechanical, 2 Charisma, 4 Logic, 2 Creativity
Friends Needed: 3
Level 8
Title: Robotician
Pay: $740
Hours: 12 PM - 8 PM
Total Skills Needed: 1 Cooking, 6 Mechanical, 3 Charisma, 5 Logic, 2 Creativity
Friends Needed: 4
Level 9
Title: Space-Time Tinkerer
Pay: $870
Hours: 10 AM - 4 PM
Total Skills Needed: 1 Cooking, 8 Mechanical, 4 Charisma, 7 Logic, 4 Creativity
Friends Needed: 5
Level 10
Title: Death Ray Inventor
Pay: $1,000
Hours: 10 AM - 2 PM
Total Skills Needed: 2 Cooking, 10 Mechanical, 5 Charisma, 8 Logic, 5 Creativity
Friends Needed: 6
Jock
Level 1
Title: Mascot
Pay: $130
Hours: 10 AM - 2 PM
Total Skills Needed: None
Friends Needed: None
Level 2
Title: Ball Collector
Pay: $170
Hours: 9 AM - 2 PM
Total Skills Needed: None
Friends Needed: None
Level 3
Title: Rookie
Pay: $230
Hours: 10 AM - 3 PM
Total Skills Needed: 2 Body
Friends Needed: None
Level 4
Title: Starter
Pay: $300
Hours: 10 AM - 3 PM
Total Skills Needed: 4 Body
Friends Needed: None
Level 5
Title: All-Star
Pay: $385
Hours: 9 AM - 3 PM
Total Skills Needed: 1 Charisma, 6 Body
Friends Needed: None
Level 6
Title: MVP
Pay: $510
Hours: 9 AM - 3 PM
Total Skills Needed: 2 Mechanical, 1 Charisma, 7 Body
Friends Needed: 1
Level 7
Title: Superstar
Pay: $680
Hours: 9 AM - 4 PM
Total Skills Needed: 1 Cooking, 2 Mechanical, 2 Charisma, 8 Body
Friends Needed: 2
Level 8
Title: Head Coach
Pay: $850
Hours: 8 AM - 2 PM
Total Skills Needed: 2 Cooking, 2 Mechanical, 3 Charisma, 9 Body
Friends Needed: 3
Level 9
Title: Hall of Famer
Pay: $1,000
Hours: 9 AM - 3 PM
Total Skills Needed: 3 Cooking, 2 Mechanical, 5 Charisma, 10 Body
Friends Needed: 4
Level 10
Title: Living Legend
Pay: $1,200
Hours: 9 AM - 3 PM
Total Skills Needed: 4 Cooking, 2 Mechanical, 5 Charisma, 10 Body
Friends Needed: 6
Movie Star
Level 1
Title: Mall Clown
Pay: $100
Hours: 10 AM - 2 PM
Total Skills Needed: None
Friends Needed: None
Level 2
Title: Kiddie Show Sidekick
Pay: $150
Hours: 9 AM - 1 PM
Total Skills Needed: None
Friends Needed: None
Level 3
Title: Stunt Double
Pay: $200
Hours: 9 AM - 3 PM
Total Skills Needed: 2 Charisma
Friends Needed:
Level 4
Title: Horror Movie Extra
Pay: $275
Hours: 7 AM - 3 PM
Total Skills Needed: 2 Charisma, 1 Body
Friends Needed: 2
Level 5
Title: Soap Opera Star
Pay: $375
Hours: 7 AM - 4 PM
Total Skills Needed: 3 Charisma, 2 Body, 1 Creativity
Friends Needed: 3
Level 6
Title: Game Show Host
Pay: $500
Hours: 10 AM - 6 PM
Total Skills Needed: 4 Charisma, 2 Body, 2 Creativity
Friends Needed: 4
Level 7
Title: Sitcom Star
Pay: $650
Hours: 10 AM - 6 PM
Total Skills Needed: 6 Charisma, 3 Body, 2 Creativity
Friends Needed: 6
Level 8
Title: Sex Symbol
Pay: $900
Hours: 5 PM - 1 AM
Total Skills Needed: 7 Charisma, 3 Body, 2 Creativity
Friends Needed: 6
Level 9
Title: Director
Pay: $1,100
Hours: 10 AM - 5 PM
Total Skills Needed: 8 Charisma, 4 Body, 5 Creativity
Friends Needed: 8
Level 10
Title: Movie Mogul
Pay: $1,400
Hours: 10 AM - 3 PM
Total Skills Needed: 10 Charisma, 4 Body, 8 Creativity
Friends Needed: 10
Gangster
Level 1
Title: Vandal
Pay: $140
Hours: 10 AM - 2 PM
Total Skills Needed: None
Friends Needed: None
Level 2
Title: Shoplifter
Pay: $200
Hours: 9 AM - 1 PM
Total Skills Needed: None
Friends Needed: None
Level 3
Title: Burglar
Pay: $275
Hours: 11 PM - 5 AM
Total Skills Needed: 2 Creativity
Friends Needed: None
Level 4
Title: Car Thief
Pay: $350
Hours: 9 AM - 3 PM
Total Skills Needed: 1 Mechanical, 4 Creativity
Friends Needed: 2
Level 5
Title: Mugger
Pay: $425
Hours: 5 PM - 1 AM
Total Skills Needed: 2 Mechanical, 5 Creativity
Friends Needed: 3
Level 6
Title: Bodyguard
Pay: $530
Hours: 3 PM - 11 PM
Total Skills Needed: 3 Mechanical, 1 Charisma, 1 Body, 6 Creativity
Friends Needed: 4
Level 7
Title: Arsonist
Pay: $640
Hours: 9 AM - 3 PM
Total Skills Needed: 3 Mechanical, 1 Charisma, 3 Body, 7 Creativity
Friends Needed: 6
Level 8
Title: Extortionist
Pay: $760
Hours: 9 AM - 3 PM
Total Skills Needed: 5 Mechanical, 2 Charisma, 3 Body, 8 Creativity
Friends Needed: 8
Level 9
Title: Hitman
Pay: $900
Hours: 9 AM - 3 PM
Total Skills Needed: 5 Mechanical, 3 Charisma, 5 Body, 9 Creativity
Friends Needed: 8
Level 10
Title: Mob Boss
Pay: $1,100
Hours: 9 AM - 3 PM
Total Skills Needed: 5 Mechanical, 4 Charisma, 5 Body, 10 Creativity
Friends Needed: 8
Free Play Mode Careers
In Free Play mode, you can expect your Sim to have to work some pretty long hours throughout the game. This balances the fact that you're never going to have to leave your home, but will still make progress in your skills somewhat slow. Don't hesitate to take a day or two off every once in a while to work out for that next promotion.
Computer Geek
Level 1
Title: Cable Grunt
Pay: $120
Hours: 9 AM - 5 PM
Total Skills Needed: None
Friends Needed: None
Level 2
Title: Video Game Tester
Pay: $150
Hours: 6 PM - 2 AM
Total Skills Needed: None
Friends Needed: None
Level 3
Title: Tech Support
Pay: $200
Hours: 8 AM - 4 PM
Total Skills Needed: 2 Mechanical, 1 Logic
Friends Needed: None
Level 4
Title: Virus Writer
Pay: $240
Hours: 12 PM - 8 PM
Total Skills Needed: 3 Mechanical, 2 Logic
Friends Needed: 1
Level 5
Title: Web Designer
Pay: $400
Hours: 10 AM - 7 PM
Total Skills Needed: 4 Mechanical, 2 Logic, 2 Creativity
Friends Needed: 2
Level 6
Title: Hacker
Pay: $610
Hours: 4 PM - 11 PM
Total Skills Needed: 4 Mechanical, 4 Logic, 4 Creativity
Friends Needed: 2
Level 7
Title: Programmer
Pay: $800
Hours: 10 AM - 8 PM
Total Skills Needed: 4 Mechanical, 2 Charisma, 5 Logic, 6 Creativity
Friends Needed: 3
Level 8
Title: Gizmo Investor
Pay: $1,100
Hours: 10 AM - 7 PM
Total Skills Needed: 4 Mechanical, 4 Charisma, 7 Logic, 7 Creativity
Friends Needed: 4
Level 9
Title: AI Theorist
Pay: $1,300
Hours: 11 AM - 8 PM
Total Skills Needed: 5 Mechanical, 6 Charisma, 8 Logic, 9 Creativity
Friends Needed: 5
Level 10
Title: Cyborg
Pay: $1,550
Hours: 11 AM - 8 PM
Total Skills Needed: 4 Mechanical, 2 Charisma, 5 Logic, 6 Creativity
Friends Needed: 6
Artist
Level 1
Title: Artist's Model
Pay: $100
Hours: 3 PM - 8 PM
Total Skills Needed: None
Friends Needed: None
Level 2
Title: House Painter
Pay: $130
Hours: 9 AM - 4 PM
Total Skills Needed: None
Friends Needed: None
Level 3
Title: Studio Cleaner
Pay: $190
Hours: 9 AM - 3 PM
Total Skills Needed: 2 Creativity
Friends Needed: None
Level 4
Title: Museum Guard
Pay: $250
Hours: 8 AM - 4 PM
Total Skills Needed: 5 Creativity
Friends Needed: 1
Level 5
Title: Studio Artist
Pay: $325
Hours: 7 AM - 2 PM
Total Skills Needed: 2 Mechanical, 6 Creativity
Friends Needed: 2
Level 6
Title: Resident Artist
Pay: $400
Hours: 11 AM - 8 PM
Total Skills Needed: 5 Mechanical, 7 Creativity
Friends Needed: 3
Level 7
Title: Art Critic
Pay: $550
Hours: 12 PM - 9 PM
Total Skills Needed: 5 Mechanical, 4 Body, 8 Creativity
Friends Needed: 4
Level 8
Title: L'Enfant Terrible
Pay: $700
Hours: 11 AM - 6 PM
Total Skills Needed: 5 Mechanical, 2 Charisma, 5 Body, 10 Creativity
Friends Needed: 5
Level 9
Title: Gallery Owner
Pay: $1,100
Hours: 5 PM - 2 AM
Total Skills Needed: 5 Mechanical, 7 Charisma, 7 Body, 10 Creativity
Friends Needed: 6
Level 10
Title: Museum Director
Pay: $1,400
Hours: 10 AM - 3 PM
Total Skills Needed: 5 Mechanical, 10 Charisma, 7 Body, 4 Logic, 10 Creativity
Friends Needed: 8
Swindler
Level 1
Title: Traveling Salesman
Pay: $120
Hours: 9 AM - 3 PM
Total Skills Needed: None
Friends Needed: None
Level 2
Title: Used Car Dealer
Pay: $180
Hours: 9 AM - 4 PM
Total Skills Needed: None
Friends Needed: None
Level 3
Title: Telemarketer
Pay: $250
Hours: 9 AM - 4 PM
Total Skills Needed: 1 Mechanical, 2 Charisma
Friends Needed: None
Level 4
Title: Con Artist
Pay: $320
Hours: 9 AM - 4 PM
Total Skills Needed: 2 Mechanical, 2 Charisma
Friends Needed: 2
Level 5
Title: Fad Starter
Pay: $400
Hours: 9 AM - 4 PM
Total Skills Needed: 2 Mechanical, 2 Charisma, 2 Logic
Friends Needed: 3
Level 6
Title: Inventor
Pay: $520
Hours: 9 AM - 4 PM
Total Skills Needed: 2 Mechanical, 3 Charisma, 3 Logic, 2 Creativity
Friends Needed: 4
Level 7
Title: Loan Shark
Pay: $660
Hours: 9 AM - 5 PM
Total Skills Needed: 2 Mechanical, 4 Charisma, 2 Body, 4 Logic, 2 Creativity
Friends Needed: 6
Level 8
Title: Real Estate Developer
Pay: $800
Hours: 9 AM - 5 PM
Total Skills Needed: 2 Mechanical, 5 Charisma, 2 Body, 6 Logic, 3 Creativity
Friends Needed: 8
Level 9
Title: Inside Trader
Pay: $950
Hours: 9 AM - 4 PM
Total Skills Needed: 2 Mechanical, 6 Charisma, 2 Body, 7 Logic, 5 Creativity
Friends Needed: 8
Level 10
Title: Monopolist
Pay: $1,200
Hours: 9 AM - 3 PM
Total Skills Needed: 2 Mechanical, 8 Charisma, 2 Body, 9 Logic, 6 Creativity
Friends Needed: 8
Slacker
Level 1
Title: Janitor
Pay: $100
Hours: 5 PM - 10 PM
Total Skills Needed: None
Friends Needed: None
Level 2
Title: Convenience Store Clerk
Pay: $120
Hours: 9 AM - 4 PM
Total Skills Needed: None
Friends Needed: None
Level 3
Title: Gas Station Attendant
Pay: $190
Hours: 9 AM - 3 PM
Total Skills Needed: 2 Mechanical
Friends Needed: None
Level 4
Title: Taxi Driver
Pay: $250
Hours: 8 AM - 4 PM
Total Skills Needed: 2 Mechanical, 3 Body
Friends Needed: 2
Level 5
Title: Tow Truck Driver
Pay: $325
Hours: 7 AM - 2 PM
Total Skills Needed: 3 Mechanical, 3 Body, 2 Creativity
Friends Needed: 2
Level 6
Title: Car Mechanic
Pay: $400
Hours: 11 AM - 8 PM
Total Skills Needed: 3 Mechanical, 3 Charisma, 3 Body, 3 Creativity
Friends Needed: 4
Level 7
Title: Repo Sim
Pay: $550
Hours: 12 PM - 9 PM
Total Skills Needed: 5 Mechanical, 4 Charisma, 4 Body, 4 Creativity
Friends Needed: 5
Level 8
Title: Private Investigator
Pay: $700
Hours: 11 AM - 6 PM
Total Skills Needed: 5 Mechanical, 4 Charisma, 5 Body, 2 Logic, 5 Creativity
Friends Needed: 8
Level 9
Title: Cargo Pilot
Pay: $1,100
Hours: 5 PM - 2 AM
Total Skills Needed: 5 Mechanical, 6 Charisma, 8 Body, 3 Logic, 7 Creativity
Friends Needed: 8
Level 10
Title: Smuggler
Pay: $1,400
Hours: 10 AM - 3 PM
Total Skills Needed: 5 Mechanical, 8 Charisma, 9 Body, 4 Logic, 10 Creativity
Friends Needed: 8
Rock Star
Level 1
Title: Groupie
Pay: $100
Hours: 10 AM - 4 PM
Total Skills Needed: None
Friends Needed: None
Level 2
Title: Roadie
Pay: $120
Hours: 9 AM - 4 PM
Total Skills Needed: None
Friends Needed: None
Level 3
Title: Record Store Clerk
Pay: $190
Hours: 9 AM - 3 PM
Total Skills Needed: 2 Creativity
Friends Needed: None
Level 4
Title: Elevator Music Composer
Pay: $250
Hours: 8 PM - 4 AM
Total Skills Needed: 5 Creativity
Friends Needed: 2
Level 5
Title: Jingle Writer
Pay: $325
Hours: 7 AM - 2 PM
Total Skills Needed: 2 Mechanical, 6 Creativity
Friends Needed: 2
Level 6
Title: Wedding Singer
Pay: $400
Hours: 11 AM - 8 PM
Total Skills Needed: 5 Mechanical, 4 Charisma, 7 Creativity
Friends Needed: 3
Level 7
Title: Bar Band Singer
Pay: $550
Hours: 12 PM - 9 PM
Total Skills Needed: 5 Mechanical, 4 Charisma, 4 Body, 8 Creativity
Friends Needed: 4
Level 8
Title: Rock Star
Pay: $700
Hours: 11 AM - 6 PM
Total Skills Needed: 5 Mechanical, 4 Charisma, 5 Body, 10 Creativity
Friends Needed: 4
Level 9
Title: Solo Artist
Pay: $1,100
Hours: 5 PM - 2 AM
Total Skills Needed: 5 Mechanical, 7 Charisma, 7 Body, 10 Creativity
Friends Needed: 6
Level 10
Title: Record Producer
Pay: $1,400
Hours: 10 AM - 3 PM
Total Skills Needed: 5 Mechanical, 10 Charisma, 7 Body, 4 Logic, 10 Creativity
Friends Needed: 8
Bustin' Out Mode
As with the previous console version of the Sims, Bustin' Out offers a loosely-structured, mission-based game that lets you start out with an unemployed Sim and work your way up the cutthroat corporate food chain until you rule over your own capitalism fiefdom, crushing the peons who oppose you and spreading the domain of your iron fist across all the land. As with the Sims games in general, the main goal here is simply to have Fun, so there's no artificial time limit that's imposed on you, and no mandatory goals that you're forced to achieve, save for the fact that you'll have to gain promotions in your given career before you can unlock new locations to visit and move into.Before you begin, though, here are a few tips to help you out.
Mom, I Want To Be An Interior Decorator
When you move into a new location, you're given an oddly landlord-like carte blanche regarding each house's interior design and overall construction. Want to knock down a wall, or add a new door leading to the sidewalk? Feel free. Want to sell off all of your roommate's possessions and spend the proceeds on a $10,000 television set? You can do that, too. What's more, when you spend your money to remodel a place, and wind up increasing a house's overall value, your roommates will reimburse you for your expenditures when you move out. If handled with a little finesse, this system can let you buy the most expensive items in the game with nary a hit on your pocketbook.First off, though, you'll need to earn enough money to be able to afford the pricier items on your own. The Paramilitary career track is a good way to earn some early cash, as it features the highest early-game salaries without many requirements for advancement over the first few promotions. After you've unlocked a couple of locations and gotten a few promotions under your belt, you'll hopefully have a few thousand dollars available to you, and that's all you need to take advantage of this little exploit.
The trick involves the fact that items add almost their entire value to the cost of a home. So, if you move into a house, buy a few thousand dollars worth of appliances, then move out, your roommate will pay you the full price of your purchases immediately. You'll get this money back whether you move out immediately or move out later, but moving out immediately lets you move back in again, having bought a large number of room and Fun boosting items without putting a dent in your pocketbook. In essence, this is the difference between having money now and money later, but since there's no penalty for rapid moving, you should always do the bulk of your purchases immediately after moving into a location, then move out and back in, so you have plenty of extra cash on hand for bills, services, and other items that you unlock at that location.
One important consideration is that your roommates must be at home when you move out in order to get your money back. If you move out when they're at work, you're screwed! Luckily, the game auto-saves before you move out, so if you don't get the message where they reFund your money, restart your console and reload your game and try again.
Conspicuous Consumption
Most of the game's high-quality items are locked when you start a new game; these items can only be unlocked via accomplishing the game's various goals. Since different career paths force you to move into different buildings, each with their own set of goals, this means that you'll be forced to change from career to career in order to obtain the truly elite items that will spruce up any house and allow you to take care of your Sim's motives with relative ease.Of course, you should feel free to explore the career paths and different houses at your leisure, but if you want to have an easier time satisfying your Sim's motives, the following items are worth seeking out early in the game, in order according to the level of the house in which they become accessible:
- HyperGraphix (Dudley's Trailer, Paramilitary career)
- Flush Force 5 XLT (Toane's Gym)
- Sonic Shower (Toane's Gym, Gangster career)
- Aromaster Whifferpuff "Gold" (Toane's Gym, Jock career)
- Floyd Co. Laser Light Show (Studio 8, Fashion Victim career)
No, Really, Don't Get Up
In Level 3 and higher locations, you'll be able to control multiple Sims at the same time. Having the ability to control more than one Sim gives you a lot of flexibility in managing your household.Your housemate Sims do go to work, and the money they earn is deposited into your account, but they cannot earn promotions. On the other hand, they also can't be fired, so feel free to keep them at home if you don't need their job's money; this will help them stay happy, and will let them greet guests that come over to your house so that your "real" Sim can Socialize when he or she gets back from work.
At Your Service

Don't neglect to call up services on the phone when you can't be bothered to do things yourself. The Maid and Repairman have to be unlocked; the Maid can be found by using the bathroom at Mom's House, while the Repairman is accessible after you repair Mimi's Espresso Machine when living with her.
- The Maid: The Maid will come in every day at 10:00 AM and make your bed, clean up plates in the kitchen, mop up any spills you have around the house, and generally make things neat and tidy. This service is well worth the $10 an hour fee, so call her up and start the maid service as soon as you move into a new house. Your room motive will thank you.
- The Gardener: Gardeners take care of the plant life around your residence. They'll stop by once every three days to water the plants, and charge you $10 an hour for the work. This keeps your outdoors room score high, but probably isn't worth the money unless your roommates don't water by themselves and you're going to be living in a single house for a while.
- The Repairman: The Repairman sets you back for a one-time charge of $50 per hour, and will wander through your house, replacing lightbulbs and repairing broken equipment until there's nothing left for him to do. If you buy the best equipment possible, you shouldn't ever have to worry about calling for help. Note that you can attempt to repair an item yourself, with the duration of the repair depending on your Mechanical skill. The Miss Gyrotic item can also repair anything in your house, after you purchase and activate her.
- Pizza: If you're unable or unwilling to cook for yourself, you can call up a Pizza and have food delivered to your door. Pizza costs $40, and takes an hour to arrive, so it's not a very efficient manner of feeding your Sim, but it can help provide a mid-party burst of food. Wait until a couple of hours have passed since your guests arrived and got their initial plates of food, call for a pizza, and clear off a space on the counter for it while waiting. After it arrives, many of your guests will likely help themselves to another serving of food.
Compromise Means Doing What She Wants
As you progress into the higher levels of the game, you'll notice that some of the goals are available at all of the locations. Two of these, Get Married and Raise A Baby To A Child, are available at any of the level five houses, while a third, Send Your Child To Prep School With Straight A's, becomes available at Malcolm's House.If you do decide to get married, your Spouse will move with you from location to location. This can be a good thing, since you'll have easy access to Socialization, but can also complicate your living arrangements and make it more difficult to use physical interactions with your other roommates. In any case, these goals offer little in terms of substantial rewards; each of them offers you a new vehicle to unlock. Since vehicles are only used when moving from location to location, and offer no benefit besides having something nice to look at while a location loads, feel free to ignore these goals and live a life of crushing loneliness instead. If you do want to get married and/or have a child, check the Relationships chapter for more info on completing these objectives.
Level 1 Locations
Mom's House
Goals
Press the right trigger for double speed : 50 bucksUse a toilet to empty your Bladder : Unlocks the Maid
Eat enough food to fill your stomach : 50 bucks
Do Fun stuff to raise your Fun level : 50 dollars
Use the newspaper to find a job : Unlocks next location and Super Scooter
Your mother's house is the training level for the Bustin' Out mode; in it, you'll learn some of the most basic actions that your Sim can take. None of the above tasks should be very difficult to figure out; just activate double speed, go to the bathroom at the rear of the house, grab a plate of the food that your mother prepares, then hit the television to raise your Fun level.
If you wish, you can now move out of your mom's house after getting a job via the newspaper. If you do, however, you're going to be missing out on a prime opportunity to get your Sim prepared for the "real world." Because the game doesn't want to penalize new players too drastically for not knowing what to do, the entirety of your mother's house acts as a kind of motive-dampening zone, where your vital motives will decay at only a very small fraction of their normal rates. If you don't mind sitting by your console for a little while, you can take advantage of this introductory leniency by raising some of your Sim's skills quite high, and make a lot of money in the process.
To begin with, you'll need a point in cooking to avoid burning the house down every time you prepare a meal. Grab a cooking book from the bookshelf near the television and get your skill up to one point; this should be enough for the time being. Afterwards, press start to enter the Build mode and move the easel on the back patio indoors into the main room and start painting. You can raise your creative score three or four points in a relatively short period of time, stopping only to take care of your most urgent motives when they begin to impinge on your mood. If you really want to crunch out the skills, you can raise your creative skill all the way to ten, but you'll have to click through only a few hundred nags from your mother in the meantime. Don't forget to set fast forward as a toggle in the options menu before attempting this, just to avoid having to sit with your hand on the controller the whole time. As your creative skill goes higher, you'll be able to sell your paintings for larger amounts of money, but the profits aren't really worth noting until you reach above rank seven or so.

After you're done with your creative skill, or raised it as high as you were willing to go, you can attempt to work on some of the other skills. There's a mirror to practice your charisma on in the bedroom here, and the bookshelf can be used to study cooking or mechanical, but you'll need to buy a treadmill or chess set if you want to work on your body or logic skills. If you do want to buy one of these items, feel free to sell off some of your Mom's possessions to afford them.
At the very least, you should consider getting three or four points in every skill. This doesn't take much time, and will leave you well-prepared for the early ranks in each of the careers. Whatever you do, though, be sure to raise your relationship with your mother to 100 before you move out; this will help ensure that you meet the friends requirement for the earliest levels in the game.
Level 2 Locations
Dudley's Trailer
Dudley's Trailer isn't much bigger than your mom's place; if anything, it's actually a bit smaller, so it's a great way to get started off on one of the career paths. The compact arrangement of the living room/kitchen area will let you satisfy most of your basic needs without having to meander through a huge number of rooms, as you will in some of the later houses. As you earn a bit of money here, you'll probably want to work on rearranging the living room area a bit. It's not very efficiently laid out, so shuffle around the kitchen equipment until the fridge, food processor (definitely buy one of these), a stove, and a countertop are all in a line. You can put the food processor on top of the trash compactor to save on counter space; if you find that the kitchen is still cluttered, you can sell one of the extra countertops. You might also want to move the stereo back towards where the television is located, selling the chess set if necessary; Dudley and your guests will often resort to dancing, and it's a bad idea to have them all standing around, clogging up the kitchen area. 
Another area that could use some improvement is the door. Although the patio and main door are fairly accessible, they're set too far back in from the sidewalk, so if you can afford it, you may want to add a new door or set of double doors in the kitchen area, with concrete tiles leading out to the sidewalk. This will let all of your guests have easy access to plates of food. Speaking of food, move Dudley's ghetto meal table out next to your mailbox and buy something that's a little nicer, and either buy more chairs for guests or move them over from the chess set.
Your bedroom will also require a bit of work. Moving up to a more expensive bed is a good idea, and you can also eliminate one of the wall segments leading from your room to Dudley's room if you want to increase the room score for your bedroom by a small margin. You can also set up a concrete walkway leading from a new door in your bedroom to the patio if you want to be able to sleep right up until the bus comes.
After you get things situated, move back to your mom's place to get reimbursed by Dudley, then move back, call up a Maid, and hire one right away; Dudley apparently has zero points in the Neat trait, and will leave messes all around.
Goals
Interact With Other Sims to Satisfy Your Social Needs : 50 dollarsGet to Know Dudley Better : Unlock Pull My Finger Social option
These two goals can be satisfied in tandem by talking to Dudley for a little while. After you reach a relationship score of 35 with this suave gentleman, you'll earn the fart-tastic Pull My Finger Social option.
Have One Skill Point in Cooking : 200 dollars
If you didn't obtain this skill point at Mom's place, study up with the bookshelf near Dudley's room.
Invite Mom Over to Your New Place : Unlock Nag About House Social option
All you have to do is call her on the telephone and invite her over; you don't have to greet her at the door, or indeed even be present when she arrives.
Visit Mimi's Place and get her to Pull Your Finger : Unlock Big Mouth Chair
You'll need to have gotten this Social interaction from Dudley before you can accomplish this goal. The Big Mouth Chair offers six comfort, so it's worth taking the time to visit Mimi.
Clean Up the Mess : Unlock the Toxic Barrel
Cleaning up all of the messes in Dudley's house is a task for a Maid, so call one up and let her get to work. Make sure you've bought a trash can (or two) for her to use. If only a few messy areas remain after she clocks out on her first day, go ahead and finish off the job by yourself for the reward (a bigger trash can).
Get to Potion Tester in Mad Scientist Career : Unlocks Torchemada Wall Torch, Dude Buggy
Get to Pyro in Mad Scientist Career : Experimental Lamp
Get to Shoplifter in Gangster Career : Nevegass Secret Door, Dude Buggy
Get to Burglar in Gangster Career : Serenade Social Option
Get to Ball Collector in Jock Career : What The Puck! Air Hockey, Dude Buggy
Get to Rookie in Jock Career : Neon Flamingo Sign
Get to Boot Polisher in Paramilitary Career : Hellagraphix 1024, Dude Buggy
Get to Drill Instructor in Paramilitary Career : Portable Up-Light
Mimi's Place

Mimi's house is actually fairly well set up; she's got some of the best cooking equipment around, and a fairly nice living room area, with high room scores all throughout the establishment. One of the sticking points are the walking paths; you'll often find your Sims walking inefficiently, so add some cheap doors between the rooms, and make a path from the bathroom and bedroom to the sidewalk outside. Also, remove the open doorways between the kitchen and den and knock down the wall sections there to boost your room score. Mimi sleeps in the bedroom nearest the bus, so Socialize with her until you're fast friends, switch her bed out for at least a Napeleon Sleigh Bed, and sleep with her to have easier access to the morning bus. In her living room, you may want to add a Deiter couch for the extra Comfort it provides, and install another Fun item to give your parties some spice; the Hellagraphix is a great choice if you unlocked it at Dudley's place, but it is expensive.
Goals
Interact With Other Sims to Satisfy Your Social Needs : 50 dollarsGet to Know Mimi Better : Unlock Sign Language Social option
Have One Skill Point in Cooking : 200 dollars
Invite Mom Over to Your New Place : Unlock Nag About House Social option
All of these are repeated from Dudley's trailer, but can be completed again for another round of rewards.
Visit Dudley and use Sign Language : Unlock Topiary Skull
You'll need to get the Sign Language Social option from Mimi before you can accomplish this goal.
Fix All The Broken Things : Unlock Repairman Service
You'll have to flex your mechanical muscles on the Espresso Machine before you can complete this goal. Expect to spend an hour or two doing it, but it's worth doing to unlock the Repairman.
Get to Lingerie Model in Fashion Victim Career : SlushRush Bar Counter, Imposter Type-S (Vehicle)
Get to Body Waxer in Fashion Victim Career : "VenuSpice Dresser"
Get to Kiddie Show Sidekick in Movie Star Career : Gossip Social option, Imposter Type-S
Get to Stunt Double in Movie Star Career : Exoticalistism Floor Lamp
Get to Leaflet Distributor in Counter-Culture Career : Epicurious Gourmet Stove
Get to Basket Weaver in Counter-Culture Career : Confucious Wall Lamp
Level 3 Locations
Goth Mansion
The Goth Mansion is lacking in a few material comforts. How on earth Bella and Mortimer survive without a refrigerator is difficult to imagine, but luckily for them, you're on hand to provide them with everything that's missing. Begin with a full kitchen set. Knock down the wall that separates the kitchen from the dining room, though, and set your kitchen line along the wall that borders the nearby bathroom, getting rid of the door first. If you set it up right, your Sim should set their plate of food down on a counter near the dining table, which you should replace, along with all of its chairs. 
This main room is actually large enough to serve as both your dining area and Fun area, if you remove the art from the little divider wall near the doorway and knock that wall down. A Hellagraphix and sound system can fit easily in the free space, and you can also make use of the Sim-Phony piano near the dining table to entertain your guests.
The two bathrooms should remain where they are, but replace the fixtures with the best plumbing options you have. You should claim the well-furnished bedroom for your own, setting up an aromatherapy device near the bed to cut down on your sleeping time. After that, you should be set. This house is fairly easy to consolidate, so count yourself lucky.
Goals
Make Friends with Mortimer or Bella : Nag About Friends (Bella) or Kiss Hands (Mortimer) Social optionControl Another Sim : Tell Story Social option
Find the fern that was stolen from the Goths : RGB Flashback (vehicle)
The fern in question is out behind Dudley's Trailer. Visit there and select the "steal" option after selecting the fern.
Buy $1000 worth of improvements for the Goths : Specter Detector Séance Table
Exorcise the ghosts by holding a séance : Anatomical Skeleton Display
You'll have to buy the Séance Table in order to exorcise the ghosts. Séances can only be held after dark, and you'll need to do two of them to get rid of both ghosts. The Anatomical Skeleton Display is a cost-effective decorative item, but the ghosts won't hurt you or disturb your sleep, so unless you're desperate to spice up your rooms with bones, you can skip the séances. They take a bit too long to be worthwhile anyhow.
Get to Horror Movie Extra in Movie Star Career : TumulTech "Sim-Phony" Synthesizer
Get to Soap Opera Star in Movie Star Career : Do Magic Trick Social option
Get to Virus Breeder in Mad Scientist Career : Gene Genie Incubator
Get to Chemist in Mad Scientist Career : Boggs' Memorial Commode
Studio 8
Studio 8 has some of the highest average room scores in the game, thanks to a bevy of expensive art objects scattered around. You shouldn't sell the art objects right away, as their cost can come back to bite you when you move out and get assessed for their cost; instead, just rearrange them into other rooms as necessary for space. 
When considering your remodeling options, your first task should be to relocate the kitchen into the smaller room near the entrance to the building, where Malcolm zapped away the two objects at the beginning of the level. Remove a couple of the windows on the wall facing the street and relocate the entrance doors there, then rearrange the doors leading into and out of the room to allow for an unobstructed line of kitchen equipment. An empty countertop or two for plates of food should lead to a 2x2 kitchen table in the middle of the room. You can also build a 2x2 room on the outside wall of this room to make an impromptu bathroom. The original foyer, where the two Monticello doors are on either side of the plate glass windows, can also be converted into a bathroom. Remove the doors and shift them to another area of the house before installing a Force Flush 5 and a sink, and you'll have another elimination option for your guests.
The larger area to the rear of the lot (what was originally the kitchen) can be remade into your entertaining room. A couple of Deiters, a Hellagraphix, and a Strings Theory should be all you need for Fun; you can move some of the art from the gallery into this area to boost its room score. You'll also need some more lighting in this area, so you may want to move a few of the windows from the art gallery here, as well as lay down some more electric lamps of varying types.
Finally, your bed. There are a couple of bedroom areas in the far rear corner of the room, as well as a bathroom. They're a little too far back for our tastes, so when you buy your bed, just throw it into the art gallery, near the foyer, with doors leading to the foyer/bathroom and to the Fun area. If you have the extra money, go ahead and throw another toilet and shower near your bed.
Goals
Make Friends With Artie or Charity : Fake Out or Tell Lies Social optionControl Another Sim : Sissy Fight Social option
Visit Mimi's Place and Make Sure Mimi Is Ok : Cruisette Leviathan
All that's required is to visit Mimi and pick up all of the trash that's scattered around. You won't be able to enter the Buy or Build menu, though, since you're only visiting, so you may want to move back in, throw a few trashcans around her living area (there's a lot of trash!) and then move back to Studio 8 to re-enable the goal. All you unlock is another vehicle, though, so feel free to skip this goal if you don't care what you drive around.
Buy $1000 Worth of Improvements for the Studio : Beejaphone Guitar
Have a Great Art Opening by Rearranging the Art : Kraftking Potter's Wheel
The real goal here is to throw a nice party; you don't have to move the art around. All that's required is to have a few people together in a room which has a high room score; if you can get the room to completely satisfy your room motive when you check it, you'll know that you're ready to go. The best way to do this, if you followed our remodeling tips above, is to use the Wall tool in the Build menu and knock down one of the rooms separating your kitchen from the Fun area. If you kept enough of the high-end art, your room motive should be completely full. Now, all you have to do is to throw a party, and as soon as the guests enter your house, you should complete the goal automatically. That wasn't so hard!
Get to Flower Child in Counter-Culture Career : Artist's Block
Get to Massage Therapist in Counter-Culture Career : 8-Step "Love Yourself" Wall Lamp
Get to Fingernail Painter in Fashion Victim Career : Floyd Co. Laser Light Show
Get to Wig Designer in Fashion Victim Career : Air Kiss Social
Toane's Gym

The outlay of the gym needs a lot of work, unfortunately. First off, the kitchen has very poor equipment, and is situated all the way at the rear of the house, so you're going to want to move it closer to the front door. Begin by grabbing the weightlifting machines and shoving them somewhere where they won't get in the way; outside is a good choice! They're the worst body-building machines, so don't fret over your inability to work out. Next, move the computer and all of the surrounding furniture out to where the weight machines were, then begin building and moving a new line of kitchen equipment down into this area. The windows that wrap around the walls will force you to build one square in, but you still have plenty of room.
After you've installed a fridge, food processor, stove, and espresso machine, move the closest doors on the bathrooms so that they open onto the kitchen. You can't build new doors here because of the tight quarters; you have to move the wall light in your new kitchen and then move the existing doors to the now-blank wall. Afterwards, grab one or two nice dining room tables and four or five new chairs. (The recliners that are sitting around are excellent chairs, but can't be used for sitting down to dinner.) Don't forget to switch out the existing toilets with Flush Force 5's after you unlock that plumbing option.
Now that you have the food and bathroom motives taken care of, you can try to satiate your guests' Fun motive. The best way to do this is to install a Hellagraphix game console and either move a bunch of the existing recliners around it, or buy a few Von Braun chairs for even more comfort.
Last, but not least, you can convert the now-empty rooms at the back of the building into bedrooms, or throw a few beds into one room if you don't mind sharing with Max and Goldie. Don't forget to build plenty of doors to let your Sims move around!
Goals
Make Friends with Max or Goldie : Bear Hug (Max) or Nuggie (Goldie) Social optionControl Another Sim : Snap Towel Social option
Go To Dudley's Trailer And Party : Maximoto Tsunami X-TEQ
All that you're required to do here is to visit Dudley's Trailer and Socialize with all of the guests there, until you have a relationship score of five with every other person in the house. Skip work, head over to Dudley's place around noon, and schmooze until you get the notification that the objective is complete.
Get Four Sims to Join Toane's as Members : Turntablitz DJ Booth
Prospective members should be Sims with a high relationship score with your main Sim. Unfortunately, you'll have to start a party to activate the invitation Social interaction, so call over your targets before starting the party, and have Goldie get to work on cooking the food. After your guests have been fed and visited the bathroom, ask them to join the gym; if they refuse, let them have some Fun and try again. You don't need to get all four members in a single party; if you have to spread your invitations out over a couple of days, you'll still complete the goal.
Buy $1,000 Worth of Improvements for the Gym : Flush Force 5 XLT
Get to Starter in Jock Career : Life Rocks! Climbing Wall
Get to All-Star in Jock Career : Aromaster Whifferpuff "Gold"
Get to Car Thief in Gangster Career : High Dive (Build menu)
Get to Mugger in Gangster Career : Sonic Shower
Get to Paratrooper in Paramilitary Career : Show Off Muscles Social option
Get to Chopper Pilot in Paramilitary Career : Miss Memo Sleeper
Level 4 Locations
Shiny Things Labs

Shiny Things consists of a prohibitive number of smallish rooms, all of which surround a large open area. You're going to have to make this large area even larger by knocking down most of the walls in the building to create a single, huge kitchen/entertainment complex. You should be familiar with the equipment you need by now, so proceed with the destruction, making sure to clear the walls of any excess lamps or decoration. A wall with something on it will resist the awesome might of the Build tool, so clean before clearing. You can keep the bedroom where it is, if you like, but moving it closer to the bus stop might be a wise idea.
As far as curb-side skill-building goes, the best option is the Tesla Coil, after you unlock it. If you notice a little lightning bolt shooting off, you can enter the Buy mode and sell it for 50 bucks a pop.
Note also that Vaughn and Makino are true neat freaks, which somewhat obviates the need for a Maid, if you oppose the continued employment of the service class. Concentrate on your primary character's motives, and let your roommates do the cleaning and cooking.
Goals
Invite Your Lover Over : Bird of ParadiseEither fall in love with one of your roommates (scientists are pretty sexy, after all), or call over one of your other "special friends" to automatically complete this goal. Get Married : SpritzenFunken Q3 (vehicle)
Buy $1500 Worth of Equipment For the Lab : KraftKing Inventor's Workshop
Show Off Rocket Gnomes At A "Launch Party" : Hypnotize Social option
You'll need to have the Inventor's Workshop for this party, so unlock it and use it to boost your mechanical skill until you start making red Rocket Gnomes. After you've made five of them, place them outside the Lab with the Buy menu, making sure that they're in a line. Throw a party, and when your guests arrive, launch all of the gnomes off, starting with one on either end and moving down the line. None of your guests actually have to be outside to witness the big event. This will complete your objective and get you the Hypnotize option.
Go To Studio 8 And Change Their Minds About Scientists : Pathmatic Sliding Door
If you manage to jump through hoops and complete the Launch Party goal, travel over to Studio 8 and use the Hypnotize interaction on either of the proprietors to unlock a new sliding door.
Find Out Where The Contaminating Spores Are Coming From : Giant Fern
As with the previous mission that saw you stealing a fern from Dudley's Trailer, this objective requires you to hop over to the Goth Manor and pluck one of the ferns from their lawn. Easily enough done.
Get to Vivisectionist in Mad Scientist Career : Tesla Coil 3.0
Get to Gene Splicer in Mad Scientist Career : SLP Lamp
Get to Covert Ops in Paramilitary Career : Horrowitz "Star-Track" Telescope
Get to Secret Agent in Paramilitary Career : WarKraft Radar Dish
Club Rubb
Again, there's plenty of open room which you can mangle as you see fit. Begin by selling off any low-quality seating items that are in the main room, then proceed to set up your kitchen in-between where the bus arrives and the door. You may want to expand onto the lawn outside this new kitchen area to make a bedroom and bathroom, or two different bathrooms for your party-goers. If you do decide to make new bathrooms, sell the toilets on the far side of the club to avoid having people wander around. 
As you buy and place your entertainment equipment, keep in mind that you're going to need to buy the Bounce My Booty Dance Floor to fulfill one of the goals here; it's a 4x4 dance floor that offers up unparalleled Fun, but obviously requires a lot of space. You may want to knock down the wall leading into the former bathroom area and/or eliminate the bathrooms and sinks back there, in order to back your DJ Booth up and save space for the BMBDF. At any rate, it becomes available after buying just 1,500 dollars worth of items, so pick out a couch or two, exit Buy mode to unlock it, then put it down wherever you have space in your main room. It does offer up 10 Fun, so you may be tempted to replace your Hellagraphix with it, but remember that your Sims also regenerate their comfort when playing the Hellagraphix, assuming they're sitting on a couch. Sims get no comfort from dancing, but still, it's a nice change of pace, and the new interactions that you can unlock here go well with it.
Goals
Invite Your Lover Over : KlassicKlean "More-Saic" TubCalling over a lover or falling in love with one of your roommates fulfills this goal. Get Married : SpritzenFunken Q3 (vehicle)
Buy $1500 Worth of Equipment For the Club : Bounce My Booty Dance Floor
Find Out What's Going On at Toane's Gym : Wicked Breeze Outdoor Shower, Visit Studio 8
All you have to do here is visit Toane's Gym and do three Triple Jumps in a row off of their high-dive board. This is easy enough to do, if you've built up your Body score. Otherwise, you may have trouble stringing together the dives. If you can't seem to perform correctly, skip this goal and come back later.
Throw the Ultimate DJ Dance Party : Q3 Recliner
To begin with, throw a party and invite a few extra guests over. To complete this goal, you're going to need the Bounce My Booty Dance Floor, so buy a few extra accoutrements for the club, exit out to unlock it, then place it near your DJ Booth. After your guests have their basic motives appeased, have one of your Sims with a high creativity skill get behind the DJ booth and select the "Spin" option. Your other two Sims will have to use the dance floor and dance, while inviting the partygoers over. As soon as you get five people on the dance floor, you win!
Show Off Some Club Rubb Moves at Studio 8 : The Apoplectic Photoelectric
To complete this goal, get friendly with Bing Bling until you learn his Breakdance Social interaction, then visit Studio 8 and perform for either Artie or Charity. Get to MVP in Jock Career : Tell Dirty Joke Social option
Get to Super Star in Jock Career : Wolf Whistle Social option
Get to Game Show Host in Movie Star Career : Booty Tease Social option
Get to Sitcom Star in Movie Star Career : Moon Walk Social option
Get to Hair Stylist in Fashion Victim Career : Admire Body Social option
Get to Makeup Artist in Fashion Victim Career : Slow Dance Social option
Casa Caliente
As with Toane's Gym, you're going to have a lot of free space with which to play here. Your first objective should be to move the kitchen near the door, and move the other Fun equipment back where the cooking equipment originally was. Note that the Counter-Culture career is going to start taxing your cooking skill here, so you may want to replace your regular stove with one of the large Epicurious Gourmet stoves, available under the Skills section of your Buy menu. Regular food can be prepared on this stove, or you can use it to make hors d'oeuvres and boost your cooking skill. (Normal cooking, of food from the refrigerator, won't boost your skill, so get ready to make a lot of snacks.) 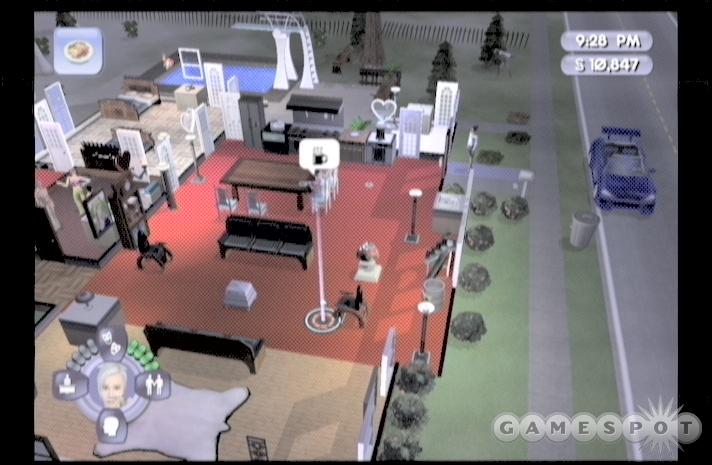
The entertainment area can be placed fairly close to your dining table; just set up whatever your usual assortment of Fun-boosters are, and replace the recliners with Von Brauns or Deiters to suit your taste. If the fireplace takes up too much space, move it into the now-empty former kitchen; it'll boost the room score wherever it is, so just get it out of the way and let it do its thing from a distance. The smaller room on the other side of the fireplace wall can become your house's main bathroom, with a Force Flush and a Sonic Shower; another bathroom can be built on the deck near the entrance to the house to give your guests two options.
Lastly, you'll need to situate your bed. The small room at the rear of the house is barely big enough to hold a bed or two for you and your roommates, but you can go ahead and construct something a little nicer by moving the pool. Don't shove the pool all the way back to the beach, though; knock down some of the iron grates outside and move it laterally away from the building so that it's still accessible to your guests, or just sell it back if you don't want to fragment your parties. After that's done, use the Build menu to make a spacious new bedroom for yourself. Don't forget to add lighting to your interior rooms, especially if you blocked off their windows.
Note the telescope out near the beach; you can move this towards the sidewalk so that your Sim has something to do while waiting for their bus.
Goals
Invite Your Lover Over : Hawaiian Fantasy Tiki TorchIf you've developed a lover before now, you can call him or her and get intimate (via Kissing or Flirting) to complete this goal. Falling in love with Randy or Paisley also works.
Get Married : SpritzenFunken Q3 (vehicle)
Buy $1500 Worth of Equipment For the Club : Sham-Shag Polar Bear Rug
Score with Two Sims at the Same Party : Romantic Kiss Social option
As the name implies, you're going to need to start a party (via the telephone) before you can attempt to, ahem, "score." You'll need to have good relationships with your targets, and their moods will need to be high, so start the party off with food and accessible bathrooms, and when your targets start to mill about, call them into an enclosed area, like your bedroom, and use the Try and Score interaction on them. Make sure you do this individually, though; either lover will get upset if they see you mackin' on their competition.
Go to Studio 8 and Help with the "Outsider Art" : That 70's Window, Visit Goth Manor
All you need to do here is to visit Studio 8 and paint a picture on the easel. If you sold it when you were there earlier, buy a new one and put it by the curb to shorten your walking distance. If you don't have a high enough creativity score, you may have to come back and try again later.
Find a Neighbor Who Knows About Candelabras : Torchemada Candelabra
Bella or Mortimer can both be used to complete this goal. All you need to do is get friendly with either of them and use the Romantic Kiss Social option on them; if you haven't unlocked it, you'll need to do the party goal above and try again. You'll unlock the Torchemada Candelabra, which has a rare (for lighting) room score of two. Still, if you aren't having trouble getting your room scores high, you don't need to bother with this.
Get to Body Guard in Gangster Career : Force to Slap Self Social option
Get to Arsonist in Gangster Career : Niagara Love Tub
Get to Yoga Instructor in Counter-Culture Career : Vibromatic Heart Bed
Get to Transcendenalist in Counter-Culture Career : Sili-Camp Tent
Level 5 Locations
Pixel Acres
Pixel Acres is the most untraditional of any of the houses in Bustin' Out, in that it isn't a house so much as it is a nature preserve. This little nudist colony consists of a couple of bathrooms and a whole lot of open space. Luckily for you, the fact that there's so little infrastructure means that you essentially get to custom-design your own structure, assuming you don't want to stick with the theme and live outdoors, which makes for some difficult sleeping.

Your base of operations will obviously be set up in the corner of the level near the bus stop, so move all of the trees and plants there out of the way and draw up a good-sized outer perimeter for your new home. Feel free to go crazy with your design, but keep it Functional, and don't forget to throw in a bunch of doors leading to the street. You'll probably need to move out and back in a couple of times to get the cash required to construct your new abode, but it'll be well worth the effort, since you'll be able to entertain and keep your guests contained in a smaller area.
Goals
Get Married: SpritzenFunken Q3Raise a Baby to a Child : SchnellMeister "Technik" Edition
Buy $2000 Worth of Equipment For the Pixel Acres : Hot Spring Conversion Kit
Seduce Someone At Casa Caliente : Varmenkosse Euro Fireplace, Visit Shiny Things Labs
All you have to do here is to visit Casa Caliente, become friendly with either of the residents, click on the polar bear rug, choose to "Relax," then have your paramour join you, and voila, you have another massive, semi-useless decorative item for your home.
Find Someone Interested in Chase's Secret Formula : Boomtowne Redwood Table, Visit Goth Manor
After you become friends with Chase, you'll learn his Tell Secrets Social option. Take it over to Shiny Things and use it on either of the residents to get your reward.
Find Out What "Ghost" of a Problem the Goths Are Having : RustyRedneck Stump Chair
The only way to complete this goal is to have your creativity skill above nine. Do whatever is required to boost your skill to this level, then head over to the Goth Manor and play their keyboard. You'll automatically learn the Pixel Booty song, which has...interesting side effects.
Frame Malcolm and Get Him Busted For Indecent Exposure : $5,000
Your goal here is to have a party with Malcolm attending, and then somehow convince him to remove his clothes. Malcolm works some odd hours, so you may have to throw your party later in the evening, or at least sometime after five o'clock or so. At any rate, if you get friendly enough with Malcolm and raise his mood, you may be able to ask him to "Get Free" via that Social interaction, which will convince him to take his clothes off. An easier way is to simply buy a Sim-Phony keyboard, install it, and use your Pixel Booty song that you learned from the Goth Manor earlier on. This will force everyone to disrobe, including Malcolm, and you'll get your five g's automatically.
Get to Extortionist in Gangster Career : Table Tennis
Get to Hit Man in Gangster Career : BroilBastard Stone Grill
Get to Love Guru in Counter-Culture Career : Tetherball
Get to Psychic Activist in Counter-Culture Career : Barnyard Taunt Social option
The Octagon

The Octagon is one of the most difficult houses in the game to reshape, mostly due to the pitiful state that it's in when you arrive. None of the equipment is really suitable for living with, so go ahead and start selling off the folding chairs and other furniture that's inside, then start knocking down the interior walls. The main entrance is far too removed from the sidewalk to be much good, so build out as far as possible. Your new main doors should ideally be flush up against the sidewalk. If you build laterally towards the bus stop, you may want to recess your outermost wall one step back in so that no one comes knocking on the wrong door. Or, alternately, you can just knock down most of the walls on the outside of the Octagon and start a completely new building along the sidewalk. Whichever the case may be, you're going to have a lot of work cut out for you when it comes to remodeling and furnishing. The room scores here will be virtually nil when you move in, so knock down some of the interior walls and get decorating.
Goals
Get Married : SpritzenFunken Q3Raise a Baby to a Child : SchnellMeister "Technik" Edition
Buy $2000 Worth of Equipment For the Octagon : Atlantean Column
Find and Supress Anti-War Protestors : Toy Parrot by FauxFriend
Said supposed anti-war protestors are located over at Club Rubb. Find them and destroy them! You'll need to have an above-average Body skill if you want to win in a fight, and winning an Attack interaction is what completes this objective.
Find and Shut Down the Hackers : Spartan Special Desk Lamp, Visit Club Rubb
Shiny Labs has computers. Thus, they're the hackers. Visit them and use the Steal interaction on any of their computers to get your reward.
Seek and Destroy Bio Weapons : GyroSport "AbDominator"
Oddly enough, the Sim WMDs are in the same place that was having trouble with phantoms earlier on. Visit Goth Manor and click on the incubator around the back to destroy it.
Eliminate Senator Landgrabb : $5,000

There are many ways of offing Malcolm, but the easiest is to simply invite him over and Attack him. Alternately, you can use a Miss Gyrotic to do the same thing, via the "Program for Defense" option, or just get Malcolm out into an open area, enter the Buy menu, and build a set of walls around him without a door. Leave him alone for a while and you'll eventually complete the goal.
Get to Robotician in Mad Scientist Career : Miss Gyrotic
Get to Space-Time Tinkerer in Mad Scientist Career : RiteLite Spotlight
Get to Code-Breaker in Paramilitary Career : Flip Social option
Get to Intelligence Director in Paramilitary Career : SimSentry Motion Detector
Tinsel Bluffs

At Tinsel Bluffs, you'll again be blessed with a surfeit of space, so make use of it all. The kitchen, for once, has decent appliances, so you won't need to fiddle around very much with it, or the dining room table, for that matter. You should have plenty of space left over near the fireplace (which you can move, if you wish) for your entertainment setup. Malcolm unfortunately robbed you of your Information Overlord, but you should be able to substitute any number of decent entertainment options by this point in the game. You'll also probably want to add a bathroom or two near the bus stop, and extend a bit of the living room wall out to the side to make a new bedroom on that side of the house.
Goals
Get Married : SpritzenFunken Q3Raise a Baby to a Child : SchnellMeister "Technik" Edition
Buy $2000 Worth of Equipment For the House : Constructed Table
Muscle the Muscle at the Gym : Frigidarium Colossicus
Visit Toane's Gym and choose to Attack either Goldie or Max (preferably the one with whom you have the worst relationship). You don't need to win the fight to complete the objective.
Find Out Where You Can Score a Red Pool Table : Overlord Pool Table, Visit Shiny Labs
Considering that the only pool table you've seen thus far has been in Club Rubb, you'll probably want to head over there to find out where they got it. Do so, start playing pool, then invite Bing over and beat him in a contest. (This will require a high Body score.) Afterwards, you'll unlock the Overlord Pool Table.
Find a Good Sci-Fi Movie Script : Cypress Tree
The Think Tank in the main room of Shiny Things Labs contains your objective, so visit there and use the Steal Script interaction on it. You'll need to be in a good mood for this to work.
Get Malcolm to Put You in His Big Movie : $5,000
There are three ways to complete this goal, all of which must be performed during a party. First, you can attack Malcolm and attempt to intimidate him into giving you a role in the film. You'll need to be in a bad mood before this will work, though. Second, you can have a roommate with nine or more creative play a musical instrument, or one with nine or more charisma sing on the mic, then ask Malcolm nicely. You'll also need to be friendly with him for this to work. Third, and easiest, you can work on Malcolm until you have a relationship of 90 or more, invite him to the party, and ask him straight up. Any of these methods will net you the prize money.
Get to Runway Model in Fashion Victim Career : CYMK Floodlight
Get to Centerfold in Fashion Victim Career : Fontis Publicus
Get to Head Coach in Jock Career : Information Overlord
Get to Hall of Famer in Jock Career : Autocrat by Emporium Imperium
Get to Sex Symbol in Movie Star Career : Nostalgico Microphone
Get to Director in Movie Star Career : Manila 1000 Marine Aquarium
Level 6 Locations
Malcolm's Mansion
If you haven't gotten married yet, you'll be the sole inhabitant of Malcolm's Mansion (he'll run off as soon as you arrive). Thus, you won't have to worry about much beyond your own needs and the needs of your guests, so start chopping down walls to create a design that's a bit more efficient. 
First off, the entire foyer space can be removed, leaving only the wall that contains the entry doors. The cooking area, dining room, and pool area should all become one huge inside/outside area where all of your activities and food will be set up. The kitchen can remain where it is (but replace the dishwasher with a more expensive brand), but move the dining room table out into the open, and place a couch and Hellagraphix nearby. Either, or both, of the two enclosed rooms closest to the front of the house can become bathrooms, while one of the remaining rooms farther back on the lot can become your bedroom. Feel free to sell the pool and move the fish tanks and Malcolm's big-ass fountain back to the rear of the house; they'll boost your room score no matter where they are, if you knock down the walls like we suggest.
Note that the bills at Malcolm's Mansion are exorbitant, and, when combined with the $20,000 outlay required to complete one of the goals here, can knock your account balance precariously low. If you are presented with a bill, and can't afford to pay it, just move out, get a couple of promotions in another career, and come back later.
Goals
Get Married : SpritzenFunken Q3Raise a Baby to a Child : SchnellMeister "Technik" Edition (vehicle)
Send Your Child to Prep School with Straight A's : Sataniti Diavolo GT 1000 (vehicle)
If you have a child, continue to ensure that he or she goes to school in a good mood, and pack as much study time in as possible. After they get to the highest grade level, they'll get sent off to Eton and will be out of your hair for the rest of the game.
Show Off Your Fortune and Upgrade the Mansion : Limo Ultimo
This is another one of those "Spend $X and get a prize!" goals. In this case, you'll need to lay down 20,000 clams before you get another car.
Get to Movie Mogul in Movie Star Career : Movie Star Career Gnome
Get to Death Ray Inventor in Mad Scientist Career : Mad Scientist Career Gnome
Get to Full Time Freak in Counter-Culture Career : Counter-Culture Career Gnome
Get to Mob Boss in Gangster Career : Gangster Career Gnome
Get to Super Model in Fashion Victim Career : Fashion Victim Career Gnome
Get to War Minister in Paramilitary Career : Paramilitary Career Gnome
Get to Living Legend in Jock Career : Jock Career Gnome
Each of these gnomes appears on Malcolm's Temple of the Simoleon after you get to level 10 in one of the careers. Each career has its own rendered ending; after you reach the maximum level in all of the careers, you'll be able to Activate the fountain and watch all of the movies. This will also unlock the Temple of the Simoleon for purchase, under the Decorative tab of the Buy menu.
Cheats
The Sims: Bustin' Out can sometimes be rather frustrating, especially if you prefer to leave the houses in Bustin' Out mode as you find them. Luckily, the game has a built-in cheat mechanism that will let you obtain infinite money, boost your motives to 100% instantaneously, and unlock all of the items and Social objectives. Choose your poison below.Xbox Cheats
Extra Simoleons: Press Start to pause your game, then enter L, Black, Right, X, Left. A blue gnome will appear outside of your house; your Sims can click on it for 10,000 Simoleons each time.100% Motives: Enter the money cheat above, then press start to pause the game. Hit R, Left, B, Down, White to instantly boost all of your current Sim's motives to 100%.
Unlock All Objects: Enter the money cheat, then hit Black, Up, Y, Down, R during gameplay.
Unlock All Social Interactions: Enter the money cheat, then press L, R, A, Down, Black during gameplay.
Unlock All Locations: Enter the money cheat, then press Black, Down, R, L, Down, Y during gameplay.
PS2 Cheats
Extra Simoleons: Press Start to pause your game, then enter L1, R2, Right, Square, L3. A blue gnome will appear outside of your house; your Sims can click on it for 10,000 Simoleons each time.100% Motives: Enter the money cheat above, then press start to pause the game. Hit R L2, R1, Left, Circle, Up to instantly boost all of your current Sim's motives to 100%.
Unlock All Objects: Enter the money cheat, then hit L2, R2, Up, Triangle, L3 during gameplay.
Unlock All Social Interactions: Enter the money cheat, then press L1, R1, Down, X, L3, R3 during gameplay.
Unlock All Locations: Enter the money cheat, then press R2, R3, L3, L2, R1, L1 during gameplay.
Gamecube Cheats
Enable Cheats: During gameplay, enter Down, L, Z, R, Left, X. A blue gnome will appear outside of your house, enabling you to enter the other cheats.100% Motives: Enter the money cheat above, then press start to pause the game. Hit L, R, Y, Down, Down, X to instantly boost all of your current Sim's motives to 100%.
Unlock All Objects: Enter the money cheat, then hit Down, Z, Up, Y, R during gameplay.
Unlock All Social Interactions: Enter the money cheat, then press L, R, Down, Down, Y during gameplay.
Unlock All Locations: Enter the money cheat, then press Left, Z, R, L, Z during gameplay.
Got a news tip or want to contact us directly? Email news@gamespot.com
Join the conversation